TFT-TOUCH-SHIELD-v2-TouchScreen
|
|
En cours de traduction/élaboration. |
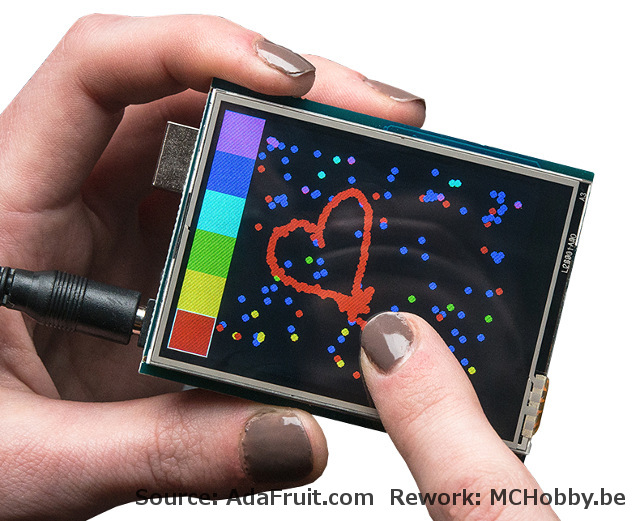
Démo Paint
L'ecran LCD est équipé d'un film tactile à 4 fils (de 2.8", coller sur l'écran). Il peut être utilisé pour détecter, la pression d'un doigt, d'un stylet, etc.
Normalement, il est nécessaire d'utiliser 4 broches analogiques pour dialoguer avec la partie tactile. Mais AdaFruit à été bien plus loin en utilisant un pilote écran tactile dédicacé. Le pilote partage les broches du bus SPI déjà utilisé pour le TFT et la carte SD. En conséquence, une seule broche supplémentaire (#8) est nécessaire pour interroger le contrôleur tactile lorsque vous êtes prêt à lire ses données. Du coup, cela permet d'économiser 3 broches sur votre Arduino qui, elles, restent disponibles pour vos projets.
Vous aurez besoin d'une bibliothèque/librairie suplémentaire pour contrôler la partie tactile - La bibliothèque contrôleur STMPE610 prend en charge tout le dialogue de bas niveau avec le circuit intégré STMPE610.
Cliquez sur le lien ci-dessous pour installer la librairie.
Redémarrez votre Arduino IDE après l'installation de la librairie. Vous devriez voir les exemples dans le menu Fichier -> Exemples -> Adafruit_ILI9341. Vous pouvez sélectionner l'exemple touchpaint et téléverser le sur votre Arduino.

Crédit: AdaFruit Industries www.adafruit.com
| The touch screen is made of a thin glass sheet, and its very fragile - a small crack or break will make the entire touch screen unusable. Don't drop or roughly handle the TFT and be especially careful of the corners and edges. When pressing on the touchscreen, sometimes people can use the tip of their fingers, or a fingernail. If you don't find the touchscreen responds well to your fingers, you can use a rounded stylus which will certainly work. Do not press harder and harder until the screen cracks! |
Ecran Tactile - Programmation
Getting data from the touchscreen is fairly straight forward. Start by creating the touchscreen object with
Adafruit_STMPE610 ts = Adafruit_STMPE610(STMPE_CS);
We're using hardware SPI so the clock, mosi and miso pins are not defined here. For the shield, CS is #8 always. Then you can start the touchscreen with
ts.begin()
Check to make sure this returns a True value, which means the driver was found. If it wasn't, make sure you have the hardware SPI jumpers set up right: for Leonardo/Mega the ICSP jumpers get closed.
Now you can call
if (! ts.bufferEmpty())
to check if there's any data in the buffer. The touchscreen driver will store touchpoints at all times. When you're ready to get the data, just check if there's any data in the buffer. If there is, you can call
TS_Point p = ts.getPoint();
To get the oldest point from the buffer. TS_Point has .x .y and .z data points. The x and y points range from 0 to 4095. The STMPE610 does not store any calibration data in it and it doesn't know about rotation. So if you want to rotate the screen you'll need to manually rotate the x/y points! The z point is 'pressure' and ranges from 0 to 255, we don't use it here but you can experiment with it on your own, the harder you press, the lower the number.
Since data from the STMPE610 comes in 0-4095 but our screen is 320 pixels by 240 pixels, we can use map to convert 0-4095 to 0-320 or 0-240. Something like
p.x = map(p.x, 0, 4095, 0, tft.width());
p.y = map(p.y, 0, 4095, 0, tft.height());
However, the touchscreen is a bit bigger than the screen, so we actually need to ignore presses beyond the touchscreen itself. We found that these numbers reflected the true range that overlaps the screen
#define TS_MINX 150
#define TS_MINY 130
#define TS_MAXX 3800
#define TS_MAXY 4000
So we use
p.x = map(p.x, TS_MINX, TS_MAXX, 0, tft.width());
p.y = map(p.y, TS_MINY, TS_MAXY, 0, tft.height());
instead.
One last point (pun intended!) since the touchscreen driver stores points in a buffer, you may want to ask the driver "is the touchscreen being pressed RIGHT NOW?" You can do that with
if (ts.touched())
Source: Adafruit 2.8" TFT Touch Shield v2
Créé par LadyAda pour AdaFruit Industries.
Traduction réalisée par Meurisse D pour MCHobby.be.
Toute référence, mention ou extrait de cette traduction doit être explicitement accompagné du texte suivant : « Traduction par MCHobby (www.MCHobby.be) - Vente de kit et composants » avec un lien vers la source (donc cette page) et ce quelque soit le média utilisé.
L'utilisation commercial de la traduction (texte) et/ou réalisation, même partielle, pourrait être soumis à redevance. Dans tous les cas de figures, vous devez également obtenir l'accord du(des) détenteur initial des droits. Celui de MC Hobby s'arrêtant au travail de traduction proprement dit.
Traduit avec l'autorisation d'AdaFruit Industries - Translated with the permission from Adafruit Industries - www.adafruit.com