ADAFRUIT-FONA-Arduino-Test
|
|
En cours de traduction/élaboration. |
Préambule
| La bibliotèque Fona est toujours en développement! cette page pourrait donc changer prochainement. |
Télécharger Adafruit_FONA
Avant de pouvoir lire les données depuis le module Fona, vous aurez besoin de télécharger la bibliothèque Adafruit_FONA depuis le dépôt github. Vous pouvez réaliser cette tâche en visitant le dépôt github et procéder à un téléchargement manuel ou, plus facile, cliquer sur le bouton de téléchargement de l'archive zip
Renommez et décompressez l'archive dans un répertoire nommé Adafruit_FONA et vérifiez que le répertoire Adafruit_FONA contient bien les fichiers Adafruit_FONA.cpp et Adafruit_FONA.h
Placez la bibliothèque Adafruit_FONA dans votre répertoire répertoire_des_croquis_arduino/libraries/ .
Vous pourriez avoir besoin de créer un sous-répertoire libraries s'il s'agit de votre nouvelle bibliothèque. Redémarrez votre IDE Arduino.
Nous disposons d'un tutoriel pour l'installation de bibliothèque si vous avez besoin d'un petit coup de main.
Charger la démo
Ouvrez le croquis Fichier->Exemples->Adafruit_FONA->FONAtest et téléversez/téléchargez le sur votre Arduino branché au module Fona.
Pour un Arduino Mega, Leonardo ou Micro, vous devez changer la définition de FONA_TX vers la broche utilisée (voyez les broches supportées comme FONA_TX sur ces plateformes, voyez ce tuto)!
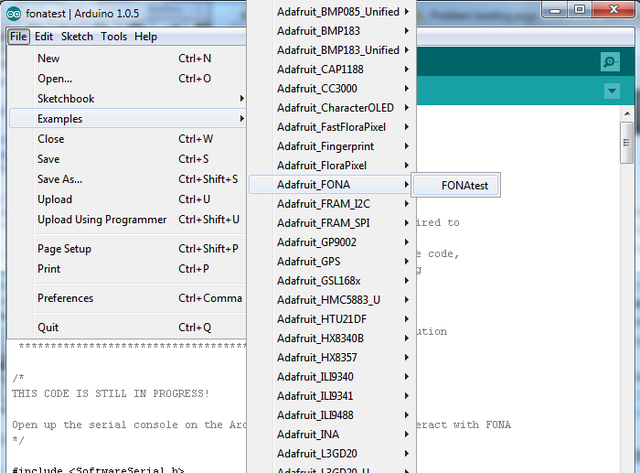
Crédit: AdaFruit Industries www.adafruit.com
Assurez-vous d'avoir chargé votre Accu LiPoly 3.7/4.2V (ou accu LiIon) et d'avoir branché l'accu et l'antenne sur le Fona
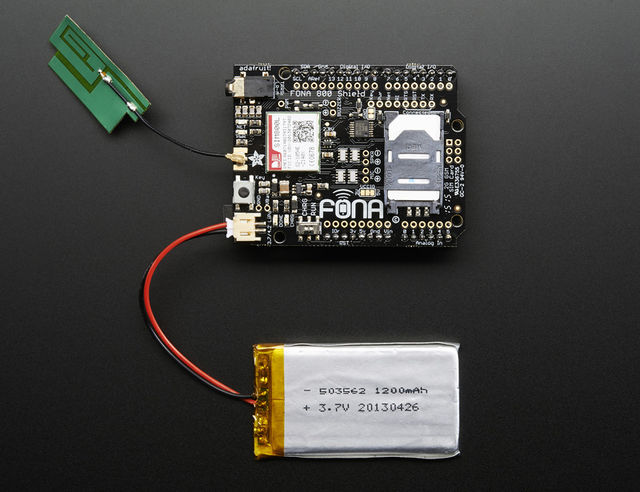
Crédit: AdaFruit Industries www.adafruit.com
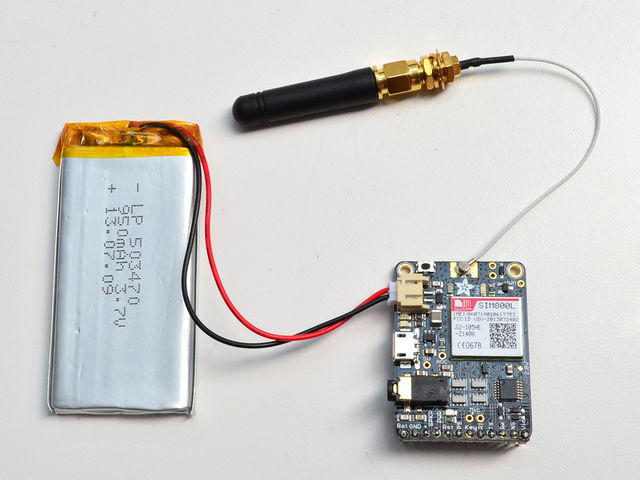
Crédit: AdaFruit Industries www.adafruit.com
Une fois téléchargé/téléversé sur votre Arduino, ouvrez la console série et fixez le débit sur 115200 bauds pour commencer à tester le programme.
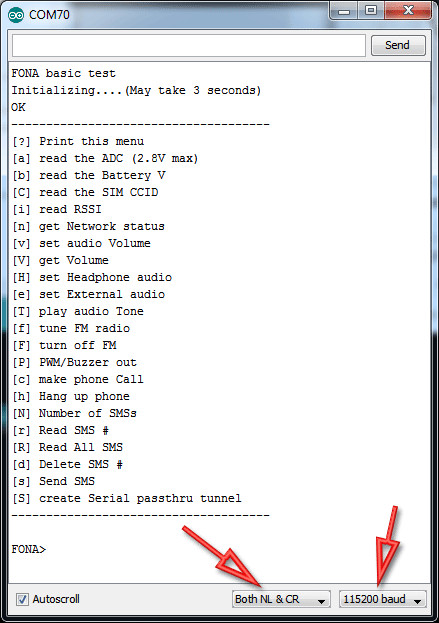
Crédit: AdaFruit Industries www.adafruit.com
Assurez-vous également que vous avez bien utilisé "NL & CR" comme option d'envoi de commande. Cela signifie que lorsque vous envoyez des données vers votre Arduino avec la console, les données envoyées seront terminée par un NL + un CR.
NL & CR signifie "newline/return" que l'on traduira pas "Nouvelle Ligne/Retour Clavier" correspondant au caractère chr(10) / chr(13) dans les programmes.
Utiliser ce Croquis
Le croquis de test dispose d'une interface menu permettant de tester tout ce qu'il est possible de réaliser avec un Fona.
Ce menu pourrait être complété avec de nouvelles fonctionnalités lorsque qu'Adafruit fera des mise-à-jour de sa bibliothèque!
Tension de l'accu
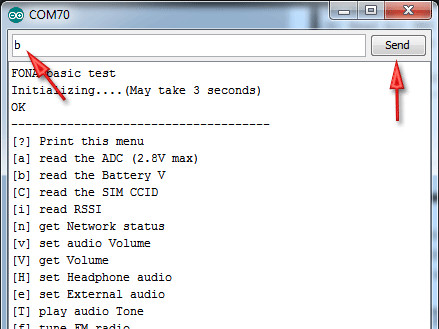
Commençons par lire la tension de l'accu (nous parlons de l'accu Lipoly branché sur le Fona). C'est pratique si nous avons besoin de savoir si le niveau de l'accu est bas!
Tapez b dans la fenêtre de commande et pressez le bouton Send (envoi)
Crédit: AdaFruit Industries www.adafruit.com
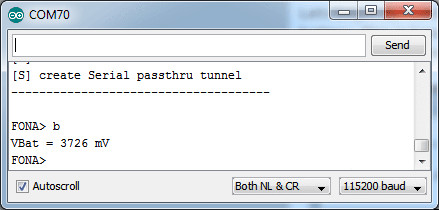
Vous verrez alors apparaître la tension de l'accu en mV (millivolts). Dans notre cas, il s'agit de 3.726 Volts
Crédit: AdaFruit Industries www.adafruit.com
Vérifier le CCID de la carte SIM
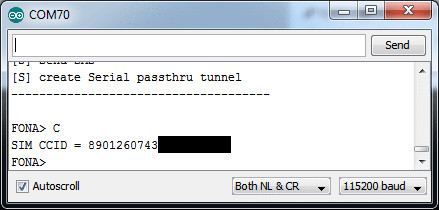
Vous pouvez vérifier que la carte SIM est insérée et fonctionne correctement en lisant le CCID, qui est l'identifiant unique de la carte.
Saisissez C dans la zone de commande.
Crédit: AdaFruit Industries www.adafruit.com
Vérifier le RSSI (force du signal)
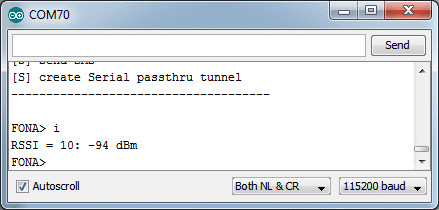
Vous pouvez interroger le FONA sur la force du signal avec la commande i. La réponse est un nombre que vous pouvez convertir en dBm. Essayez d'avoir une force de signal supérieur à 5 pour faire des appels, envoyer des SMS, etc.
Dans notre cas, nous avons obtenu 10
Crédit: AdaFruit Industries www.adafruit.com
Vérifier l'enregistrement réseau
Si votre FONA dispose d'un bon signal, il va automatiquement essayer de localiser la tour d'émission de la cellule réseau et s'y enregistrer.
Vous pouvez vérifier le statut du réseau avec la commande n
Une fois enregistré sur le réseau cellulaire, votre Fona aura encore besoin de 5-10 secondes suppélementaire pour essayer d'accéder/envoyer des SMS ou faire des appels téléphoniques.
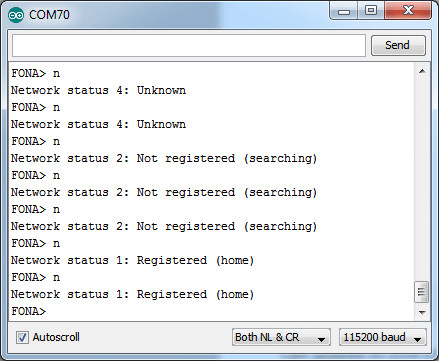
Crédit: AdaFruit Industries www.adafruit.com
Volume audio
Vous pouvez fixer le volume audio à l'aide de la commande v. Vous pouvez obtenir le volume actuel avec la commande V - il s'agit d'un pourcentage de volume (entre 0 et 100%).
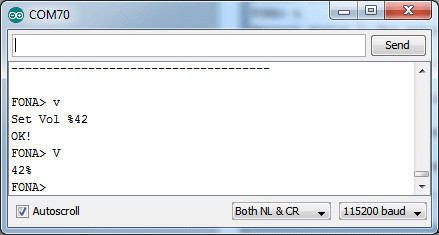
Crédit: AdaFruit Industries www.adafruit.com
Casque Audio et Audio externe
There are two audio paths on the FONA. One is the headset, thru the 3.5mm audio jack. The other is "external" - using the two speaker and mic pins for wiring up external speaker and mic. FM audio, phone calls, tones, etc can be routed to one or the other.
- To set the audio to headset, use the command H
- To set the audio to external, use the command e
| Note the FONA 808 only has Headset audio, so setting External audio wont do anything |
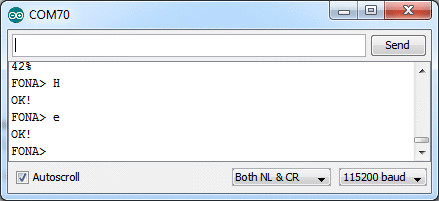
Crédit: AdaFruit Industries www.adafruit.com
Jouer des sons (tonalités)
You can test the audio path with the toolkit tones. These are tones that mimic what some phone services sound like. For a full list of tones, you can check the AT+STTONE command in the AT command datasheet. We'll use tone #20 which is the American dial tone.
You can switch to headset mode, play a tone, then try it on the external audio mode. This is a very easy way to try out both speakers for debugging
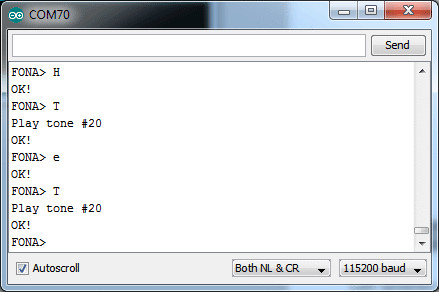
Crédit: AdaFruit Industries www.adafruit.com
PWM/Buzzer
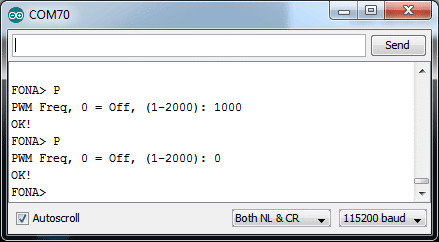
There is a single PWM output pin that you can use to control a Piezo or a vibrating motor. The datasheet is a little unclear on how to use it in 'PWM' mode where you have full frequency and duty cycle control. In the mode we're using it, you can set the frequency from 1-2000 Hz and it will have 50% duty cycle. The PWM pin is the straight-from-the-module output, 2.8Vpp. The Buzzer pins have a PNP driver, so you can use it with a motor buzzer and power from the lipoly battery.
Crédit: AdaFruit Industries www.adafruit.com
Faire un appel
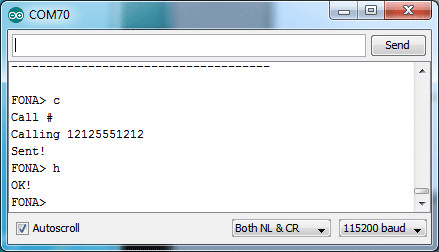
OK now we're onto the good stuff. You can make a phone call with FONA pretty easily. Make sure you have the right audio interface selected (external or headset!) before you go forward
Make a call with c - the call happens in the 'background'. When you're done then you can hang up with h
Crédit: AdaFruit Industries www.adafruit.com
Envoyer et recevoir des SMS
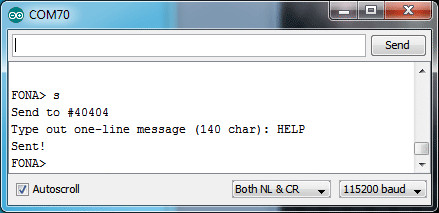
Another easy thing you can do is send and receive SMS messages. Lets start by sending an SMS. We'll use twitter's 40404 short code, which will auto respond, making it easy to verify both sending and receiving
You can send multi-line SMS's using the library API but for this example, its easier to parse the data if its a single line!
Crédit: AdaFruit Industries www.adafruit.com
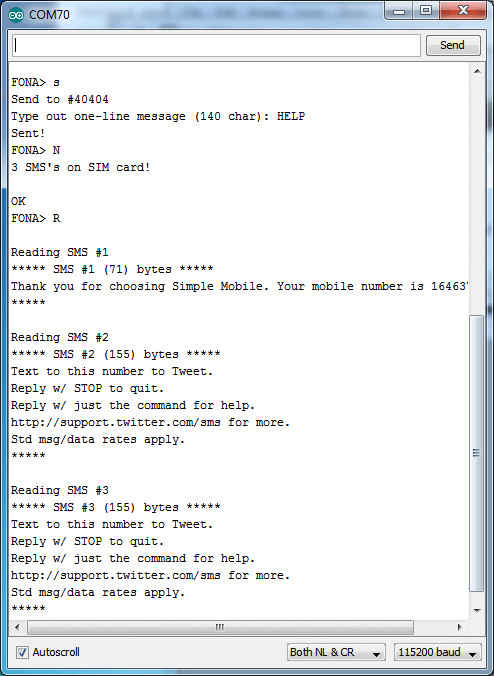
You can then ask the SIM how many SMS's it has with N and read all of them with R
Note that SMS's are referred to by slots but the number does not include empty slots. We'll show this in detail in a bit
Crédit: AdaFruit Industries www.adafruit.com
You can read individual SMS's with r
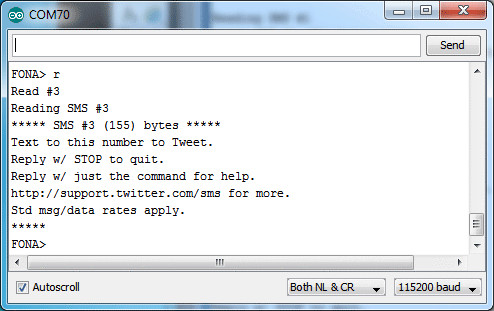
Crédit: AdaFruit Industries www.adafruit.com
And delete SMS's by slot # with d
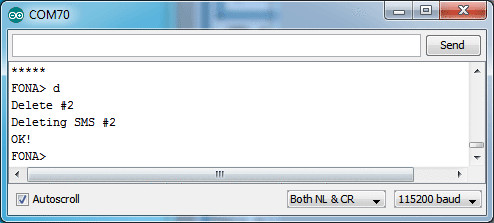
Crédit: AdaFruit Industries www.adafruit.com
Note that before I deleted SMS #2, so if I read them again, that SMS # will be an empty slot. SMS number #3 doesn't "move slots"!
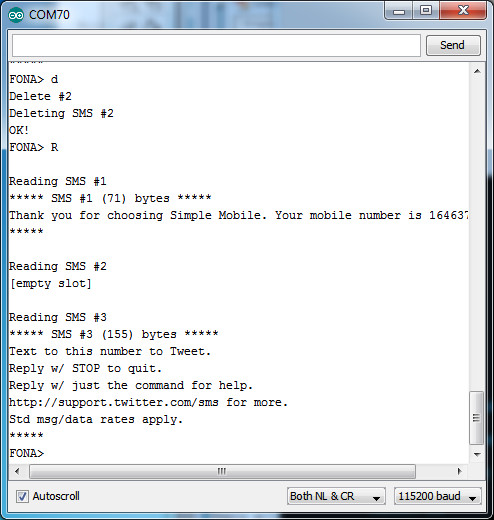
Crédit: AdaFruit Industries www.adafruit.com
Radio FM (FONA 800 uniquement)
The FONA has an FM receive in it. It uses the headset as the 'antenna' but it works pretty well considering! The FM radio goes thru whatever audio path you have set up
You can open and tune to an FM frequency in units of 100KHz. So if you want to tune to 88.1MHz, type in 881. For 102.3, type in 1023.
Use the f command to open and tune, and F to close it
| FM radio tuning/listening is only for FONA 800, the 808 does not contain a tuner |
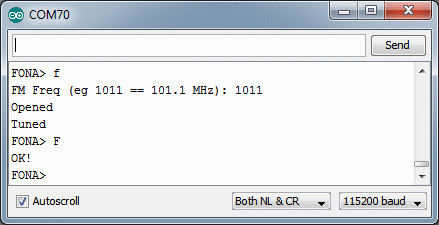
Crédit: AdaFruit Industries www.adafruit.com
Sous module GPS (FONA 808 uniquement)
The FONA 808 has a built in GPS module, you can use it for locating yourself in space! You will need to attach a GPS antenna to the uFL connector and make sure the GPS antenna is outside and pointing up to towards the sky
You can start out by turning on the GPS module with O (capital-o) and query the status of the 'fix' with x. It will take a minute or two to get a fix.
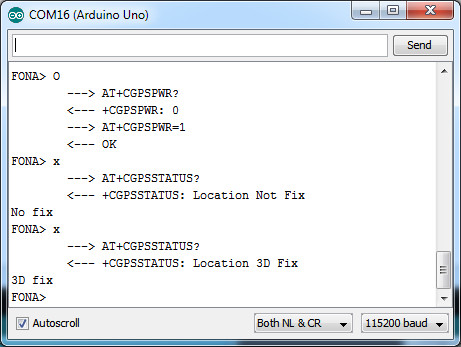
Crédit: AdaFruit Industries www.adafruit.com
Once you have a fix you can query and get the location/time data with L

Crédit: AdaFruit Industries www.adafruit.com
The data is in a comma-seperated format:
0,4043.576433,7400.316980,58.647405,20150601201258.000,64,12,0.548363,100.442406
Can be parsed out to:
- 0 - this is the mode (will be 0)
- 4043.576433 - this is the longitude
- 7400.316980 - this is the latitude
| People often get confused because the GPS is working but is "5 miles off" - this is because they are not parsing the lat/long data correctly. Despite appearances, the geolocation data is NOT in decimal degrees. It is in degrees and minutes in the following format: Latitude: DDMM.MMMM (The first two characters are the degrees.) Longitude: DDDMM.MMMM (The first three characters are the degrees.) |
- 58.647405 - this is the altitude in meters
- 20150601201258.000 - this is the UTC time in yyymmddHHMMSS.ms format. E.g. this is year 2015, month 06, date 01, 20 hour, 12 minute, 58 seconds. If you are not in UTC timezone you'll have to adjust this for your local time
- 64 - is the ttff, time to first fix, in seconds
- 12 - is the # of visible satelites
- 0.548363 - is the speed (in knots)
- 100.442406 - this is the best guess for 'course', e.g. which way you are heading, with 0 being 'north' and 180 being 'south' (we think)
If you want to get the 'raw NMEA' data for some reason, you can do that with E - you can send a number from 0-255 indicating which sentences you want emittted.
- 0 for disable output
- +2 for $GPGGA
- +4 for $GPGLL
- +8 for $GPGSA
- +16 for $GPGSV
- +32 for $GPRMC
- +64 for $GPVTG
- +128 for GPZDA
e.g. if you want to see GPRMC and GPGGA, add +32 and +2 = 34 and put in that number. Then you'll see the data stream out at 1Hz
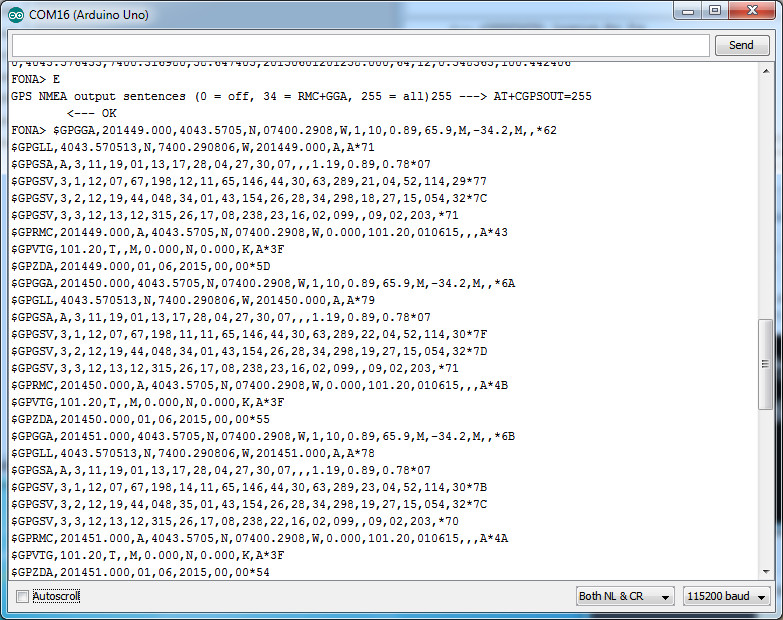
Crédit: AdaFruit Industries www.adafruit.com
When done, you can type in E and 0 (zéro) instead, which will turn off the output
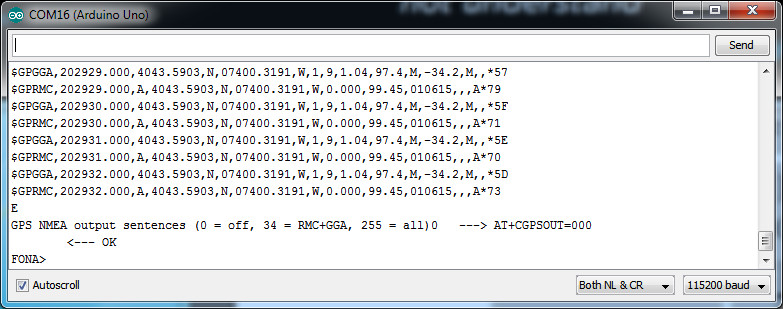
Crédit: AdaFruit Industries www.adafruit.com
Source: Adafruit FONA - Call phones, send and receive SMSs, & more! All with FONA. Ecrit par Lady Ada pour AdaFruit. Crédit AdaFruit Industries
Traduit par Meurisse D. pour MCHobby.be
Traduit avec l'autorisation d'AdaFruit Industries - Translated with the permission from Adafruit Industries - www.adafruit.com
Toute référence, mention ou extrait de cette traduction doit être explicitement accompagné du texte suivant : « Traduction par MCHobby (www.MCHobby.be) - Vente de kit et composants » avec un lien vers la source (donc cette page) et ce quelque soit le média utilisé.
L'utilisation commercial de la traduction (texte) et/ou réalisation, même partielle, pourrait être soumis à redevance. Dans tous les cas de figures, vous devez également obtenir l'accord du(des) détenteur initial des droits. Celui de MC Hobby s'arrêtant au travail de traduction proprement dit.