Arduino Robot-Guide démarrage
Arduino Robot
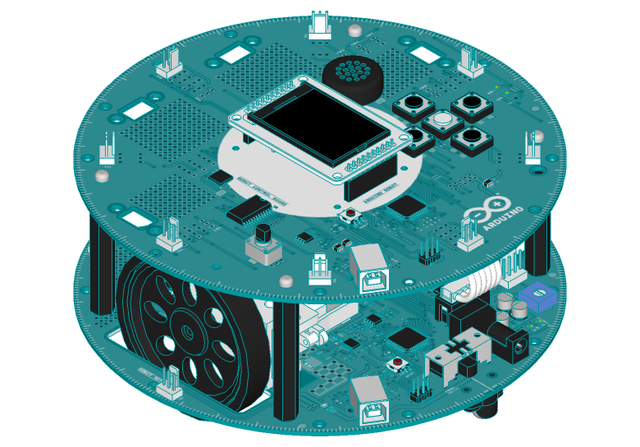
With the Arduino Robot, you can learn about electronics, mechanics, and software. It is a tiny computer on wheels. It comes with a number of of project examples you can easily replicate, and it is a powerful robotics platform that you can hack to perform all sorts of tasks.
Crédit: Arduino arduino.cc
The robot comes with a large number of inputs; two potentiometers, five buttons, a digital compass, five floor sensors, and an SD card reader. It also has a speaker, two motors, and a color screen as outputs. You can control all these sensors and actuators through the librairie du robot.
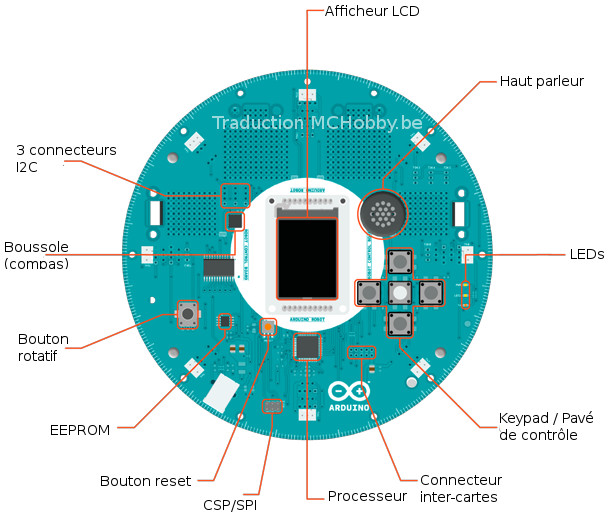
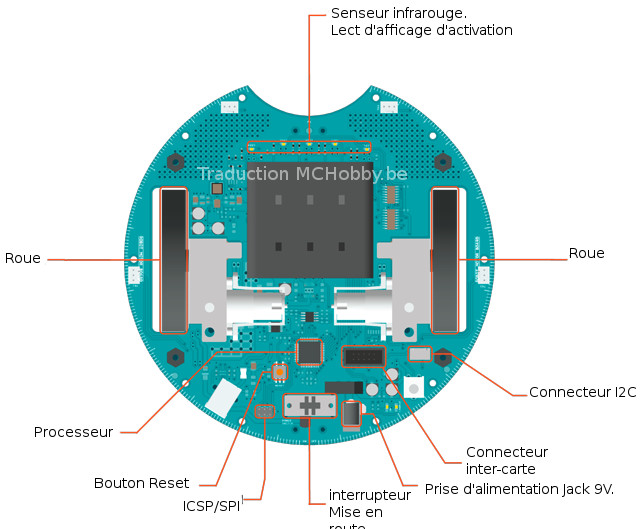
There are two different boards on the Robot: the Control Board (top) and the Motor Board (bottom). If you're just getting started with electronics and programming, you should work with the Control Board. As you become more experienced, you may want to tinker with the Motor Board.
Carte de contrôle
Crédit: Arduino arduino.cc
Traduction MCHobby.be
Carte moteur
Crédit: Arduino arduino.cc
Traduction MCHobby.be
Préparation du Robot
When you first open the robot, you'll need to set up a pair of things before it is ready to roll.
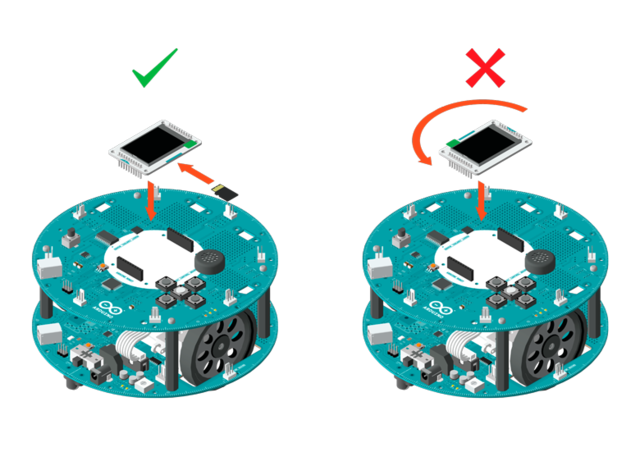
First, you'll need to insert the SD card into the slot on the backside of the TFT screen, and then insert the screen into the socket on the control board of the robot. The screen should be oriented so that the blue text with the text "SD Card" is close to the buttons and speaker.
Crédit: Arduino arduino.cc
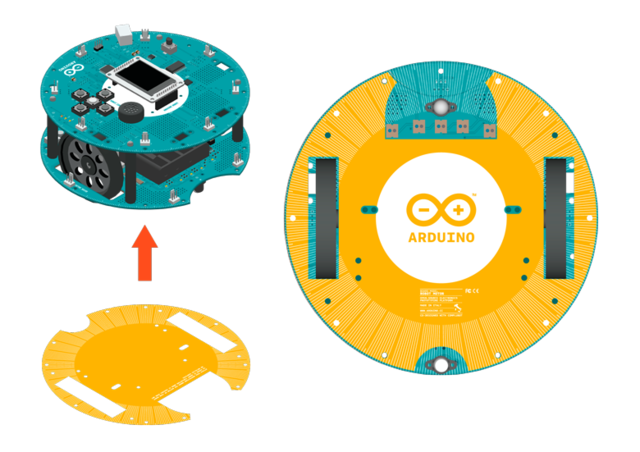
Once that's in place, you'll need to attach the protective cover for the botom board. This will help prevent any objects on the ground from damaging the motor board. Attach the protective covering to the underside of the robot as shown below.
Crédit: Arduino arduino.cc
Contenu de la carte SD
The SD card is used to store information for the robot to read. It comes preloaded with images and sound files used in the Explore examples. Once comfortable with the robot's functionality, you should be able to add your own files. If you ever accidentally remove files used by the explore sketches, you can copy them over from the SDcontent directory found in the robot library.
Brancher le Robut sur le PC
Each board on the robot has a microcontroller, which is programmed independently of the other. It is recommended that you should only program the control board (the top board) until you are familiar with the robot's functionality. The motor board (the bottom board) has a stock firmware that fulfills most general purpose applications.
Crédit: Arduino arduino.cc
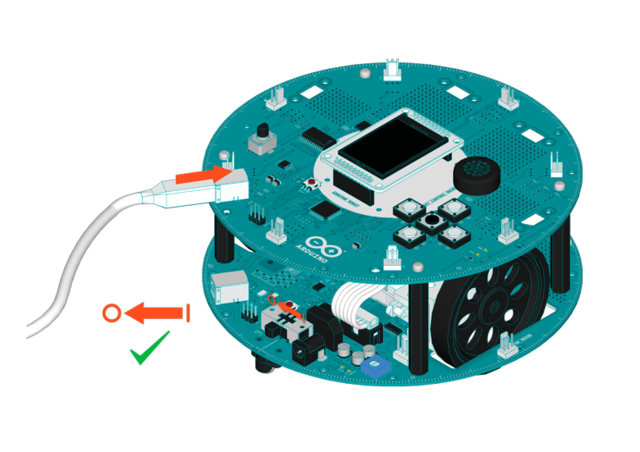
Connect the control board to your computer with a USB cable.
After you have connected the board, the green LED labelled as PWR on the Control Board will be on. LED1 beneath it will flash a few times. On the Motor Board, the red LEDs labelled as LED1 to LED5 (opposite side to the power switch) should be on as well.
If the LEDs on either board do not turn on, check if the flat 10-pin communication cable next to the power switch is connected to both boards.
Installer les pilotes
Installer les pilotes
Instructions pour Mac OS X
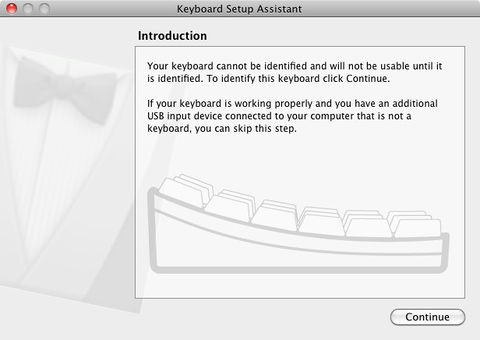
La première fois que vous connectez un Esplora sur un Mac, l'assisant de configuration de clavier ("Keyboard Setup Assistant") est démarré. Il n'y a rien à configurer avec un Esplora, vous pouvez donc fermer cette boite de dialogue en cliquant sur le bouton rouge en haut à gauche de la fenêtre.
Crédit: Arduino arduino.cc
Instructions for Windows
Les instructions suivantes concerne Windows 7. Elles sont également valable pour XP, avec quelques différences relatives au contenu des fenêtres.
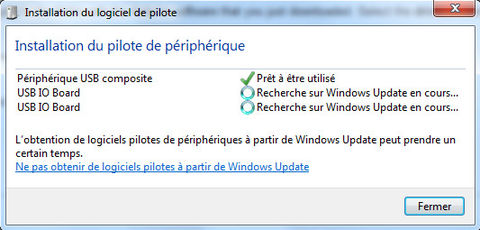
- Branchez votre carte et attendez que Windows commence le processus d'installation des pilotes.
Crédit: Arduino arduino.cc
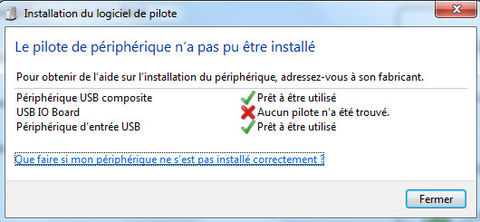
Crédit: Arduino arduino.cc
- Si le programme d'installation ne démarre pas automatiquement, naviguez jusqu'au Gestionnaire de périphérique (Windows Device Manager) via le menu Démarrer > Panneau de configuration > Gestionnaire de périphérique et cherchez après Arduino Esplora dans la liste. Faites un click droit et sélectionnez Mettre le pilote à jour... (Update driver).
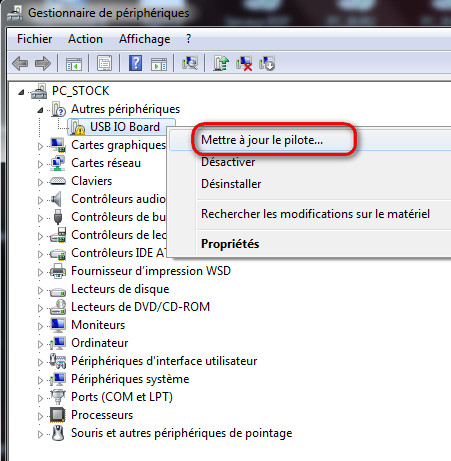
Crédit: Arduino arduino.cc
- A l'écran suivant, sélectionnez "Rechercher un pilote sur mon ordinateur" ("Browse my computer for driver software") et cliquez sur Suivant si nécessaire.
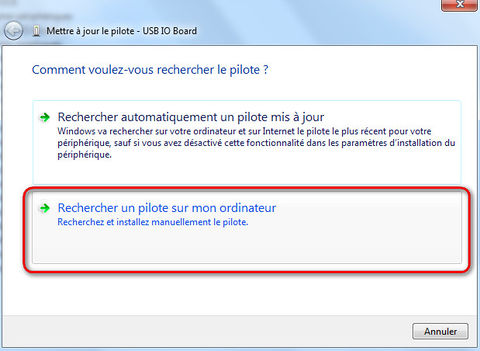
Crédit: Arduino arduino.cc
- Cliquez sur le bouton Parcourir.... Une autre boite de dialogue apparait: naviguez dans le répertoire contenant les logiciels Arduino (que vous venez juste de télécharger). Sélectionnez le répertoire drivers (terme anglais signifiant "pilote") et cliquez sur OK, puis Suivant.
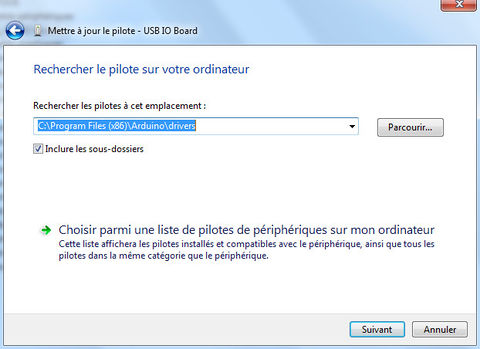
Crédit: Arduino arduino.cc
- Vous allez recevoir un notification vous indiquant que la carte n'a pas obtenu la certification Windows. Si c'est le cas, cliquez sur le bouton Continuer quand même.
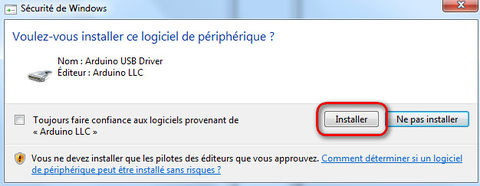
Crédit: Arduino arduino.cc
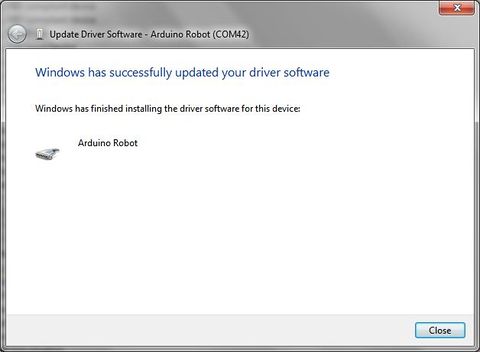
Crédit: Arduino arduino.cc
- Après quelques instant, Windows vou informe qu'il à terminé l'installation de la carte Arduino Esplora. Pressez le bouton Fermer.
Instructions pour Linux
Il n'est pas nécessaire d'installer des pilotes pour Ubuntu 12.04.
Source: Arduino Robot, getting started with the Arduino Robot, the Robot's library pages. Crédit: Arduino.cc, licence Creative Common Attribution ShareAlike.
Toute référence, mention ou extrait de cette traduction doit être explicitement accompagné du texte suivant : « Traduction par MCHobby (www.MCHobby.be) - Vente de kit et composants » avec un lien vers la source (donc cette page) et ce quelque soit le média utilisé.
L'utilisation commercial de la traduction (texte) et/ou réalisation, même partielle, pourrait être soumis à redevance. Dans tous les cas de figures, vous devez également obtenir l'accord du(des) détenteur initial des droits. Celui de MC Hobby s'arrêtant au travail de traduction proprement dit.