Différences entre versions de « ENG-CANSAT-BELGIUM »
| (44 versions intermédiaires par le même utilisateur non affichées) | |||
| Ligne 1 : | Ligne 1 : | ||
[[File:ENG-CANSAT-BELGIUM.jpg|thumb|200px]] [[File:ENG-CANSAT-THECAN.jpg|thumb|200px]] | [[File:ENG-CANSAT-BELGIUM.jpg|thumb|200px]] [[File:ENG-CANSAT-THECAN.jpg|thumb|200px]] | ||
| + | {{infobox tuto | ||
| + | | image = ENG-CANSAT-THECAN.jpg | ||
| + | | title = CanSat Belgium Guide | ||
| + | | subtitle = A comprehensive technical guide to assemble, use and get the best of the Feather M0 Express for CanSat launch. | ||
| + | | version = 0.2 | ||
| + | }} | ||
== What is CanSat? == | == What is CanSat? == | ||
CanSat Contest simulates the fly of miniaturized satellites named CanSat (Can Satellite). | CanSat Contest simulates the fly of miniaturized satellites named CanSat (Can Satellite). | ||
| Ligne 5 : | Ligne 11 : | ||
The CanSat is an autonomous devices enclosed within the volume of a soda can. | The CanSat is an autonomous devices enclosed within the volume of a soda can. | ||
| − | The volume of a CanSat has the following characteristics: 66mm diameter, 115mm height for a | + | The volume of a CanSat has the following characteristics: 66mm diameter, 115mm height for a mass of 350gr. |
As the CanSat have small volume and are very affordable, the CanSat contest is great for learning more about space technologies. | As the CanSat have small volume and are very affordable, the CanSat contest is great for learning more about space technologies. | ||
| Ligne 27 : | Ligne 33 : | ||
In Europe, the CanSat competition is promoted by the ESA ([https://en.wikipedia.org/wiki/CanSat#_Europe source]). | In Europe, the CanSat competition is promoted by the ESA ([https://en.wikipedia.org/wiki/CanSat#_Europe source]). | ||
| − | For Belgium, the '''CanSat Belgium''' competition is promoted by '''InnovIris''' ([http://www.innoviris.be/fr/promotion/cansat-belgium CanSat Belgium NL], [http://www.innoviris.be/nl/promotie/cansat-belgium CanSat Belgium FR], [https://www.facebook.com/CanSat.Belgium?fref=ts CANSAT Belgium FaceBook] ) | + | For Belgium, the '''CanSat Belgium''' competition is promoted by '''InnovIris''' ([http://www.innoviris.be/fr/promotion/cansat-belgium CanSat Belgium NL], [http://www.innoviris.be/nl/promotie/cansat-belgium CanSat Belgium FR], [https://www.facebook.com/CanSat.Belgium?fref=ts CANSAT Belgium FaceBook] ). |
| + | |||
| + | Innoviris is the Brussels Institute for the encouragement of scientific research and innovation. | ||
== About this Wiki == | == About this Wiki == | ||
| Ligne 33 : | Ligne 41 : | ||
MC Hobby does promote, mainly in French, the Arduino Open-Source plateform, MicroPython, Raspberry-Pi, coding, electronics to made knowledge freely available de the mass. | MC Hobby does promote, mainly in French, the Arduino Open-Source plateform, MicroPython, Raspberry-Pi, coding, electronics to made knowledge freely available de the mass. | ||
| − | This CanSat Belgium Wiki is one of the [https://shop.mchobby.be MC Hobby] [https://wiki.mchobby.be documentation project]. | + | This CanSat Belgium Wiki is one of the [https://shop.mchobby.be MC Hobby] [https://wiki.mchobby.be documentation project] partially funded by Innoviris. |
[[Fichier:ARDX-Intro-MCHobby.jpg|480px]] | [[Fichier:ARDX-Intro-MCHobby.jpg|480px]] | ||
| Ligne 61 : | Ligne 69 : | ||
|img=tlogo-feather-m0-express.jpg | |img=tlogo-feather-m0-express.jpg | ||
|link=ENG-CANSAT-FEATHER-M0-USER-GUIDE | |link=ENG-CANSAT-FEATHER-M0-USER-GUIDE | ||
| + | }} | ||
| + | |||
| + | {{ttuto | ||
| + | |label=Forcing Flash Mode | ||
| + | |descr=Useful tip to know. | ||
| + | |img=tlogo-feather-m0-tips.jpg | ||
| + | |link=ENG-CANSAT-FEATHER-M0-FORCING-FLASH | ||
}} | }} | ||
| Ligne 84 : | Ligne 99 : | ||
</div> | </div> | ||
| − | == Test the | + | == Test the devices == |
{{ttuto-begin}} | {{ttuto-begin}} | ||
| Ligne 104 : | Ligne 119 : | ||
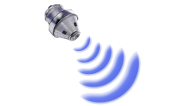
|label=RFM69HCW radio | |label=RFM69HCW radio | ||
|descr=User guide for the <strong>RFM69HCW</strong> radio module. | |descr=User guide for the <strong>RFM69HCW</strong> radio module. | ||
| − | |img=tlogo-CANSAT-RFM69HCW.png | + | |img=tlogo-CANSAT-RFM69HCW-user.png |
|link=ENG-CANSAT-RFM69HCW | |link=ENG-CANSAT-RFM69HCW | ||
}} | }} | ||
| Ligne 117 : | Ligne 132 : | ||
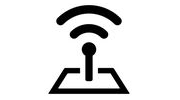
{{ttuto | {{ttuto | ||
|label=Radio Antenna | |label=Radio Antenna | ||
| − | |descr=A well designed Antenna can increase the communication distance | + | |descr=A well designed Antenna can increase the communication distance. |
| − | |img=tlogo-CANSAT-antenna. | + | |img=tlogo-CANSAT-antenna.png |
|link=ENG-CANSAT-ANTENNA | |link=ENG-CANSAT-ANTENNA | ||
| − | | | + | }} |
| + | |||
| + | {{ttuto | ||
| + | |label=NeoPixel | ||
| + | |descr=Using the NeoPixel LED available on the board. | ||
| + | |img=ENG-CANSAT-NEOPIXEL.png | ||
| + | |link=ENG-CANSAT-NEOPIXEL | ||
}} | }} | ||
| Ligne 126 : | Ligne 147 : | ||
== Mission 1 == | == Mission 1 == | ||
| − | + | The team must build a CanSat and program it to accomplish the primary (madatory) mission, as follows: | |
| + | |||
| + | After release and during descent, | ||
| + | * the CanSat shall measure several parameters, | ||
| + | * the data shoudld be transmitted as telemetry information to the ground station. | ||
| + | * the telemetry should, at least, be send once every second. | ||
| + | |||
| + | The following informations should be captured: | ||
| + | * Air temperature | ||
| + | * Air pressure | ||
| + | |||
| + | It must be possible for the team to analyse the data obtained (for example, make a calculation of altitude) and display it in graphs (for example, altitude vs. time and temperature vs. altitude). | ||
| + | |||
| + | <div style="margin: 15px 0; background: rgba(255,204,102,.3); display: block; padding: 15px 15px 15px 15px; -webkit-border-radius: 2px; -moz-border-radius: 2px; border-radius: 2px; border: 1px solid #ff9900;" >So, don't forget to also capture the time for each data collected. This information is as critical than pressure and temperature</div> | ||
{{ttuto-begin}} | {{ttuto-begin}} | ||
{{ttuto | {{ttuto | ||
| − | |label=Mission 1 | + | |label=Mission 1: Emitter |
| − | |descr= | + | |descr=Wiring sensors, capturing datas and sending over radio. |
| − | |img=tlogo-CANSAT-MISSION1. | + | |img=tlogo-CANSAT-MISSION1.png |
|link=ENG-CANSAT-MISSION1-CAPTURE | |link=ENG-CANSAT-MISSION1-CAPTURE | ||
| − | |||
}} | }} | ||
{{ttuto | {{ttuto | ||
| − | |label=Mission 1 | + | |label=Mission 1: Receiver |
| − | |descr= | + | |descr=Receiving the transmitted data. |
| − | |img=tlogo-CANSAT-MISSION1. | + | |img=tlogo-CANSAT-MISSION1-RECEIVER.png |
| − | |link=ENG-CANSAT-MISSION1- | + | |link=ENG-CANSAT-MISSION1-RECEIVE |
| − | |||
}} | }} | ||
| − | |||
| − | |||
| − | |||
| − | |||
| − | |||
| − | |||
| − | |||
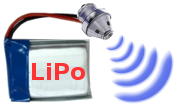
{{ttuto | {{ttuto | ||
| − | |label=Mission | + | |label=Mission 1: Going autonomous |
| − | |descr= | + | |descr=Receiving the transmitted data. |
| − | |img=tlogo-CANSAT- | + | |img=tlogo-CANSAT-MISSION1-RECEIVER-Lipo.png |
| − | |link=ENG-CANSAT- | + | |link=ENG-CANSAT-MISSION1-AUTONOMOUS |
| − | |||
}} | }} | ||
{{ttuto-end}} | {{ttuto-end}} | ||
| − | == | + | == Resources == |
| − | |||
{{ttuto-begin}} | {{ttuto-begin}} | ||
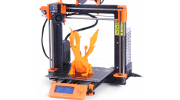
| Ligne 171 : | Ligne 194 : | ||
|label=CanSat 3D | |label=CanSat 3D | ||
|descr=CanSat 3D models to print your own one | |descr=CanSat 3D models to print your own one | ||
| − | |img=tlogo-CANSAT-3D. | + | |img=tlogo-CANSAT-3D.png |
|link=ENG-CANSAT-3D | |link=ENG-CANSAT-3D | ||
| − | |||
}} | }} | ||
{{ttuto | {{ttuto | ||
|label=Radio Antenna | |label=Radio Antenna | ||
| − | |descr=A well designed Antenna can increase the communication distance | + | |descr=A well designed Antenna can increase the communication distance. |
| − | |img=tlogo-CANSAT-antenna. | + | |img=tlogo-CANSAT-antenna.png |
|link=ENG-CANSAT-ANTENNA | |link=ENG-CANSAT-ANTENNA | ||
| − | |||
}} | }} | ||
{{ttuto | {{ttuto | ||
|label=Parachute | |label=Parachute | ||
| − | |descr= | + | |descr=Some reference to design the parachute |
| − | |img=tlogo-CANSAT- | + | |img=tlogo-CANSAT-parachute.png |
|link=ENG-CANSAT-PARACHUTE | |link=ENG-CANSAT-PARACHUTE | ||
| − | |||
}} | }} | ||
{{ttuto-end}} | {{ttuto-end}} | ||
| − | Other | + | Optional: Adding a GPS module to transmit the CanSat position with the telemetry data would ease to positioning when back on the earth. |
| + | |||
| + | Other resources: | ||
* [https://en.wikipedia.org/wiki/CanSat#_Europe CanSat Europe] on WikiPedia - Lot of informations | * [https://en.wikipedia.org/wiki/CanSat#_Europe CanSat Europe] on WikiPedia - Lot of informations | ||
| − | * [ | + | * [http://df.mchobby.be/wiki-export/Eng-Cansat/Eng-Cansat.pdf This wiki as PDF] (''pdf'') |
| + | * [http://df.mchobby.be/wiki-export/Eng-Cansat/ENG-CANSAT-ARDUINO-IDE.pdf Install & configure '''ARDUINO IDE''' for Feather M0 Express] (''pdf'') | ||
| + | * [http://df.mchobby.be/wiki-export/Eng-Cansat/Cansat-kit-presentation.pdf CanSat Kit Presentation] (''pdf'') | ||
Version du 15 novembre 2018 à 12:39


What is CanSat?
CanSat Contest simulates the fly of miniaturized satellites named CanSat (Can Satellite).
The CanSat is an autonomous devices enclosed within the volume of a soda can.
The volume of a CanSat has the following characteristics: 66mm diameter, 115mm height for a mass of 350gr.
As the CanSat have small volume and are very affordable, the CanSat contest is great for learning more about space technologies.
The CanSats are deployed from a rocket (the launch vehicle) at a height of about 3000m depending on the competition (see all the details in the contest rules).
The CanSats are not orbited and are always deployed in the athmosphere. So they always comes back to the earth.
The CanSat volume cannot increase until the CanSat is deployed out of the rocket.
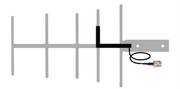
This means that external antenna is allowed only after the CanSat left the rocket.
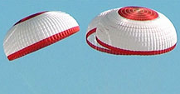
A parachute (that increase the volume of the CanSat) is usually used to limit damages. The aim is to reuse the CanSat for several missions.
In Europe, the CanSat contest includes two missions:
- Mission 1: mesure pressure and temperature and transmit data in real time.
- Mission 2: free choice mission (using Intertial Measurement Unit, GPS, MPX differential pressure sensor, etc).
How to subscribe the contest?
In Europe, the CanSat competition is promoted by the ESA (source).
For Belgium, the CanSat Belgium competition is promoted by InnovIris (CanSat Belgium NL, CanSat Belgium FR, CANSAT Belgium FaceBook ).
Innoviris is the Brussels Institute for the encouragement of scientific research and innovation.
About this Wiki
MC Hobby does promote, mainly in French, the Arduino Open-Source plateform, MicroPython, Raspberry-Pi, coding, electronics to made knowledge freely available de the mass.
This CanSat Belgium Wiki is one of the MC Hobby documentation project partially funded by Innoviris.

Getting Started
You may learn more from Adafruit Industries (or this translation).
Test the devices

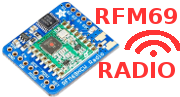
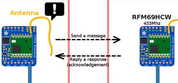
Testing the communication with RFM69HCW and sending data through the radio module.
Mission 1
The team must build a CanSat and program it to accomplish the primary (madatory) mission, as follows:
After release and during descent,
- the CanSat shall measure several parameters,
- the data shoudld be transmitted as telemetry information to the ground station.
- the telemetry should, at least, be send once every second.
The following informations should be captured:
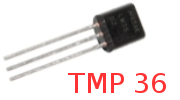
- Air temperature
- Air pressure
It must be possible for the team to analyse the data obtained (for example, make a calculation of altitude) and display it in graphs (for example, altitude vs. time and temperature vs. altitude).
Resources
Optional: Adding a GPS module to transmit the CanSat position with the telemetry data would ease to positioning when back on the earth.
Other resources:
- CanSat Europe on WikiPedia - Lot of informations
- This wiki as PDF (pdf)
- Install & configure ARDUINO IDE for Feather M0 Express (pdf)
- CanSat Kit Presentation (pdf)