Différences entre versions de « ENG-CANSAT-RFM69HCW »
| Ligne 41 : | Ligne 41 : | ||
* '''GND''': Common ground between logic and power. | * '''GND''': Common ground between logic and power. | ||
* '''Vin''': Power In 3.3 to 6V. The board regulated it to 3.3V. '''Be sure you can supply up to 150mA''' on this pin since Radio Emitting can reach this current level. | * '''Vin''': Power In 3.3 to 6V. The board regulated it to 3.3V. '''Be sure you can supply up to 150mA''' on this pin since Radio Emitting can reach this current level. | ||
| − | * '''EN''': Enbable Pin used to switch off the Power supply (and the radio module). EN use a pull-up resistor to maintain the regulator enabled, just | + | * '''EN''': Enbable Pin used to switch off the Power supply (and the radio module). EN pin use a pull-up resistor to maintain the regulator enabled, just set it to LOW to switch off the radio. |
== SPI Interface Pins == | == SPI Interface Pins == | ||
Version du 13 octobre 2018 à 09:11
|
|
En cours de traduction/élaboration. |
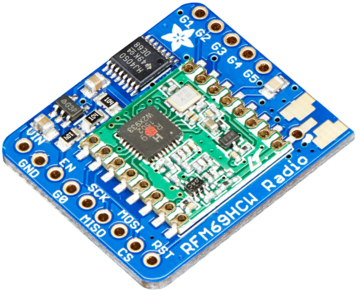
RFM69 Radio Module
Before starting make sure you have your Feather and Arduino working properly with basic functionalities. This will make this part more easier and you can upgrade your project to radio transmission.
Both RFM69 and RFM9x LoRa breakouts have the exact same pinouts! And they exists in 900 MHz or 433 MHz flavor.
- The silkscreen identify the RFM69HCW -OR- LoRa
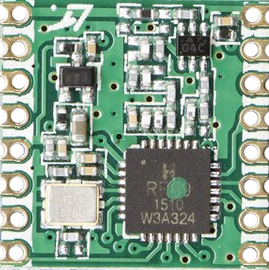
- The 900 MHz modules have a green or blue dot on top.
- The 433 Mhz modules have a red dot on top.
The sub-GHz radio transmission does have lower throughput so it is not made to stream audio or video! The sub-GHz is suited for small packets of data. The data rate is adjustable but its common to stick to around 19.2 Kbit per second. Lower is the rate and better woud be the transmissions.
To use such modules you will need both of them! The radios must be matched in frequency (eg: 433 MHz & 433 MHz will match, 433 MHz & 900 MHz will not match).
The both module must use the same encoding schemes. You cannot use a RFM69 900 MHz packet radio together with a RFM9x packet radio (LoRa).
| In Belgium, you cannot use the RFM69 900 Mhz without having the appropriate license, see this "IBTP Frequency Plan" link for more details. |
According to the same "IBTP Frequency Plan" the RFM69HCW should be used between 430-440 MHz.
Raw vs Packet Transmission
The SX1231 module used on the RFM69 breakout board can be used in 'raw Rx/Tx' where it modulates incoming bits (from pin #2) and sends them on the radio. In 'raw Rx/Tx' there is no error correction and no addressing. This mode is weak and error prone so it will not be covered.
Packet mode will be suited for almost 99% of use cases. When packetized, the code can setup a recipient for the data, ensure error correction (data transmitted correctly), automatic retries on transmission error and acknowledgement when the packet is delivered. In packet mode, you got a reliable data pipe, transparent communication without getting care about the complex details of data transmission over radio frequencies.
With a SX1231 module, the complexity is reduced to 4 main characteristics more easy to handle:
- the frequency to use
- the power level to use
- the encryption key to use
- the appropriate antenna (depending on the expected transmission range)
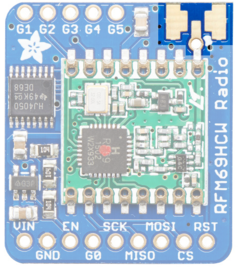
Power Pins
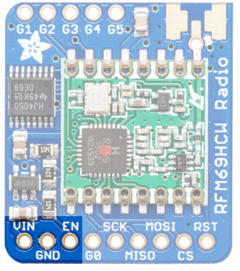
- GND: Common ground between logic and power.
- Vin: Power In 3.3 to 6V. The board regulated it to 3.3V. Be sure you can supply up to 150mA on this pin since Radio Emitting can reach this current level.
- EN: Enbable Pin used to switch off the Power supply (and the radio module). EN pin use a pull-up resistor to maintain the regulator enabled, just set it to LOW to switch off the radio.
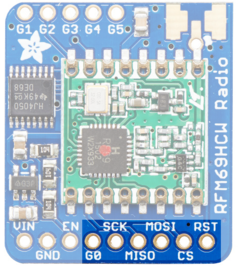
SPI Interface Pins
Antenna Slot
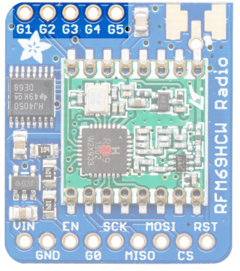
Extra GPIOs Pins
Written by Meurisse D. from MC Hobby - License: CC-SA-BY.
