FEATHER-M0-MicroPython
|
|
En cours de traduction/élaboration. |
Introduction
Crédit: AdaFruit Industries www.adafruit.com
CircuitPython est un dérivé de MicroPython conçu pour simplifier L'expérimentation et l'apprentissage sur les microcontrôleurs abordables. Il rend le prototypage plus simple que jamais car il ne requière aucun logiciel spécifique sur votre ordinateur. Téléchargez simplement CircuitPython et déposez le sur le lecteur qui apparaît (uniquement disponible pour les cartes Express). Une fois CircuitPython installé, vous pouvez programmer votre carte express en CircuitPython en faisant de simples copiés/collés de vos scripts Python sur le lecteur.
Télécharger
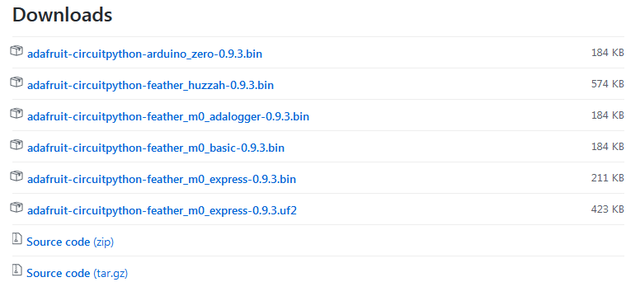
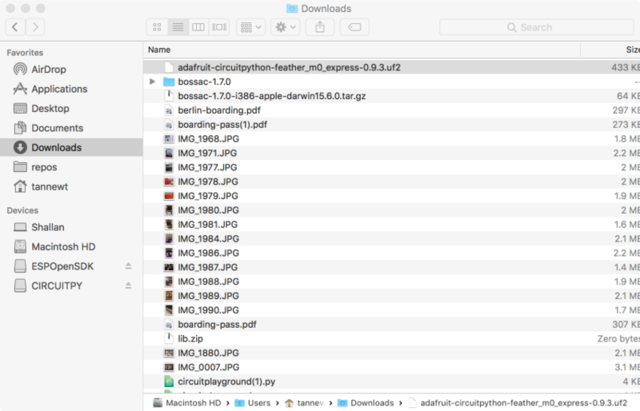
Les derniers build de CircuitPython sont disponibles sur la page release du projet GitHub. Les fichiers binaires pour les différentes cartes sont disponibles sous la section "Downloads" (téléchargement).
Sélectionnez le fichier binaire correspondant à votre carte tel que:
- adafruit-circuitpython-feather_m0_express-0.9.3.bin pour le Feather M0 Express -ou-
- adafruit-circuitpython-metro_m0_express-0.9.3.bin pour le Metro M0 Express (carte au format Arduino R3).
Les fichiers terminant par .bin peuvent être flashé sur la carte à l'aide d'outil comme esptool.py ou de bossac.
Les fichier terminant par .uf2 peuvent être flashé sur le lecteur virtuel lorsque la carte est en mode bootloader.
La liste contient de nombreuses versions de CircuitPython. La liste des téléchargements est longue car Adafruit supporte de nombreuses versions matérielles différentes!
Crédit: AdaFruit Industries www.adafruit.com
Voyez ci-dessous le fichier à télécharger!
Flasher
Le "Flashage" est le processus de mise-à-jour du coeur de CircuitPython. Cette opération n'est pas nécessaire lorsque vous mettrez à jour vos propres scripts Python.
Il y a deux méthodes disponibles pour cette opération: UF2 et bossac. Le flashage UF2 est uniquement disponible sur les cartes Express, elles disposent d'un bootloader compatible UF2. Le flashage à l'aide de bossac est possible pour les bootloader des cartes Express et des cartes "Arduino" originales. Nous recommandons l'utilisation de UF2 si cela est possible. Si le flashage UF2 échoue (ou n'est pas disponible) alors essayez bossac.
|
|
En cours de traduction/élaboration. |
Regardless of what method you use, you must first get the board into the bootloader mode. This is done by double clicking the reset button. The board is in bootloader mode when the red led fades in and out. Boards with the status neopixel will also show USB status while the red led fades. Green means USB worked while red means the board couldn't talk to the computer. The first step to troubleshooting a red neopixel is trying a different USB cable to make sure its not a charge-only cable.
Flashing UF2
Adafruit Express boards come with a new beta bootloader called UF2 that makes flashing CircuitPython even easier than before. This beta bootloader allows you to drag so-called ".uf2" type files onto the BOOT drive. <a href="../../../../adafruit-feather-m0-express-designed-for-circuit-python-circuitpython/uf2-bootloader">For more information, check out our UF2 bootloader page.</a>
Start by double-clicking the reset button while it is plugged into your computer. You should see a new disk drive 'pop up' called METROBOOT or FEATHERBOOT or similar, and the NeoPixel on your board glow green.
The drive will contain a few files. If you want to make a 'backup' of the current firmware on the device, drag-off and save the CURRENT.UF2 file. Other than that, you can ignore the index.htm and info_uf2.txt files. They cannot be deleted and are only for informational purposes.
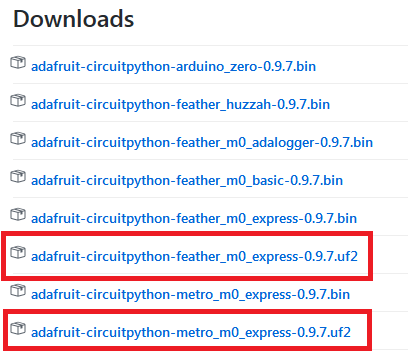
Next up, find the Feather M0 Express UF2 or Metro M0 Express UF2 file in the github downloads list:
Crédit: AdaFruit Industries www.adafruit.com
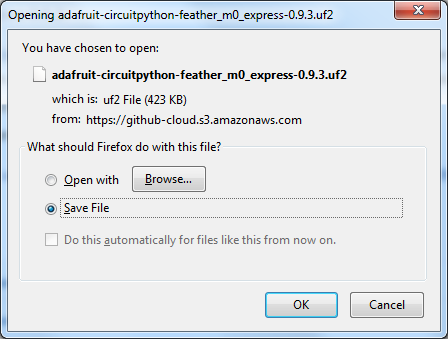
Click to download and save the file onto your Desktop or somewhere else you can find it
Crédit: AdaFruit Industries www.adafruit.com
Then drag the uf2 file into the BOOT drive
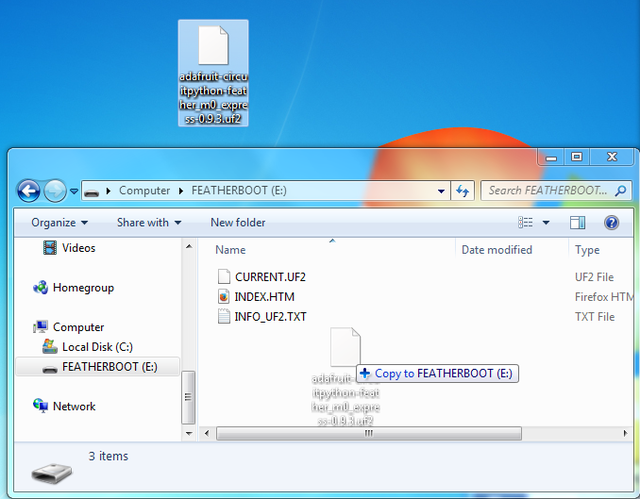
Crédit: AdaFruit Industries www.adafruit.com
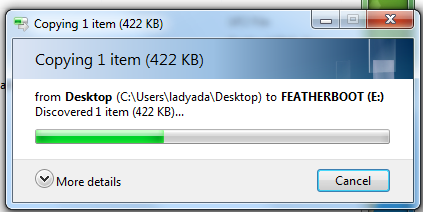
Crédit: AdaFruit Industries www.adafruit.com
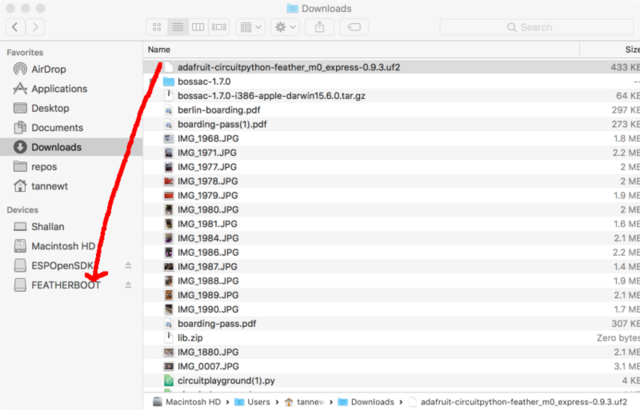
Crédit: AdaFruit Industries www.adafruit.com
Once the full file has been received, the board will automatically restart into CircuitPython. Your computer may warn about ejecting the drive early, if it does, simply ignore it because the board made sure the file was received ok.
Flashing with BOSSAC
This method is only recommended if you can't use UF2 for some reason!
To flash with bossac (BOSSA's command line tool) first download the latest version from <a href="https://github.com/shumatech/BOSSA/releases/latest">here</a>. The mingw32 version is for Windows, apple-darwin for Mac OSX and various linux options for Linux. Once downloaded, extract the files from the zip and open the command line to the directory with bossac.
bossac -e -w -v -R ~/Downloads/adafruit-circuitpython-feather_m0_express-0.9.3.bin
This will erase the chip, write the given file, verify the write and Reset the board. After reset, CircuitPython should be running. Express boards may cause a warning of an early eject of a USB drive but just ignore it. Nothing important was being written to the drive.
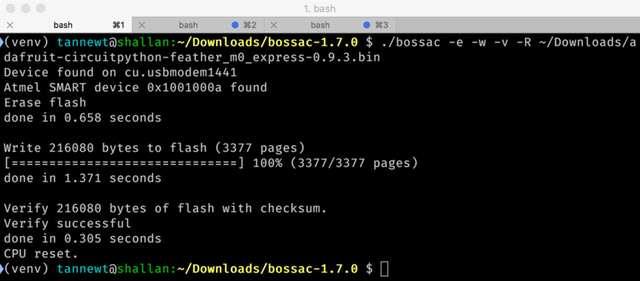
Crédit: AdaFruit Industries www.adafruit.com
<a href="#after-flashing" class="anchor-link"></a>After flashing
After a successful flash by bossac or UF2 you should see a CIRCUITPY drive appear.
Crédit: AdaFruit Industries www.adafruit.com
Source: Adafruit Feather M0 Express - Designed for CircuitPython créé par LadyAda, Tony DiCola, Scorr Shawcroft, Dan Halbert pour AdaFruit Industries. Crédit AdaFruit Industries
Traduit par Meurisse D. pour MCHobby.be
Traduit avec l'autorisation d'AdaFruit Industries - Translated with the permission from Adafruit Industries - www.adafruit.com
Toute référence, mention ou extrait de cette traduction doit être explicitement accompagné du texte suivant : « Traduction par MCHobby (www.MCHobby.be) - Vente de kit et composants » avec un lien vers la source (donc cette page) et ce quelque soit le média utilisé.
L'utilisation commercial de la traduction (texte) et/ou réalisation, même partielle, pourrait être soumis à redevance. Dans tous les cas de figures, vous devez également obtenir l'accord du(des) détenteur initial des droits. Celui de MC Hobby s'arrêtant au travail de traduction proprement dit.