Différences entre versions de « FEATHER-CHARGER-MICROPYTHON-ESP8266-EN »
| Ligne 87 : | Ligne 87 : | ||
[[Fichier:OLI-ESP8266-EVB.jpg|180px]] | [[Fichier:OLI-ESP8266-EVB.jpg|180px]] | ||
| − | + | To activate the Flash Mode on the {{pl|668|ESP8266-EVB}} (Evaluation Board from Olimex) (using a {{pl|667|ESP8266-DEV}}): | |
| − | * | + | * Presse the USER button on the board (this button is wired to the small push-button on the ESP8266-EVB, himself wired to the GPIO 0) |
| − | * | + | * Plug the power cord on the evaluation board (5V max) |
| − | * | + | * Then release the GPIO 0 button. |
| − | + | Please note that {{pl|668|ESP8266-EVB}} and {{pl|667|ESP8266-DEV}} do not have USB-to-Serial converter, you will have to use a {{pl|144|console cable (USB-Série-TTL)}} to communicates with the ESP8266 board. | |
[[Fichier:UEXT-SERIAL-wiring2.jpg|240px]] [[Fichier:UEXT-SERIAL-wiring.jpg|240px]] | [[Fichier:UEXT-SERIAL-wiring2.jpg|240px]] [[Fichier:UEXT-SERIAL-wiring.jpg|240px]] | ||
Version du 19 mai 2021 à 13:07
This page is currently under translation
Pre-requisites
Note: This page also exists in French
Before using MicroPython on ESP8266, you will need to reflash the ESP8266 with the last version of the MicroPython firmware.
Here is a compact and afordable tutorial but you can also find the official instructions (micropython.org, english) to loads MicroPython on an ESP8266.
Firstly, you will need to install a Python environment. Previously, Python 2.7 was required but it should work with more recent 3.x version. If you are running under Windows, do not forget to add the PATH to the search path. Python is usually available out-of-the-box on Linux based machine.
Next, you will need to install the esptool.py software. It is used to send firmware to the ESP8266. A quick and easy is to use the pip (or pip3 for Python 3.x setups) Python Package Installer.
Key-in the following line into a terminal:
pip install esptool
Note for Mac OSX & Linux: you may need to run this command as root with sudo for the software to be installed property:
sudo pip install esptool

Crédit: AdaFruit Industries www.adafruit.com
Tricky note from the past days:
If pip informs you that esptool.py doesn't work with Python x.x then you may also try to install it with the pip2 command instead of regular pip (if Python 3.x is the default interpreter then the pip command should be link to pip3... this may be confusing and leading to strange situation). It should no more exists in 2021.
Download MicroPython
Next, download the last binary version of the MicroPython firmware for ESP8266. Such are also compiled everyday from the GitHub souce code but we do not recommend to use them unless you know what you are doing.
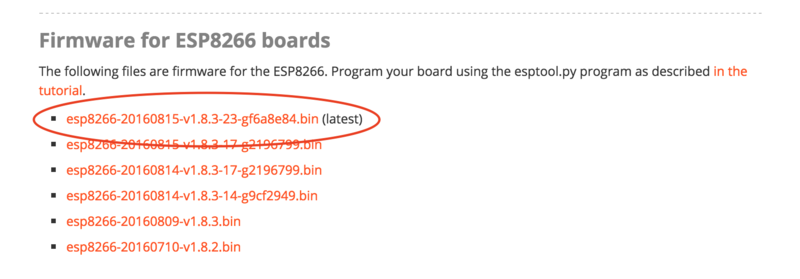
The following screen capture shows the list of links, we just click on the most recent version to download it on the computer.
Crédit: AdaFruit Industries www.adafruit.com
Wiring + activates Flash mode on ESP8266
Now, we need to wire our ESP8266 on a computer and make it ready to receive the new firmware (called "Flash" mode).
Some board do already have USB connector, some not.
Some board do automagically start the flash mode, some not.
Here are the "Wiring + Flash mode" operation for many of the ESP8266 plateforms.
Common use case
You have a RAW ESP8266 without serial-to-usb interface. In most common-case, they offer a FTDI pin-out to attach a FTDI Friend (an USB-to-Serial adapter).
- for the raw ESP8266 or NodeMCU Lolin you will need to wire the GPIO0 to the GROUND with a push-button THEN do the same with the RESET line.
- Maintain the GPIO0 button down (to connect it to the Ground) THEN press and release the RESET button (while still maintaining GPIO0).
- AFTER release the GPIO0 button. => you just activated the Flash mode.
On some board like breakout HUZZAH ESP8266 the GPIO0 and RESET button are already available on the board. This will ease the operation.
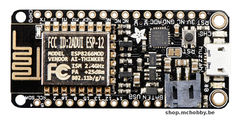
Feather HUZZAH ESP8266, Wemos D1
Such module can automatically start the Flash mode thank to an hardware trick.
That will avoids additionnal handling to start the Flash mode.
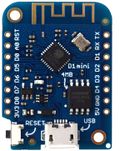
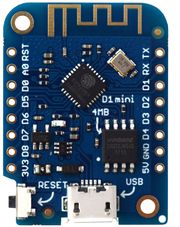
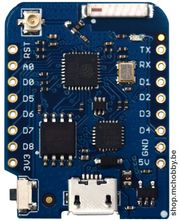
The Feather HUZZAH ESP8266, Wemos D1 Mini, Wemos D1 Pro detects when the serial line is opened and automatically reset and start the Flash mode.
You just need to send the firmware to the ESP8266 module, it will be automagically programmed.
- On Windows: you will have to install the CP210x SiLabs driver to make the Serial-to-USB available on the board.
For Windows, it will be necessary to install the standard VCP driver (normal VCP driver), do not select the driver with Serial Enumeration (it will not work). - On MacOS X: the driver should already be supported.
- On Linux: no driver needed, it work out of the box.
| The Wemos ESP8266 do use another Serial-to-USB chip based on CH340D. You will need to install the appropriate driver on Windows/Mac. |
ESP8266-DEV (only)
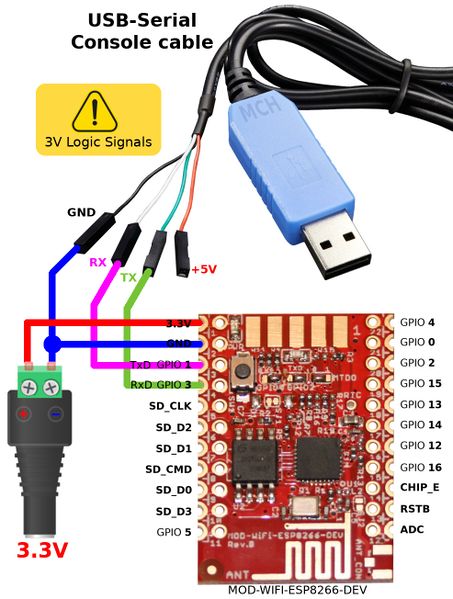
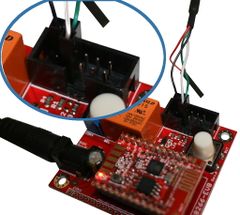
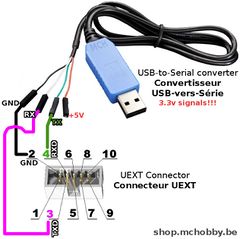
You can flash a ESP8266-DEV module by using a console cable (USB-Série-TTL) using 3V logic for RX/TX .
Here how to wire the board.
To activates the Flash Mode on the ESP8266-DEV (from Olimex):
- Press the GPIO 0 button (the small user button on the board is wired to GPIO 0)
- Then power-up the module.
- Release the GPIO 0 button.
Voila, the ESP8266-DEV is set to Flash mode.
ESP8266-EVB (evaluation board)
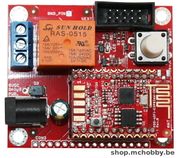
To activate the Flash Mode on the ESP8266-EVB (Evaluation Board from Olimex) (using a ESP8266-DEV):
- Presse the USER button on the board (this button is wired to the small push-button on the ESP8266-EVB, himself wired to the GPIO 0)
- Plug the power cord on the evaluation board (5V max)
- Then release the GPIO 0 button.
Please note that ESP8266-EVB and ESP8266-DEV do not have USB-to-Serial converter, you will have to use a console cable (USB-Série-TTL) to communicates with the ESP8266 board.
Erase the Flash
Il est recommander d'effacer entièrement le contenu de la mémoire Flash d'une carte ESP8266 avant de téléverser un nouveau FirmWare. Exécutez le code suivant dans un terminal pour effectuer cette opération:
esptool.py --port /chemin/vers/ESP8266 erase_flash
Où /chemin/vers/ESP8266 est le chemin ou nom du port série connecté sur l'ESP8266. Le nom exacte du périhérique varie en fonction du type de convertisseur USB-vers-série. Lister vis port série avant de connecter le module ESP826 puis répétez l'opération avec le port série connecté. Le port qui vient d'apparaître est celui correspondant à votre ESP8266.

Crédit: AdaFruit Industries www.adafruit.com
Flashing MicroPython on ESP8266
ESP8266 from Adafruit Industries
Pour le breakout HUZZAH ESP8266 et le Feather HUZZAH ESP8266 + FTDI Friend:
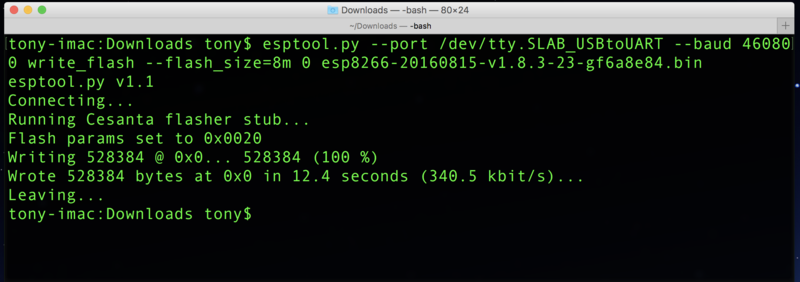
Remettez votre ESP8266 en "mode Flashage" et exécutez la commande suivante pour charger le nouveau firmware (celui que vous avez déjà téléchargé sur votre ordinateur):
esptool.py --port /chemin/vers/ESP8266 --baud 115200 write_flash --flash_size=detect -fm dio 0 firmware.bin
| Depuis la version 1.3 d'EspTool, il est possible d'utiliser Python 2.7 et Python 3.5. Depuis la version du 2.x d'EspTool, il est possible d'utiliser l'option --flash_size=detect pour éviter les erreurs taille de flash. |
Encore une fois, /chemin/vers/ESP8266 est le chemin ou nom du port série connecté sur l'ESP8266. Remplacez firmware.bin avec le vrai nom (et chemin d'accès) du fichier firmware que vous voulez téléverser sur l'ESP8266.
Crédit: AdaFruit Industries www.adafruit.com
ESP8266 WEMOS D1 Mini
Pour le Wemos D1 dispose de 4MB de Flash comme pour la plupart des ESP8266 disponible sur le marché.
Exécutez la commande suivante pour charger le nouveau firmware (celui que vous avez déjà téléchargé sur votre ordinateur):
esptool.py --port /chemin/vers/ESP8266 --baud 115200 write_flash --flash_size=detect -fm dio 0 firmware.bin
ESP8266 WEMOS D1 PRO
Pour le Wemos D1 Pro dispose de 16MB de Flash, la commande de Flash est donc différente:
Exécutez la commande suivante pour charger le nouveau firmware (celui que vous avez déjà téléchargé sur votre ordinateur):
esptool.py --port /chemin/vers/ESP8266 --baud 115200 write_flash --fm dio --fs=32m 0 firmware.bin
| Bien que le module n'embarque que 16MB, il est nécessaire de mentionner une Flash Size de 32m ! Flasher le module avec une Flash Size de 16m laisse celui dans un état instable après le redémarrage. |
ESP8266-EVB & ESP8266-DEV
Pour le ESP8266-EVB evaluation board et ESP8266-DEV carte de développement placée sur la carte ESP8266-EVB:
Exécutez la commande suivante pour charger le nouveau firmware (celui que vous avez déjà téléchargé sur votre ordinateur):
esptool.py --port /chemin/vers/ESP8266 --baud 115200 write_flash --flash_size=detect -fm dio 0 firmware.bin
Appliquer un cycle d'alimentation sur l'ESP8266-EVB pour réinitialiser la plateforme.
After Flash operation
Pressez le bouton RESET de votre carte une fois que l'outil à terminé le flashage du Firmware (la LED bleue clignote durant le flashage). Si vous ne possédez pas de bouton RESET, vous pouvez également déconnecter et reconnecter l'ESP8266 sur votre ordinateur.
Voila, vous venez de flasher votre ESP8266 avec la dernière version du firmware MicroPython!
Vous pouvez sauter sur la section REPL série de ce guide pour apprendre comment obtenir l'invite de commande de votre carte MicroPython.
Ressources
Error message
J'ai le message d'erreur "read failed: device reports readiness to read but returned no data (device disconnected or multiple access on port?" !
Nous avons rencontré ce problème lorsque le câble console était branché sur un HUB USB externe. Essayez de brancher le câble console directement sur l'ESP8266.
EspTool Upgrade
Les firmwares récents nécessitent une version récente d'EspTool pour être flasher l'ESP8266.
Pour notre grand malheur, nous avons essayé de flasher un firmware 1.8.x avec un EspTool 1.0.1. Inutile de dire que nous n'avons plus grand chose de fonctionnel sur notre ESP8266 !
Un upgrade d'EspTool à la version la plus récente (2.0.1 en l’occurrence, voir ici sur pypi.python.org) à résolu notre problème grâce à l'option --flash_size=detect
Pour forcer la mise-à-jour d'EspTool à une version donnée, il faut saisir:
sudo apt-get install esptool==2.0.1
More information
Voyez la page "MicroPython ESP8266 tutorial - deploying".

