Utilisateur:Admin
Liens Perso / Idées projets
Idées projets:
- Maker PI RP2040 + Zumo Robot
Idées Blog:
- Maker Pi RP2040 (Cytron) + Romi
MediaWiki reference
- Formatting in Wiki : MediaWiki Formatting
- Tweeki : Tweeki = Mediawiki + Twitter Bootstrap
- WikiMedia API : API documentation
https://wiki.mchobby.be/index.php?title=Accueil&action=XXX
Avec XXX pouvant recevoir les valeurs suivantes:
- raw : contenu de la page wiki tel que présenté dans le volet "edit"
- render : rendu HTML sans interface utilisateur et sans inclusion CSS. Idéal pour inclure dans un IFrame ou compiler un PDF.
- info : Affiche des informations sur la page
- purge : efface le cache pour la page, force la recompilation depuis la source.
- history : affiche l'historique de modification de la page
- Voir aussi Actions sur MediaWiki
Specific Ressource
Image
[[Fichier:image.png]]
[[Fichier:image.png|240px]]
ADF Images
{{ADFImage|name.jpg}}
{{ADFImage|name.jpg|250px}}
Pololu
Infobox pour page de garde compilée avec compile_tuto.py :
{{Pololu-Zumo-Shield-Arduino-NAV}}
{{infobox tuto
   | image = Pololu-Zumo-Shield-Arduino-01.jpg
   | title = Guide utilisateur du Robot Zumo Pololu
   | subtitle = Un guide complet et abordable pour assembler, utiliser et exploiter rapidement votre Robot Zumo.
   | version = 0.1
}}
Image Pololu avec crédit et description
{{POLImage|name.jpg|250px|descr}}
Lien vers produit Pololu:
{{pl|447|châssis Zumo}} {{polpl|1418}}
MediaWiki extension
Template MCHobby
- MCH-Aider
- MCH-Accord
- ADF-Accord, ARDUINO-Accord, GOF-Accord, ECE-Accord
syntaxhighlight
<syntaxhighlight lang="python">
#!/usr/bin/python

# Simple RGBMatrix example, using only Clear(), Fill() and SetPixel().
# These functions have an immediate effect on the display; no special
# refresh operation needed.
# Requires rgbmatrix.so present in the same directory.

import time
from rgbmatrix import Adafruit_RGBmatrix
</syntaxhighlight>
#!/usr/bin/python

# Simple RGBMatrix example, using only Clear(), Fill() and SetPixel().
# These functions have an immediate effect on the display; no special
# refresh operation needed.
# Requires rgbmatrix.so present in the same directory.

import time
from rgbmatrix import Adafruit_RGBmatrix
Template condensé
<syntaxhighlight lang="python">
x
</syntaxhighlight>
<syntaxhighlight lang="c">
x
</syntaxhighlight>
Round Box
<div style="border: 1px solid #FF9933; background-color: #FFCC66; padding-top: 10px; padding-bottom: 10px; padding-left:10px; border-radius: 15px; margin-bottom: 10px; text-align: left;">Traduction réalisée par Meurisse. D pour [http://shop.mchobby.be shop.MCHobby.be] - '''Licence CC-BY-SA.'''<br />
'''Crédit de traduction:''' Toute référence, mention ou extrait de cette traduction doit également être explicitement accompagné du crédit de traduction suivant : «  Traduction par MCHobby ([http://shop.mchobby.be shop.MCHobby.be]) » avec un lien vers la source (donc cette page) et ce quelque soit le média utilisé.</div>
   ou
{{rbox-orange| exemple de round box orange}}
Crédit de traduction: Toute référence, mention ou extrait de cette traduction doit également être explicitement accompagné du crédit de traduction suivant : « Traduction par MCHobby (shop.MCHobby.be) » avec un lien vers la source (donc cette page) et ce quelque soit le média utilisé.
<div style="border: 1px solid #BAC6C7; background-color: #F1BBBB; padding-top: 10px; padding-bottom: 10px; padding-left:10px; border-radius: 15px; margin-bottom: 10px; text-align: left;">Un message important à ne pas rater!</div>
   ou
{{rbox-red| exemple de round box rouge}}
<div style="background-color: #B6F7B8; padding: 8px 10px; border-radius: 0; border: 1px solid #30C164; margin-left: 10px; margin-bottom:10px; border-radius:15px;">Encore un autre modèle</div>
   ou
{{rbox-green | exemple de round box vert}}
Voyez le Color Picker de W3Schools pour les couleurs ;-)
Div Box
{{dbox-orange| dbox-orange example }}
{{dbox-red| dbox-red example }}
{{dbox-green| dbox-green example }}
{{dbox-blue| dbox-blue example }}
{{dbox-gray| dbox-gray example }}
Boxes
- AmBox et ses instructions d'installation la documentation du modèle est Modèle:Ambox/doc
- TmBox qui peut être obtenu ici, pour visualiser, faire une recherche sur le modèle Modèle:Tmbox/doc
- Visiblement besoin d'un parser pour "#ifeq:". Pour plus d'info voir Extension:ParserFunctions. Le parseur est diponible dans la version 1.16 (visiblement pas la 1.17!)
- Rechercher la page MediaWiki:Common.css et ajouter une partie du style CSS mentionné ici
- Images pour AmBox
Exemple TmBox
|
|
Some tmbox text. |
|
|
En cours de traduction |
{{tmbox | text = En cours de traduction}}
|
|
Pas Op! Une betise tu va bientôt faire une fois |
{{tmbox | type = speedy | text = Pas Op! Une betise tu va bientôt faire une fois}}
Exemple AmBox
| Some text. |
{{ambox | text = Some text.}}
| Text for a big box, for the top of articles. |
| Ne surtout pas faire cette bêtise!!! |
{{Ambox
| type       = delete
| image      = [[File:StopHand.png|40px|alt=Stop]]
| textstyle  = color: red; font-weight: bold; font-style: italic;
| text       = Text for a big box, for the top of articles.
}}

{{ambox-stop | text = Ne surtout pas faire cette bêtises!!! }}
IFrame (vidéo)
Exemple de IFrame
{{#Widget:Iframe
|url=https://www.youtube.com/embed/lmoz-XrSfEw
|width=420
|height=315
|border=0
}}
{{#Widget:Iframe
|url=https://www.youtube.com/embed/lmoz-XrSfEw
|width=420
|height=315
|border=0
}}
Petite structure permettant de naviguer plus facilement dans les articles composés de plusieurs pages.
Déclaration à l'aide d'un template
{{TFT-SHIELD-NAV}}
Anciennement, le contenu du template était:
 <div style="position: absolute; right:10px; background-color: #f6f6f6; padding-right: 5px; border: 1px #d8d8d8 solid;">
* Introduction
** [[Ecran tactile 2.8" TFT]]
* Librairie GFX
** [[Tutoriel Librairie Adafruit GFX|Tutoriel GFX]]
** [[Tutoriel Librairie Adafruit GFX - Couleurs 16 Bits|Couleurs 16 bits]]
* Acheter
** [http://mchobby.be/PrestaShop/product.php?id_product=16 Ecran tactile 2.8"]
</div>
Il est maintenant remplacé par l'utilisation du template {{TUTO-NAV}} prenant en charge l'affichage des éléments HTML du navigateur.
Voici donc le nouveau contenu de {{TFT-SHIELD-NAV}}
{{TUTO-NAV|
* Introduction
** [[Ecran tactile 2.8" TFT]]
* Librairie GFX
** [[Tutoriel Librairie Adafruit GFX|Tutoriel GFX]]
** [[Tutoriel Librairie Adafruit GFX - Couleurs 16 Bits|Couleurs 16 bits]]
* Acheter
** {{pl|16|Ecran tactile 2.8"}}
}}
Bas de page
Utilise la technique du template reprenant la nomenclature suivante:
{{TFT-SHIELD-TRAILER}}
Qui contient généralement:
<hr />
<small>Source: [http://learn.adafruit.com/wave-shield-voice-changer/overview]

''Réalisé avec l'aide de Mr Carette J. à qui nous remettons tous nos remerciements.''</small>

{{ADF-Accord}}

{{MCH-Accord}}
Bloc
Bloc Etroit
Les blocs permettent de mettre en place une section plus étroite pour placer du texte à gauche du navigateur... sans devoir utiliser soit même une série de
{{bloc-etroit
   |text=Le texte a faire paraitre dans le bloc :-) avec toute sorte de truc Wiki
}}
Bloc Download
Bloc présentant un aspect plus agréable qu'un simple lien. Le texte de la boite passe également à 120%.
{{download-box|Téléchargez Raspbian PiTFT 2.8"|http://adafruit-download.s3.amazonaws.com/PiTFT28R_raspbian140620_2014_08_25.zip}}
Bloc YouTube
Bloc présentant un aspect plus agréable qu'un simple lien. Le texte de la boite passe également à 120%.
{{youtube-box|Wiring the cansat boards|https://youtu.be/dmc9noI2WAs}}
Formatage de texte
Hormis le formatage standard de médiawiki, voici quelques petits extra:
Comment mettre un texte en souligné ;-)
Comment mettre {{underline|un texte en souligné}}
Comment mettre un text en overline
Comment mettre {{overline|un text en overline}}
Comment afficher LeNomDuneFonction() ou du code en courrier :-)
Comment afficher {{fname|LeNomDuneFonction()}} en courrier
Exemple de page type
{{Voice-Changer-NAV}}

{{traduction}}

{{bloc-etroit
   |text=Blablabla
}}

{{Voice-Changer-TRAILER}}
Ce qui produit:
|
|
En cours de traduction/élaboration. |
Blablabla
Source: Wave Shield Voice Changer. Crédit: Adafruit Industries
Réalisé avec l'aide de Mr Carette J. à qui nous remettons tous nos remerciements.
Traduit avec l'autorisation d'AdaFruit Industries - Translated with the permission from Adafruit Industries - www.adafruit.com
Toute référence, mention ou extrait de cette traduction doit être explicitement accompagné du texte suivant : « Traduction par MCHobby (www.MCHobby.be) - Vente de kit et composants » avec un lien vers la source (donc cette page) et ce quelque soit le média utilisé.
L'utilisation commercial de la traduction (texte) et/ou réalisation, même partielle, pourrait être soumis à redevance. Dans tous les cas de figures, vous devez également obtenir l'accord du(des) détenteur initial des droits. Celui de MC Hobby s'arrêtant au travail de traduction proprement dit.
Liste des tutoriels
Flag spéciaux:
- traduction=1 : permet d'indiquer un banner "under construction" à la place de l'image du tutoriel. Affiche également le texte "TRAVAUX EN COURS." en tête de description.
- link=INTERNAL_PAGE_CODE : a utiliser pour une page tuto complète.
- url=http://xxx : a utiliser à la place de link pour pointer vers une page externe au Wiki
{{ttuto-begin}}

{{ttuto
  |label=Capteur de courant
  |descr=Mesure de puissance/energie dans une installation électrique.
  |img=Senseur-Courant.jpg
  |link=SENSEUR-COURANT
  |traduction=1
}}

{{ttuto
  |label=Arduino Yun
  |descr=Arduino '''Yun''', spécialiste du WIFI et du Net. <font color="red">avec traduction de la librairie en français</font>.
  |img=tlogo-yun.jpg
  |link=Arduino Yun
}}

-- AUSSI AVEC LIEN VERS GITHUB --

{{ttuto
  |label=MOD-Wii-Chuck [UEXT]
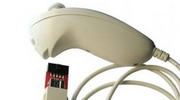
  |descr=Contrôleur de jeu I2C Wii Nunchuck. Exploiter le sous MicroPython (via port UEXT).
  |img=tlogo-mod-wii-nunchuck.png
  |url=https://github.com/mchobby/esp8266-upy/tree/master/modwii
}}

{{ttuto-end}}
TRAVAUX EN COURS. Mesure de puissance/energie dans une installation électrique.
Contrôleur de jeu I2C Wii Nunchuck. Exploiter le sous MicroPython (via port UEXT).
TABLES
Parts List - Table
{{parts-begin}}

{{parts-item
  |name=Afficheur
  |descr=Afficheur LCD (2x16 caractères)
  |img=afficheur-lcd-afficheur.jpg
  |link=http://shop.mchobby.be/product.php?id_product=176
  |qty=1
}}

{{parts-item
  |name=Potentiomètre
  |descr=pot. 10 KOhms linéraire<br />Inclus avec l'afficheur LCD
  |img=afficheur-lcd-pot.jpg
  |link=http://shop.mchobby.be/product.php?id_product=33
  |qty=1
}}

{{parts-end}}
| Description | Quantité | |
Afficheur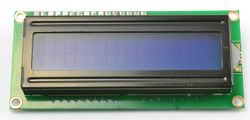
|
Afficheur LCD (2x16 caractères) disponible ici chez MCHobby |
1 |
Potentiomètre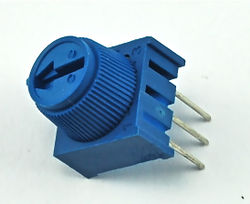
|
pot. 10 KOhms linéraire Inclus avec l'afficheur LCD disponible ici chez MCHobby |
1 |
parts-item prédéfini
Plutôt que recoder systématiquement toutes les informations d'un part-item, il est également possible d'utiliser l'un des prédéfini.
Exemple :
{{parts-begin}}
{{parts-item-pi|qty=1}}
{{parts-end}}
| Description | Quantité | |
Raspberry Pi B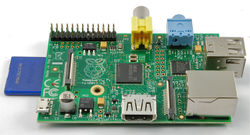
|
Raspberry Pi disponible ici chez MCHobby |
1 |
Raspberry Pi 3 ou Pi 2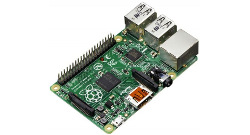
|
Raspberry Pi 3 disponible ici chez MCHobby |
1 |
Modèle pour Création :
{{parts-item
  |name=Raspberry Pi
  |descr=Raspberry Pi<br />{{{note| }}}
  |img=part-item-pi.jpg
  |link=http://mchobby.be/PrestaShop/product.php?id_product=141
  |qty={{{qty}}}
}}
Liste :
Assemblage - Tables
décrit les opérations d'assemblages
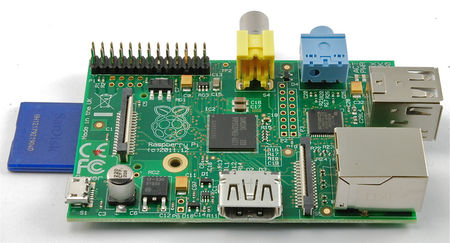
|
Le texte de description ici |

|
Avec paramètre additionnel qui réduit l'image à 250px (size=250px)
Autre ligne
|
{{asm-begin}}

{{asm-row|img=part-item-pi.jpg}}
{{asm-text}} Le texte de description ici

{{asm-row|img=afficheur-lcd-afficheur.jpg|size=250px}}
{{asm-img|img=part-item-pi.jpg}}
{{asm-text}} Avec paramètre additionnel qui réduit l'image à 250px (size=250px)

Autre ligne
* Et bullet list :-)
{{asm-end}}
WikiMedia - Tables
- SpreadSheet to Wikitable converter (fonctionne aussi avec un copy d'une table HTML)
| Titre1 | Description |
| xx | yyyy |
| xx | yyyy |
| xx | yyyy |
{| class="wikitable" border="1"
|-
| align="center" | Titre1
| align="center" | Description
|- style="font-size: 90%"
| align="left" | xx
| align="left" | yyyy
|- style="font-size: 90%"
| align="left" | xx
| align="left" | yyyy
|- style="font-size: 90%"
| align="left" | xx
| align="left" | yyyy
|}
| Titre1 | Titre2 | Description |
| ww | xx | yyyy |
| ww | xx | yyyy |
| ww | xx | yyyy |
{| class="wikitable" border="1"
|-
| align="center" | Titre1
| align="center" | Titre2
| align="center" | Description
|- style="font-size: 90%"
| align="left" | ww
| align="left" | xx
| align="left" | yyyy
|- style="font-size: 90%"
| align="left" | ww
| align="left" | xx
| align="left" | yyyy
|- style="font-size: 90%"
| align="left" | ww
| align="left" | xx
| align="left" | yyyy
|}
| Titre1 | Titre2 | Titre3 | Description |
| ww | xx | yyyy | zzzz |
| ww | xx | yyyy | zzzz |
| ww | xx | yyyy | zzzz |
{| class="wikitable" border="1"
|-
| align="center" | Titre1
| align="center" | Titre2
| align="center" | Titre3
| align="center" | Description
|- style="font-size: 90%"
| align="left" | ww
| align="left" | xx
| align="left" | yyyy
| align="left" | zzzz
|- style="font-size: 90%"
| align="left" | ww
| align="left" | xx
| align="left" | yyyy
| align="left" | zzzz
|- style="font-size: 90%"
| align="left" | ww
| align="left" | xx
| align="left" | yyyy
| align="left" | zzzz
|}
| Type de lumière ambiante... | Lumière ambiante (lux) | Valeur photo-Résistance (Ohms) | Photo-résistance + R (Ohms) | Courant (Photo-résistance + R) | Tension aux bornes de R |
| Hall faiblement éclairé | 0.1 lux | 600 KOhms | 610 KOhms | 0.008 mA | 0.1 V |
| Clair de lune | 1 lux | 70 KOhms | 80 KOhms | 0.07 mA | 0.6 V |
| Pièce sombre | 10 lux | 10 KOhms | 20 KOhms | 0.25 mA | 2.5 V |
| Jour très couvert (sombre) / Pièce lumineuse | 100 lux | 1.5 KOhms | 11.5 KOhms | 0.43 mA | 4.3 V |
| Jour couvert | 1000 lux | 300 Ohms | 10.03 KOhms | 0.5 mA | 5V |
{| class="wikitable" border="1"
|-
| align="center" | Type de lumière ambiante...
| align="center" | Lumière ambiante (lux)
| align="center" | Valeur photo-Résistance (Ohms)
| align="center" | Photo-résistance + R (Ohms)
| align="center" | Courant (Photo-résistance + R)
| align="center" | Tension aux bornes de R
|- style="font-size: 90%"
| align="left" | Hall faiblement éclairé
| align="left" | 0.1 lux
| align="left" | 600 KOhms
| align="left" | 610 KOhms
| align="left" | 0.008 mA
| align="left" | 0.1 V
|- style="font-size: 90%"
| align="left" | Clair de lune
| align="left" | 1 lux
| align="left" | 70 KOhms
| align="left" | 80 KOhms
| align="left" | 0.07 mA
| align="left" | 0.6 V
|- style="font-size: 90%"
| align="left" | Pièce sombre
| align="left" | 10 lux
| align="left" | 10 KOhms
| align="left" | 20 KOhms
| align="left" | 0.25 mA
| align="left" | 2.5 V
|- style="font-size: 90%"
| align="left" | Jour très couvert (sombre) / Pièce lumineuse
| align="left" | 100 lux
| align="left" | 1.5 KOhms
| align="left" | 11.5 KOhms
| align="left" | 0.43 mA
| align="left" | 4.3 V
|- style="font-size: 90%"
| align="left" | Jour couvert
| align="left" | 1000 lux
| align="left" | 300 Ohms
| align="left" | 10.03 KOhms
| align="left" | 0.5 mA
| align="left" | 5V
|}
Aligner des tables
| Bouton | Entrées PiGrrl 1 | Entrées Arduino |
| A | B1 | D2 |
| + | B2 | D3 |
| Bouton | Entrées PiGrrl 2 | Entrées Arduino |
| 2 | B1 | D7 |
| 1 | B2 | D8 |
{| class="wikitable" border="1" style="display: inline-block;"
|-
| align="center" | '''Bouton'''
| align="center" | '''Entrées PiGrrl 1'''
| align="center" | '''Entrées Arduino'''
|- style="font-size: 90%"
| align="center" | A
| align="center" | B1
| align="center" | D2
|- style="font-size: 90%"
| align="center" | +
| align="center" | B2
| align="center" | D3
|}

{| class="wikitable" border="1" style="display: inline-block;"
|-
| align="center" | '''Bouton'''
| align="center" | '''Entrées PiGrrl 2'''
| align="center" | '''Entrées Arduino'''
|- style="font-size: 90%"
| align="center" | 2
| align="center" | B1
| align="center" | D7
|- style="font-size: 90%"
| align="center" | 1
| align="center" | B2
| align="center" | D8
|}
Liens Produits & Categ
Hyperlien produit
Permet de créer rapidement & facilement un lien produit vers le WebShop à partir de l'ID produit.
Utilise le code PL en minuscule pour Product Link.
{{pl|_ID_|_texte_}}
Exemple:
{{pl|345|The Pi-Rack de la mort qui tue}}
The Pi-Rack de la mort qui tue
Hyperlien Categorie
Permet de créer rapidement & facilement un lien catégorie vers le WebShop à partir de l'ID produit.
Utilise le code CL en minuscule pour Category Link.
{{cl|_ID_|_texte_}}
Exemple:
{{cl|43|La gamme Trinket}}
Hyperlien Recherche produit
Permet de créer rapidement & facilement un lien recherche de produit sur le WebShop à partir de d'un mot clé.
Utilise le code SL en minuscule pour Search Link.
{{sl|_MOT_CLE_|_texte_}}
Exemple:
{{sl|neopixel|Les différents produits NéoPixel}}
Les différents produits NéoPixel
link-product-CODE
Commence par "link-product-" + code produit
- link-product-vise : étau 3ieme main
- link-product-iron : fer à souder
- link-product-pince-coupante : pince coupante (diagonale)
- link-product-bbdemi : breadboard demi-taille
- link-product-filsbb : fils de prototypage
- link-product-picobbler : Pi-Cobbler
- link-product-pi : Raspberry Pi B
- link-product-pilus : Raspberry Pi-B PLUS
- link-product-pi2 : Raspberry Pi-2
- link-product-pi3 : Raspberry Pi 3
- link-product_pi3plus : Raspberry Pi 3 B+
- link-product-arduino : Arduino Uno
- link-product-bbb : BeagleBone Black
- link-product-flora : Flora
link-product-categ
- link-product-categ-pi : Autres produits Raspberry Pi
Lien fournisseur
{{pl|447|châssis Zumo}} {{polpl|1418}}
Editing Tools / UNICODE
- SpreadSheet to Wikitable converter (LIEN MORT!, fonctionne aussi avec un copy d'une table HTML)
- text to html table
- Wikipedia:Tools/Editing tools
- Da Button Factory Creator
- Unicode
Linux: [ctrl]+[shift]+u then key-in hexa code- Unicode Arrows
- Unicode Symbol, Geometric Shape, tech symbols; etc
- Unicode MATH
- Copyright : U+00A9
- Registered : U+00AE
- Text editor
Toolbox
Quelques outils pour créer plus facilement du contenu sur ce wiki.
- MediaWiki tables
- Graphical Resistance Calculator
- graphical equation creator (Equa Image)
- GUID generator
- Commonist uploaded (a tester)
- Codes ASCII
- W3schools - Color Picker
- Symbol référence (Wikipedia)
- Regular Expression Tester (regex101.com)
- Symbole des Expressions Régulière (RegExp)
- Cron Tab online editor (crontab.com)
a CronTab guide


