ADAFRUIT-FONA-Brancher-USB
Brancher sur USB
If you have a USB console cable you can wire it up directly and send commands using any Terminal software
For Windows, we suggest Putty - it's free and open source!
Raccorder
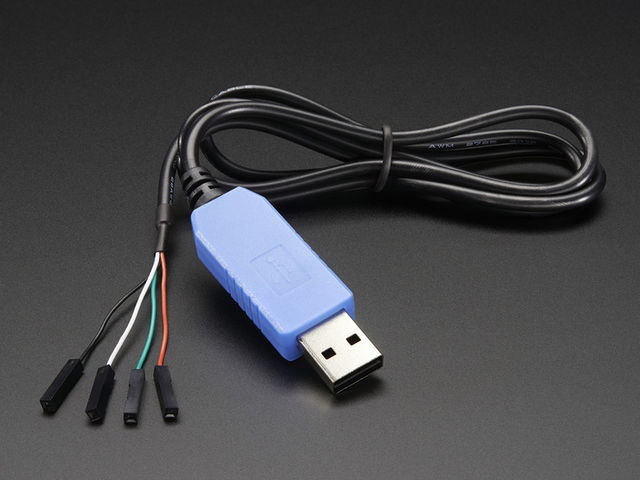
In this example, we're using le câble console que nous proposons.
Crédit: AdaFruit Industries www.adafruit.com
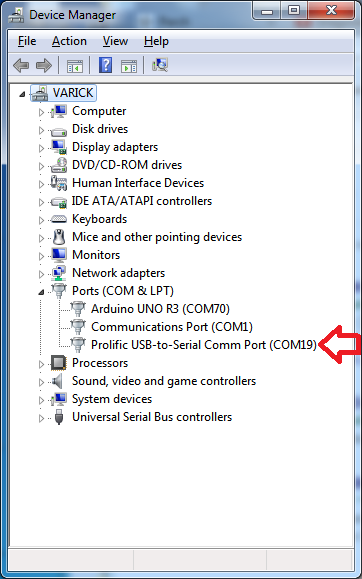
You will have to install the PL2303 driver and determine the COM port before you continue.
Crédit: AdaFruit Industries www.adafruit.com
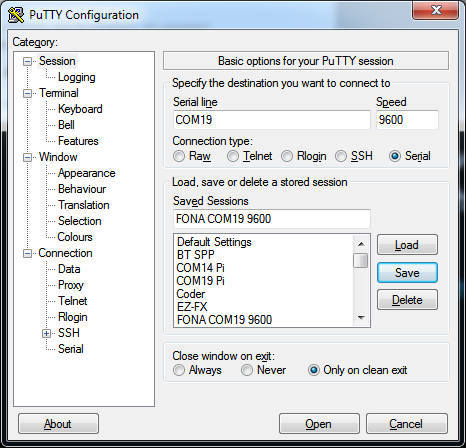
Connect to that COM port at 8N1 (8-bit, no parity bit, 1 stop bit) at 9600 baud. You can actually use any baud rate and it will autodetect but 9600 is supported by any terminal program!
Crédit: AdaFruit Industries www.adafruit.com
Vérifiez bien!
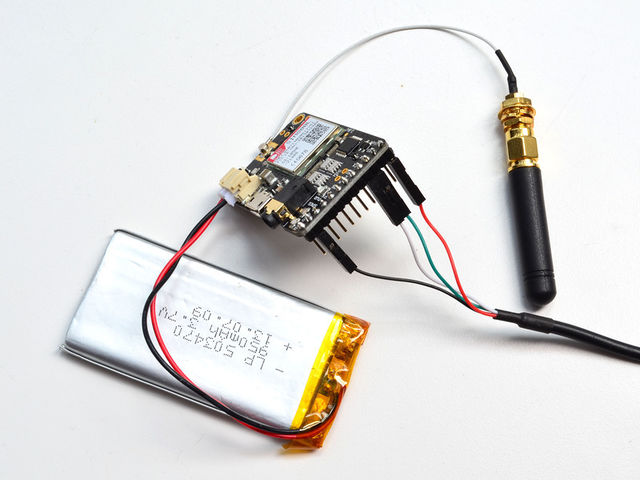
- You have a Lipoly battery plugged in to the FONA JST
- You have a working 2G SIM installed in the back
- Connect Black wire to GND
- Connect White wire to TX
- Connect Green wire to RX
- Connect Red wire to Vio
- You may need to hold down the KEY button for 2 seconds until the PWR LED is lit and the NET LED blinks
Crédit: AdaFruit Industries www.adafruit.com
Utilisateurs Linux
Nous avons également également essayé de brancher notre FONA sur une machine Linux (nous adorons Linux). Mais nous avons été très surpris de ne pouvoir communiquer facilement avec le FONA :-/
Linux (Mint/Ubuntu dans notre cas) dispose d'un très bon support matériel. Dès que nous branchons notre FONA via USB, la machine se dit que c'est peut être un modem série (ce qui est le cas du FONA) et envoi des commandes AT.
En gros, le FONA commence à être pris en charge par le système d'exploitation, ce qui perturbe énormément la communication que nous essayons d'établir avec un terminal. Bref, c'était le cauchemar pendant une journée...
Désespéré, nous sommes passés au raccordement Arduino + Test avec la console série d'Arduino IDE... et notre premier SMS à été envoyé dans les 10 minutes (raccordement+téléversement arduino+envoi SMS)!
Commandes de test
The FONA will echo characters back so you can see what you're typing - very handy!
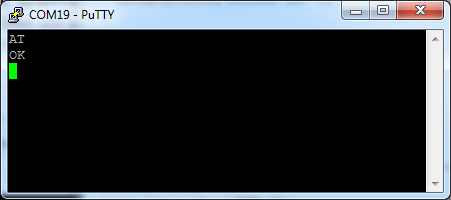
Start by initializing the auto-baud'er by sending AT and then return
Crédit: AdaFruit Industries www.adafruit.com
You may have to try it twice to get it to auto baud. Once it works you should see the AT characters echo and then OK telling you its OK!
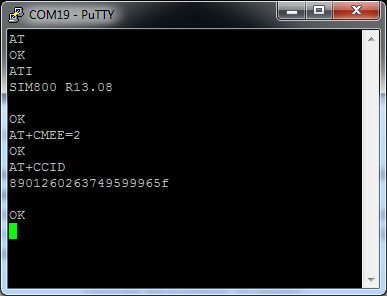
You can then send some commands to query the module and get information about it such as
- ATI - Get the module name and revision
- AT+CMEE=2 - Turn on verbose errors (handy for when you are trying out commands!)
- AT+CCID - get the SIM card number - this tests that the SIM card is found OK and you can verify the number is written on the card
Crédit: AdaFruit Industries www.adafruit.com
Tester la configuration
Some tests to verify the setup:
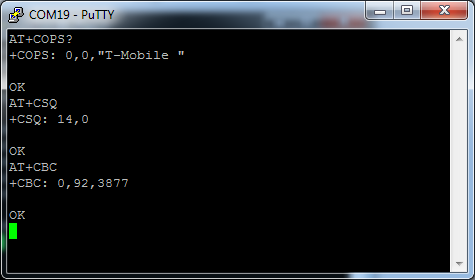
- AT+COPS? Check that you're connected to the network, in this case T-Mobile
- AT+CSQ - Check the 'signal strength' - the first # is dB strength, it should be higher than around 5. Higher is better. Of course it depends on your antenna and location!
- AT+CBC - will return the lipo battery state. The second number is the % full (in this case its 92%) and the third number is the actual voltage in mV (in this case, 3.877 V)
| If your SIM card is locked with a PIN code, you will need to enter the pin before you can connect to a network via the 'AT+CPIN' command. For example if the pin is 1234 you need to enter 'AT+CPIN=1234". |
Crédit: AdaFruit Industries www.adafruit.com
Tester l'envoi de SMS
Finally, you can try to text your phone! Sending an SMS is pretty darn easy.
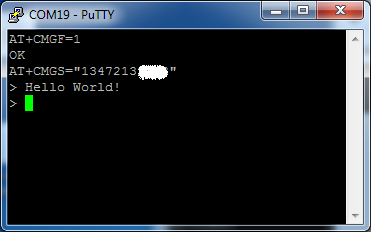
- AT+CMGF=1 - this will set it to TEXT mode not PDU (data) mode. You must do this because otherwise you cannot just type out the message.
- AT+CMGS="nnnnnn" - send a text message! You will get a '>' prompt for typing. Type out your message and when you are done send a [Control-Z] on an empty line to send
It may take a few seconds after the Control-Z character for the module to send the SMS (you'll get a +CMGS) and verify it was sent (OK reply)
Crédit: AdaFruit Industries www.adafruit.com
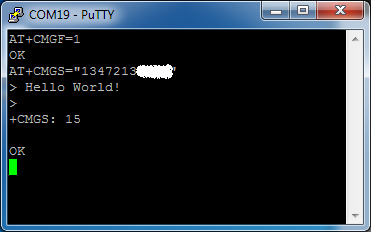
Crédit: AdaFruit Industries www.adafruit.com
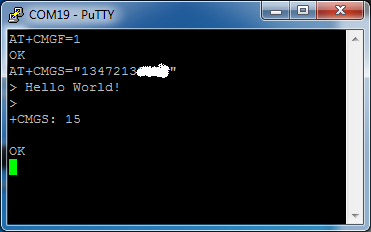
Crédit: AdaFruit Industries www.adafruit.com
Tester l'appel vocal
You can also make a phone call, you must have a headset attached to the 4-pole 3.5mm headset connector, with a mic!
To call, dial
- To call, dial ATDnnnnn; Don't forget the ; at the end!
- If they pick up you'll hear it in the headset, if no pickup, you'll get a NO CARRIER return
- Once you are chatting, you can hang up by sending ATH
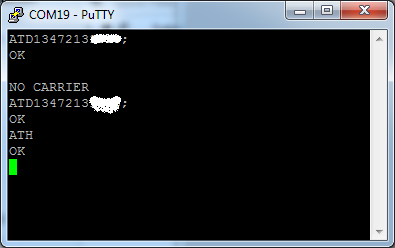
Crédit: AdaFruit Industries www.adafruit.com
Source: Adafruit FONA - Call phones, send and receive SMSs, & more! All with FONA. Ecrit par Lady Ada pour AdaFruit. Crédit AdaFruit Industries
Traduit par Meurisse D. pour MCHobby.be
Traduit avec l'autorisation d'AdaFruit Industries - Translated with the permission from Adafruit Industries - www.adafruit.com
Toute référence, mention ou extrait de cette traduction doit être explicitement accompagné du texte suivant : « Traduction par MCHobby (www.MCHobby.be) - Vente de kit et composants » avec un lien vers la source (donc cette page) et ce quelque soit le média utilisé.
L'utilisation commercial de la traduction (texte) et/ou réalisation, même partielle, pourrait être soumis à redevance. Dans tous les cas de figures, vous devez également obtenir l'accord du(des) détenteur initial des droits. Celui de MC Hobby s'arrêtant au travail de traduction proprement dit.
