Différences entre versions de « ADF-ADJ-BBALIM-UTILISER »
(Page créée avec « {{ADF-ADJ-BBALIM-NAV}} Blba {{ADF-Accord}} {{MCH-Accord}} ») |
|||
| Ligne 1 : | Ligne 1 : | ||
{{ADF-ADJ-BBALIM-NAV}} | {{ADF-ADJ-BBALIM-NAV}} | ||
| + | = Comment utiliser = | ||
| − | + | Ce kit est vraiment simple d'emploi. Vous devez d'abord assembler le kit, vérifiez les instructions d'assemblage pour savoir comment le souder! | |
| + | |||
| + | = L'entrée à main droite = | ||
| + | L'étage haute tension ('input' en anglais) se trouve à main droite. | ||
| + | |||
| + | Il y a deux sorties ("outputs" en anglais) sur la carte. A main droite, il y a l'étage haute tension. C'est la tension qui vient directement de la prise Jack (ou du bornier). | ||
| + | |||
| + | Il y a une diode pour prévenir la mise sous tension négative et protéger le régulateur... même si cela occasionne une chute de tension d'environ 200mv. | ||
| + | |||
| + | [[Fichier:ADF-ADJ-BBALIM-USE-01.jpg]] | ||
| + | |||
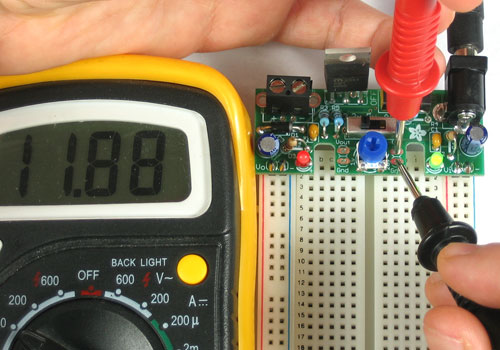
| + | For example, this photo is me testing the output of the right hand side with a 12VDC regulated power adapter attached. The voltage is within 200mV of 12V. The green LED indicates that there is power on the right hand side. | ||
| + | |||
| + | = Left hand 'output' = | ||
| + | |||
| + | The left hand side is the 'regulated' voltage side. This is the power that is running through the voltage regulator. This voltage is adjustable | ||
| + | |||
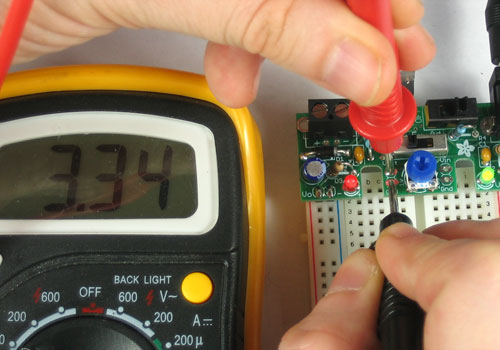
| + | If you select 3.3v on the voltage selection switch you will be able to measure that output voltage. The red indicator LED will be somewhat dim | ||
| + | |||
| + | [[Fichier:ADF-ADJ-BBALIM-USE-02.jpg]] | ||
| + | |||
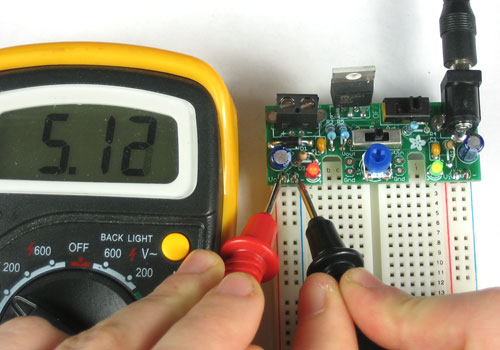
| + | Then you can also select '''5V''' to generate a regulated 5V supply | ||
| + | |||
| + | [[Fichier:ADF-ADJ-BBALIM-USE-03.jpg]] | ||
| + | |||
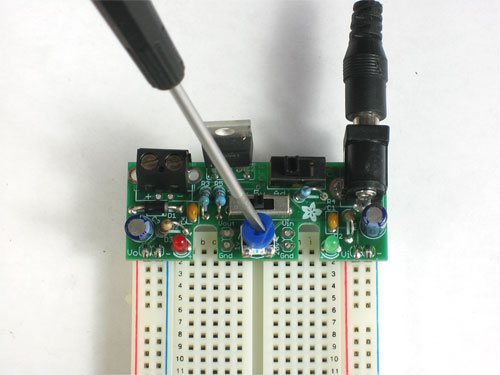
| + | Finally, by selecting '''Adj'''. you can adjust the supply to anything you want from as low as ~1.3V to within half a volt of the input (which can be as high as 20V) | ||
| + | |||
| + | [[Fichier:ADF-ADJ-BBALIM-USE-04.jpg]] | ||
| + | |||
| + | Once you set the pot, the output voltage is not dependent on the input voltage. That is, if you dial in 6V and you switch from a 9V to 12V supply, the output will stay at 6V. | ||
| + | |||
| + | [[Fichier:ADF-ADJ-BBALIM-USE-05.jpg]] | ||
| + | |||
| + | [[Fichier:ADF-ADJ-BBALIM-USE-06.jpg]] | ||
| + | |||
| + | = Le dissipateur de chaleur = | ||
| + | |||
| + | SI votre alimentation s'interrompt constamment ou si elle est très chaude ALORS vous avez besoin d'un dissipateur de chaleur! | ||
| + | |||
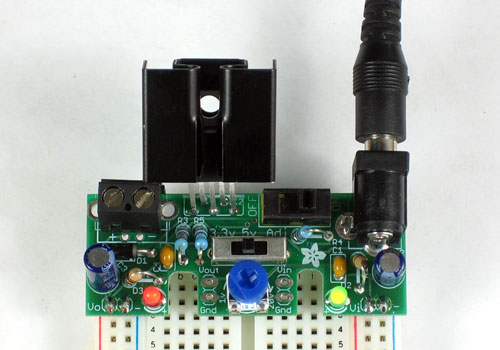
| + | Vous pouvez simplement le glisser sur le régulateur. | ||
| + | |||
| + | [[Fichier:ADF-ADJ-BBALIM-USE-07.jpg]] | ||
{{ADF-Accord}} | {{ADF-Accord}} | ||
{{MCH-Accord}} | {{MCH-Accord}} | ||
Version du 10 novembre 2012 à 15:14
Comment utiliser
Ce kit est vraiment simple d'emploi. Vous devez d'abord assembler le kit, vérifiez les instructions d'assemblage pour savoir comment le souder!
L'entrée à main droite
L'étage haute tension ('input' en anglais) se trouve à main droite.
Il y a deux sorties ("outputs" en anglais) sur la carte. A main droite, il y a l'étage haute tension. C'est la tension qui vient directement de la prise Jack (ou du bornier).
Il y a une diode pour prévenir la mise sous tension négative et protéger le régulateur... même si cela occasionne une chute de tension d'environ 200mv.
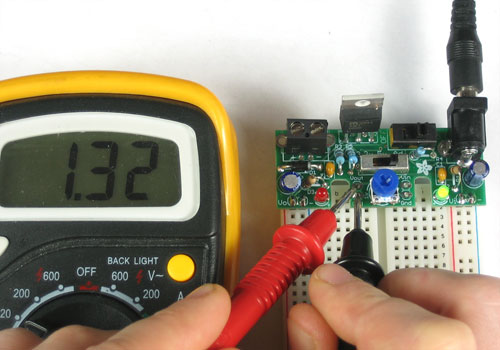
For example, this photo is me testing the output of the right hand side with a 12VDC regulated power adapter attached. The voltage is within 200mV of 12V. The green LED indicates that there is power on the right hand side.
Left hand 'output'
The left hand side is the 'regulated' voltage side. This is the power that is running through the voltage regulator. This voltage is adjustable
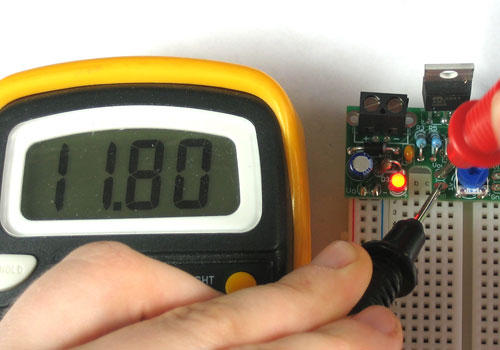
If you select 3.3v on the voltage selection switch you will be able to measure that output voltage. The red indicator LED will be somewhat dim
Then you can also select 5V to generate a regulated 5V supply
Finally, by selecting Adj. you can adjust the supply to anything you want from as low as ~1.3V to within half a volt of the input (which can be as high as 20V)
Once you set the pot, the output voltage is not dependent on the input voltage. That is, if you dial in 6V and you switch from a 9V to 12V supply, the output will stay at 6V.
Le dissipateur de chaleur
SI votre alimentation s'interrompt constamment ou si elle est très chaude ALORS vous avez besoin d'un dissipateur de chaleur!
Vous pouvez simplement le glisser sur le régulateur.
Traduit avec l'autorisation d'AdaFruit Industries - Translated with the permission from Adafruit Industries - www.adafruit.com
Toute référence, mention ou extrait de cette traduction doit être explicitement accompagné du texte suivant : « Traduction par MCHobby (www.MCHobby.be) - Vente de kit et composants » avec un lien vers la source (donc cette page) et ce quelque soit le média utilisé.
L'utilisation commercial de la traduction (texte) et/ou réalisation, même partielle, pourrait être soumis à redevance. Dans tous les cas de figures, vous devez également obtenir l'accord du(des) détenteur initial des droits. Celui de MC Hobby s'arrêtant au travail de traduction proprement dit.
