Différences entre versions de « DHTxx-Utiliser »
(Page créée avec « {{DHTxx-NAV}} To test the sketch, we'll use an Arduino. You can use any micrcontroller that can do microsecond timing, but since its a little tricky to code it up, we sugges... ») |
|||
| Ligne 1 : | Ligne 1 : | ||
{{DHTxx-NAV}} | {{DHTxx-NAV}} | ||
| − | To test the sketch, we'll use an Arduino. You can use any micrcontroller that can do microsecond timing, but since its a little tricky to code it up, we suggest verifying the wiring and sensor work with an Arduino to start. | + | {{bloc-etroit|text=To test the sketch, we'll use an Arduino. You can use any micrcontroller that can do microsecond timing, but since its a little tricky to code it up, we suggest verifying the wiring and sensor work with an Arduino to start. |
[http://learn.adafruit.com/dht/downloads Begin by downloading the DHT library from our github repository]. To download, click the '''DOWNLOADS''' button in the top right corner. Rename the uncompressed folder '''DHT''' and make sure that it contains the '''dht.cpp''' file and others. Then drag the '''DHT''' folder into the '''arduinosketchfolder/libraries/''' folder. You may have to create that libraries sub-folder if it doesnt exist. Restart the IDE | [http://learn.adafruit.com/dht/downloads Begin by downloading the DHT library from our github repository]. To download, click the '''DOWNLOADS''' button in the top right corner. Rename the uncompressed folder '''DHT''' and make sure that it contains the '''dht.cpp''' file and others. Then drag the '''DHT''' folder into the '''arduinosketchfolder/libraries/''' folder. You may have to create that libraries sub-folder if it doesnt exist. Restart the IDE | ||
| + | }} | ||
Now load up the '''Examples->DHT->DHTtester''' sketch | Now load up the '''Examples->DHT->DHTtester''' sketch | ||
Version du 16 avril 2013 à 20:29
To test the sketch, we'll use an Arduino. You can use any micrcontroller that can do microsecond timing, but since its a little tricky to code it up, we suggest verifying the wiring and sensor work with an Arduino to start.
Begin by downloading the DHT library from our github repository. To download, click the DOWNLOADS button in the top right corner. Rename the uncompressed folder DHT and make sure that it contains the dht.cpp file and others. Then drag the DHT folder into the arduinosketchfolder/libraries/ folder. You may have to create that libraries sub-folder if it doesnt exist. Restart the IDE
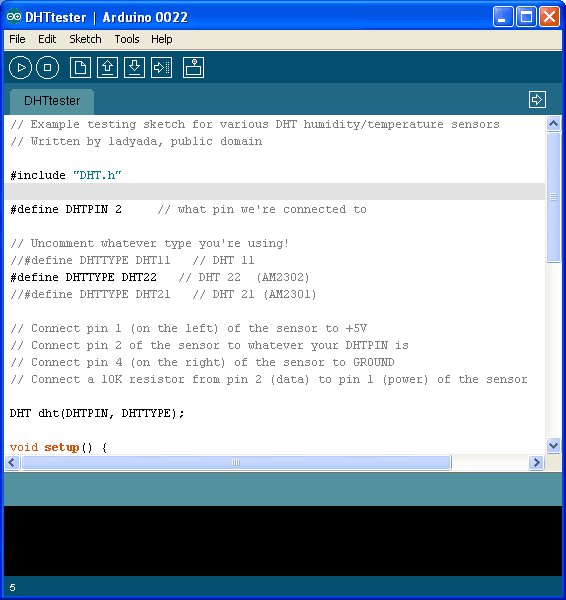
Now load up the Examples->DHT->DHTtester sketch
If you're using a DHT11 sensor, comment out the line that sets the type:
//#define DHTTYPE DHT22 // DHT 22 (AM2302)
and uncomment the line that says:
#define DHTTYPE DHT11 // DHT 11
This will make the data appear correctly for the correct sensor. Upload the sketch!
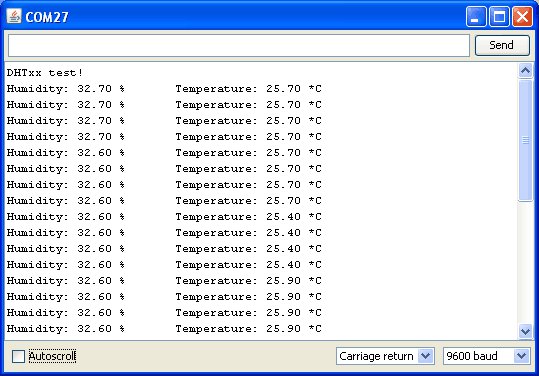
You should see the temperature and humidity. You can see changes by breathing onto the sensor (like you would to fog up a window) which should increase the humidity.
Source: DHTxx Sensors réalisé par LadyAda pour AdaFruit Industries
Créé par LadyAda pour AdaFruit Indrustries.
Traduit avec l'autorisation d'AdaFruit Industries - Translated with the permission from Adafruit Industries - www.adafruit.com
Toute référence, mention ou extrait de cette traduction doit être explicitement accompagné du texte suivant : « Traduction par MCHobby (www.MCHobby.be) - Vente de kit et composants » avec un lien vers la source (donc cette page) et ce quelque soit le média utilisé.
L'utilisation commercial de la traduction (texte) et/ou réalisation, même partielle, pourrait être soumis à redevance. Dans tous les cas de figures, vous devez également obtenir l'accord du(des) détenteur initial des droits. Celui de MC Hobby s'arrêtant au travail de traduction proprement dit.

