Différences entre versions de « FEATHER-M0-Assembler »
(Page créée avec « {{FEATHER-M0-NAV}} {{traduction}} {{FEATHER-M0-TRAILER}} ») |
|||
| Ligne 2 : | Ligne 2 : | ||
{{traduction}} | {{traduction}} | ||
| + | |||
| + | == Assemblage == | ||
| + | |||
| + | We ship Feathers fully tested but without headers attached - this gives you the most flexibility on choosing how to use and configure your Feather | ||
| + | |||
| + | |||
| + | == L'option pinHeader & connecteur == | ||
| + | Before you go gung-ho on soldering, there's a few options to consider! | ||
| + | |||
| + | <small>Toutes les images ci-dessous sont créditées à [http://www.adafruit.com Adafruit Industries] - Credit to [http://www.adafruit.com Adafruit Industries] for all the images here under</small> | ||
| + | |||
| + | {{asm-begin}} | ||
| + | |||
| + | {{asm-row|img=FEATHER-M0-Assembler-01.jpg}} | ||
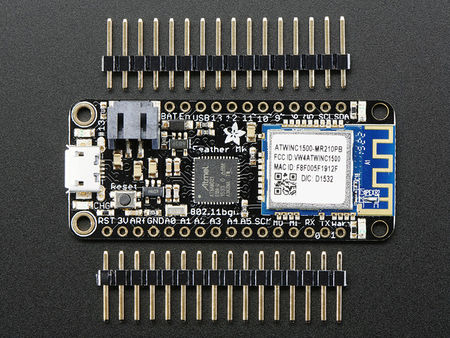
| + | {{asm-text}} The first option is soldering in plain male headers, this lets you plug in the Feather into a solderless breadboard | ||
| + | |||
| + | {{asm-row|img=FEATHER-M0-Assembler-10.jpg}} | ||
| + | {{asm-img|FEATHER-M0-Assembler-11.jpg}} | ||
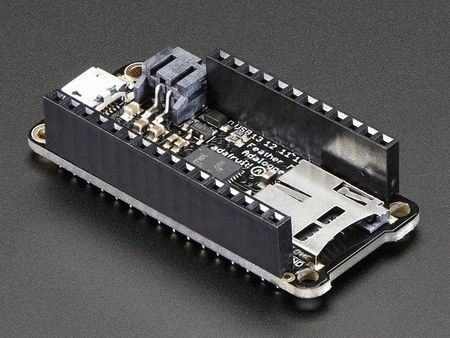
| + | {{asm-text}} Another option is to go with socket female headers. This won't let you plug the Feather into a breadboard but it will let you attach featherwings very easily | ||
| + | |||
| + | {{asm-row|img=FEATHER-M0-Assembler-20.jpg}} | ||
| + | {{asm-img|FEATHER-M0-Assembler-21.jpg}} | ||
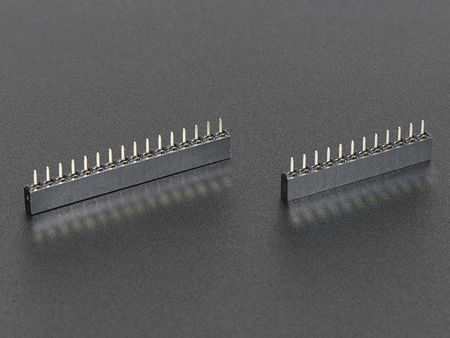
| + | {{asm-text}} We also have 'slim' versions of the female headers, that are a little shorter and give a more compact shape | ||
| + | |||
| + | {{asm-row|img=FEATHER-M0-Assembler-30.jpg}} | ||
| + | {{asm-img|FEATHER-M0-Assembler-31.jpg}} | ||
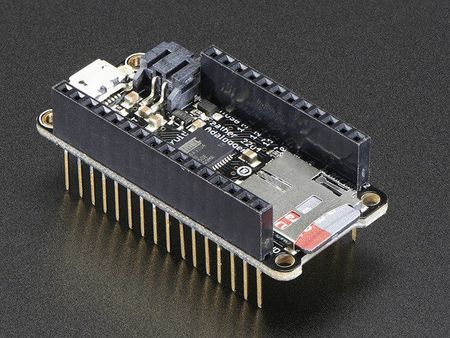
| + | {{asm-text}} Finally, there's the "Stacking Header" option. This one is sort of the best-of-both-worlds. You get the ability to plug into a solderless breadboard and plug a featherwing on top. But its a little bulky | ||
| + | |||
| + | {{asm-end}} | ||
| + | |||
| + | == Souder un pinHeader == | ||
| + | |||
| + | <small>Toutes les images ci-dessous sont créditées à [http://www.adafruit.com Adafruit Industries] - Credit to [http://www.adafruit.com Adafruit Industries] for all the images here under</small> | ||
| + | |||
| + | {{asm-begin}} | ||
| + | |||
| + | {{asm-row|img=FEATHER-M0-Assembler-50.jpg}} | ||
| + | {{asm-text}} '''Prepare the header strip:''' | ||
| + | |||
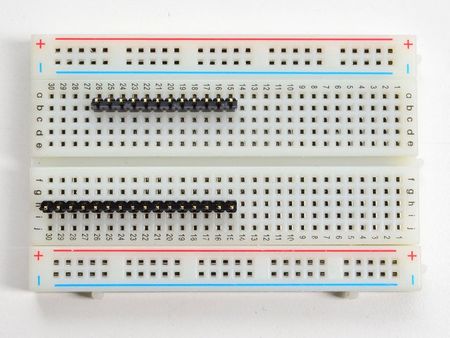
| + | Cut the strip to length if necessary. It will be easier to solder if you insert it into a breadboard - '''long pins down''' | ||
| + | |||
| + | {{asm-row|img=FEATHER-M0-Assembler-51.jpg}} | ||
| + | {{asm-text}} '''Add the breakout board:''' | ||
| + | |||
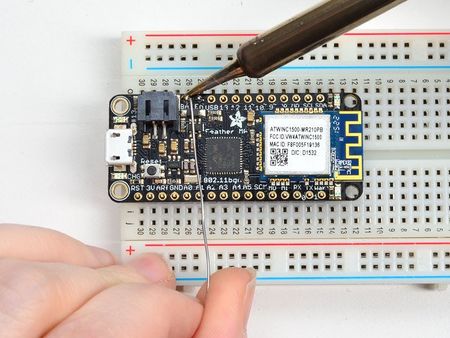
| + | Place the breakout board over the pins so that the short pins poke through the breakout pads | ||
| + | |||
| + | '''And Solder!''' | ||
| + | |||
| + | Be sure to solder all pins for reliable electrical contact. | ||
| + | |||
| + | {{asm-row|img=FEATHER-M0-Assembler-52.jpg}} | ||
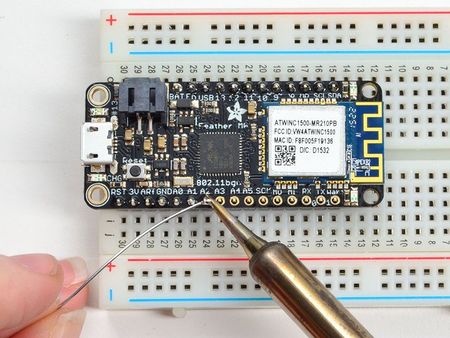
| + | {{asm-text}} Solder the other strip as well. | ||
| + | |||
| + | {{asm-row|img=FEATHER-M0-Assembler-52.jpg}} | ||
| + | {{asm-text}} You're done! Check your solder joints visually and continue onto the next steps | ||
| + | |||
| + | {{asm-end}} | ||
| + | |||
| + | == Souder un connecteur femelle == | ||
| + | |||
| + | {{asm-begin}} | ||
| + | |||
| + | {{asm-row|img=FEATHER-M0-Assembler-60.jpg}} | ||
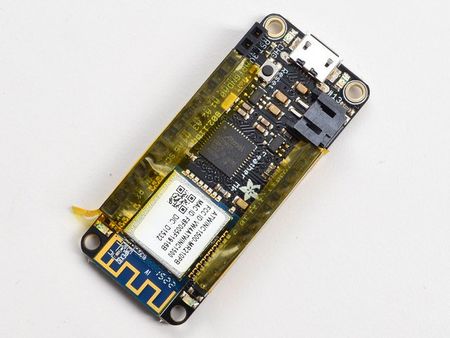
| + | {{asm-text}} xxx | ||
| + | |||
| + | {{asm-end}} | ||
| + | |||
| + | |||
{{FEATHER-M0-TRAILER}} | {{FEATHER-M0-TRAILER}} | ||
Version du 25 avril 2016 à 16:15
|
|
En cours de traduction/élaboration. |
Assemblage
We ship Feathers fully tested but without headers attached - this gives you the most flexibility on choosing how to use and configure your Feather
L'option pinHeader & connecteur
Before you go gung-ho on soldering, there's a few options to consider!
Toutes les images ci-dessous sont créditées à Adafruit Industries - Credit to Adafruit Industries for all the images here under
Souder un pinHeader
Toutes les images ci-dessous sont créditées à Adafruit Industries - Credit to Adafruit Industries for all the images here under
Souder un connecteur femelle
|
xxx |
Source: Adafruit Feather M0 Basic Proto créé par LadyAda pour AdaFruit Industries. Crédit [www.adafruit.com AdaFruit Industries]
Traduit par Meurisse D. pour MCHobby.be
Traduit avec l'autorisation d'AdaFruit Industries - Translated with the permission from Adafruit Industries - www.adafruit.com
Toute référence, mention ou extrait de cette traduction doit être explicitement accompagné du texte suivant : « Traduction par MCHobby (www.MCHobby.be) - Vente de kit et composants » avec un lien vers la source (donc cette page) et ce quelque soit le média utilisé.
L'utilisation commercial de la traduction (texte) et/ou réalisation, même partielle, pourrait être soumis à redevance. Dans tous les cas de figures, vous devez également obtenir l'accord du(des) détenteur initial des droits. Celui de MC Hobby s'arrêtant au travail de traduction proprement dit.
