LCD-USB-TTL-Test-Serie
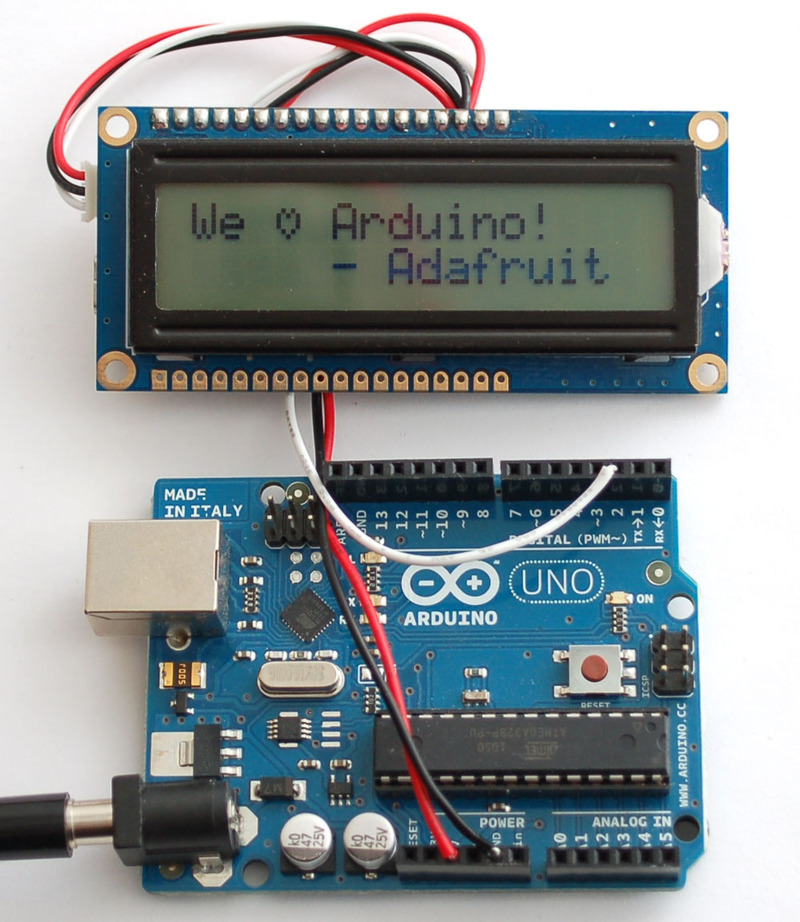
Next we will demonstrate how to send text and commands using an Arduino microcontroller. You can of course use any microcontroller that has a serial output you can configure for 9600 baud. This demo will show how to set the display size, RGB backlight and create a custom character. For more commands, see below for the full list of supported commands
Grab an Arduino and connect the JST cable to the backpack as follows: Red wire goes to +5V, Black wire goes to Ground, White data wire goes to digital #2. You can change the digital pin later, but stick with #2 for this example and adjust later as desired.
#include <SoftwareSerial.h>


// Create a software serial port!
SoftwareSerial lcd = SoftwareSerial(0,2);

void setup() {
  lcd.begin(9600);

  // set the size of the display if it isn't 16x2 (you only have to do this once)
  lcd.write(0xFE);
  lcd.write(0xD1);
  lcd.write(16);  // 16 columns
  lcd.write(2);   // 2 rows
  delay(10);
  // we suggest putting delays after each command to make sure the data
  // is sent and the LCD is updated.

  // set the contrast, 200 is a good place to start, adjust as desired
  lcd.write(0xFE);
  lcd.write(0x50);
  lcd.write(200);
  delay(10);

  // set the brightness - we'll max it (255 is max brightness)
  lcd.write(0xFE);
  lcd.write(0x99);
  lcd.write(255);
  delay(10);

  // turn off cursors
  lcd.write(0xFE);
  lcd.write(0x4B);
  lcd.write(0xFE);
  lcd.write(0x54);

  // create a custom character
  lcd.write(0xFE);
  lcd.write(0x4E);
  lcd.write((uint8_t)0);     // location #0
  lcd.write((uint8_t)0x00);  // 8 bytes of character data
  lcd.write(0x0A);
  lcd.write(0x15);
  lcd.write(0x11);
  lcd.write(0x11);
  lcd.write(0x0A);
  lcd.write(0x04);
  lcd.write((uint8_t)0x00);
  delay(10);   // we suggest putting delays after each command

  // clear screen
  lcd.write(0xFE);
  lcd.write(0x58);
  delay(10);   // we suggest putting delays after each command

  // go 'home'
  lcd.write(0xFE);
  lcd.write(0x48);
  delay(10);   // we suggest putting delays after each command

  lcd.print("We ");
  lcd.write((uint8_t)0);            // to print the custom character, 'write' the location
  lcd.println(" Arduino!");
  lcd.print("     - Adafruit");

  delay(1000);
}

uint8_t red, green, blue;
void loop() {
 // adjust colors
 for (red = 0; red < 255; red++) {
  lcd.write(0xFE);
  lcd.write(0xD0);
  lcd.write(red);
  lcd.write((uint8_t)0);
  lcd.write(255 - red);
  delay(10);  // give it some time to adjust the backlight!
 }

 for (green = 0; green < 255; green++) {
  lcd.write(0xFE);
  lcd.write(0xD0);
  lcd.write(255-green);
  lcd.write(green);
  lcd.write((uint8_t)0);
  delay(10);  // give it some time to adjust the backlight!
 }

 for (blue = 0; blue < 255; blue++) {
  lcd.write(0xFE);
  lcd.write(0xD0);
  lcd.write((uint8_t)0);
  lcd.write(255-blue);
  lcd.write(blue);
  delay(10);  // give it some time to adjust the backlight!
 }
}
You should see the following, with a color-changing background:

Crédit: AdaFruit Industries www.adafruit.com
Tutoriel USB + Serial RGB Backlight Character LCD Backpack créé par Tyler Cooper pour AdaFruit Industries.
Tutoriel traduit et augmenté par Meurisse D. pour MCHobby.be
Traduit avec l'autorisation d'AdaFruit Industries - Translated with the permission from Adafruit Industries - www.adafruit.com
Toute référence, mention ou extrait de cette traduction doit être explicitement accompagné du texte suivant : « Traduction par MCHobby (www.MCHobby.be) - Vente de kit et composants » avec un lien vers la source (donc cette page) et ce quelque soit le média utilisé.
L'utilisation commercial de la traduction (texte) et/ou réalisation, même partielle, pourrait être soumis à redevance. Dans tous les cas de figures, vous devez également obtenir l'accord du(des) détenteur initial des droits. Celui de MC Hobby s'arrêtant au travail de traduction proprement dit.