LCD-USB-TTL-Test-USB
La façon la plus facile de tester l'afficheur et le backpack est de le connecter sur un ordinateur et d'y envoyer des données en utilisant un programme Terminal.
Use any mini-B USB cable to connect to the backpack. If you're using windows, you'll need to point it to an INF driver file. See below in the download section for that INF file. Mac and Linux do not require a driver.
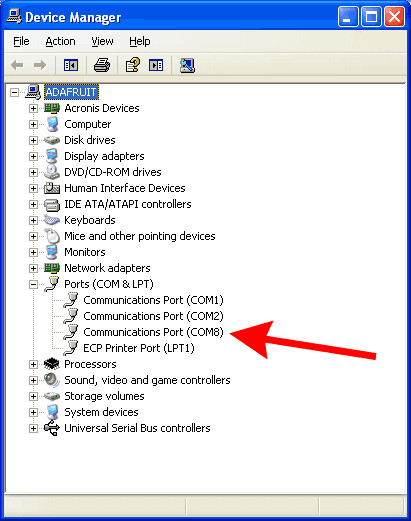
After the backpack is plugged in, it will create a serial port. Under windows this is called a COM port. You can look in the Device Manager -> Ports to see what the name of the COM port created is. You should see an entry appear/disappear when connecting the USB cable.
Crédit: AdaFruit Industries www.adafruit.com
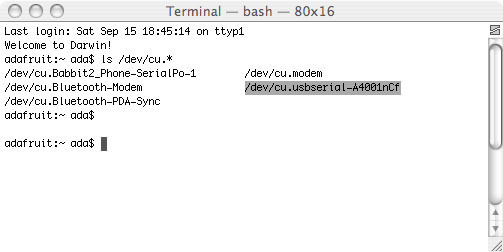
For mac/linux, once you have plugged in the cable, run dmesg to see what the name of the port is, probably something like /dev/cu.usbmodem-XXXX or similar. You can also type ls /dev/cu.* into a Terminal window and see what items appear/disappear when the cable is connected and unplugged.
Crédit: AdaFruit Industries www.adafruit.com
Now that the port is known, you can use your favorite terminal program to connect. For this example, we'll use the basic terminal built into Arduino. The only downside of the serial port monitor is that you can only send a full string at a time and there's a new line at the end. If you are using a more powerful monitor such as CoolTerm (mac) or RealTerm (Windows) you can watch as each character is entered
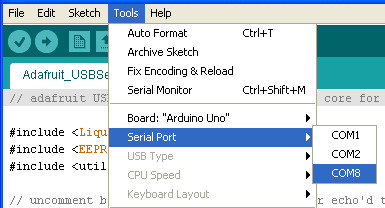
Start by selecting the same COM serial port that belongs to the backpack.
Crédit: AdaFruit Industries www.adafruit.com
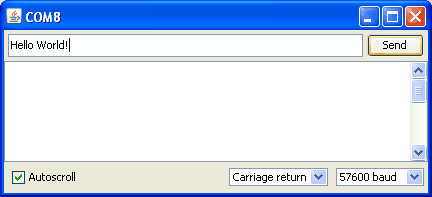
Open the serial port monitor and type Hello World! into the text box.
Crédit: AdaFruit Industries www.adafruit.com
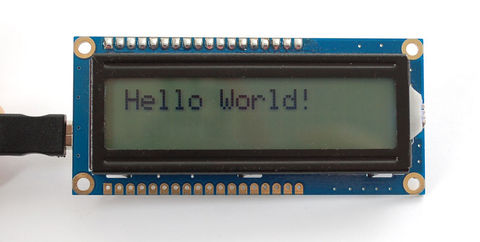
Once you hit Send it will transfer the text to the backpack, and it will appear. Thats it!
Crédit: AdaFruit Industries www.adafruit.com
For more commands, check the github repository (see the Downloads tab) for a python script that will test all commands on the display.
Tutoriel USB + Serial RGB Backlight Character LCD Backpack créé par Tyler Cooper pour AdaFruit Industries.
Tutoriel traduit et augmenté par Meurisse D. pour MCHobby.be
Traduit avec l'autorisation d'AdaFruit Industries - Translated with the permission from Adafruit Industries - www.adafruit.com
Toute référence, mention ou extrait de cette traduction doit être explicitement accompagné du texte suivant : « Traduction par MCHobby (www.MCHobby.be) - Vente de kit et composants » avec un lien vers la source (donc cette page) et ce quelque soit le média utilisé.
L'utilisation commercial de la traduction (texte) et/ou réalisation, même partielle, pourrait être soumis à redevance. Dans tous les cas de figures, vous devez également obtenir l'accord du(des) détenteur initial des droits. Celui de MC Hobby s'arrêtant au travail de traduction proprement dit.