Différences entre versions de « Modèle:EZ-LINK-PAIRING »
| Ligne 13 : | Ligne 13 : | ||
== Windows == | == Windows == | ||
| − | + | Ouvrez la panneau de contrôle des périphériques Bluetooth en cliquant sur la petite icone Bluetooth de la barre des tâches. Vous pouvez également ouvrir le panneau de control et cherchez après l'icone Bluetooth puis cliquer sur "Ajouter Périphérique" | |
{{ADFImage|EZ-LINK-PAIRING-01.png}} | {{ADFImage|EZ-LINK-PAIRING-01.png}} | ||
Version du 22 juin 2014 à 14:58
Appairage / appairement
Avant de démarrer cette étape, assurez vous d'avoir alimenté votre Bluefruit EZ-Link. Vous pouvez le faire:
- soit en appliquant une tension de 3 à 16VDC sur Vin & GND
- soit en soudant le connecteur JST à l'arrière du breakout et en y placant un accu..
Vérifiez que la connexion d'alimentation soit fiable (bien soudée, connexions fermes sans défaut électrique). N'essayer pas d'utiliser des fils torsadés ou simplement pressés sur les connecteurs (sans aucune soudure) car cela sera source de nombreuses difficultés, problème d'appairage et utilisation.
Vous devez également vous assurer que l'ordinateur destiné à l'appairage dispose d'un matériel Bluetooth v2.1 ou plus. Presque tous les desktop/laptop Mac, laptop Windows et tablette Android disposent de ce matériel. Si ce n'est pas le cas, utilisez un module Bluetooth USB, mais faite attention, la plupart des modules USB Bluetooth bon marché ne supporte que Bluetooth v2.0 (ceux la ne fonctionnerons pas avec le BlueFruit étant donné qu'il utilise des fonctionnalités avancées du firmware).
| Il n'est pas possible d'appairer l'EZ-Link avec des périphériques iOS tels que iPhones ou iPads - Apple n'autorise pas les appairage 'SSP'! Vous pouvez utiliser un Bluefruit EZ-Key avec iOS, EZ-Key est un module clavier bluetooth que vous devriez être capable d'utiliser. |
Windows
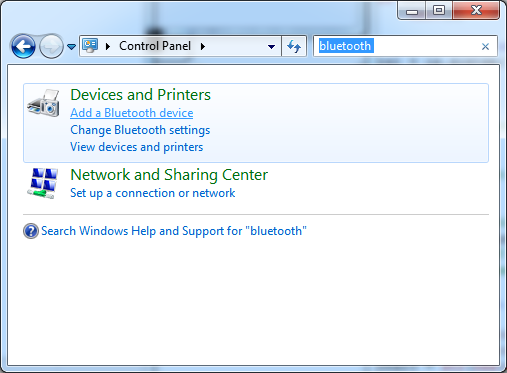
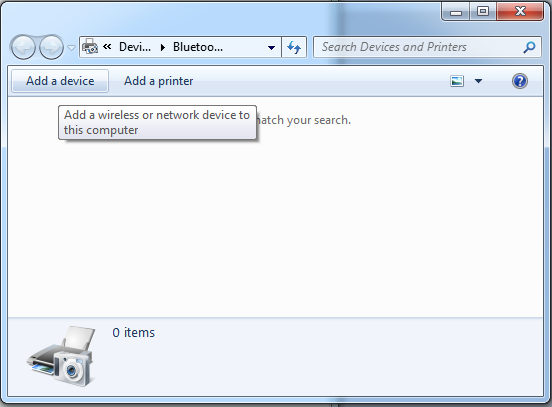
Ouvrez la panneau de contrôle des périphériques Bluetooth en cliquant sur la petite icone Bluetooth de la barre des tâches. Vous pouvez également ouvrir le panneau de control et cherchez après l'icone Bluetooth puis cliquer sur "Ajouter Périphérique"
Crédit: AdaFruit Industries www.adafruit.com
Crédit: AdaFruit Industries www.adafruit.com
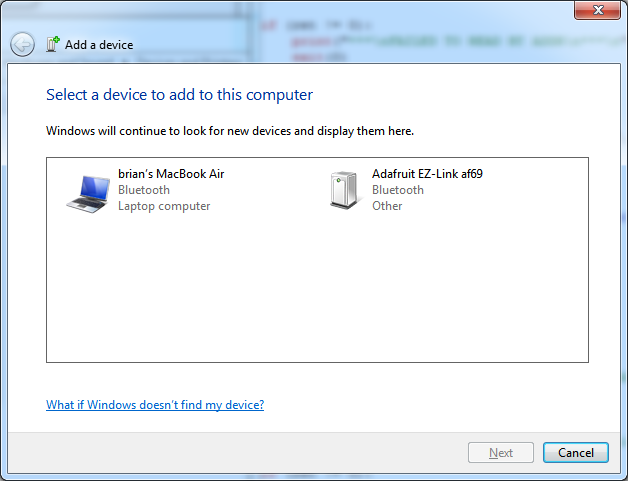
Either way, you'll get to a panel like this. Make sure the EZ-Link is plugged in and you see a once-every-two-seconds slow blink on the red LED. Within 30 seconds you should also see the Adafruit EZ-Link xxxx device appear. Now you can pair to this device.
Crédit: AdaFruit Industries www.adafruit.com
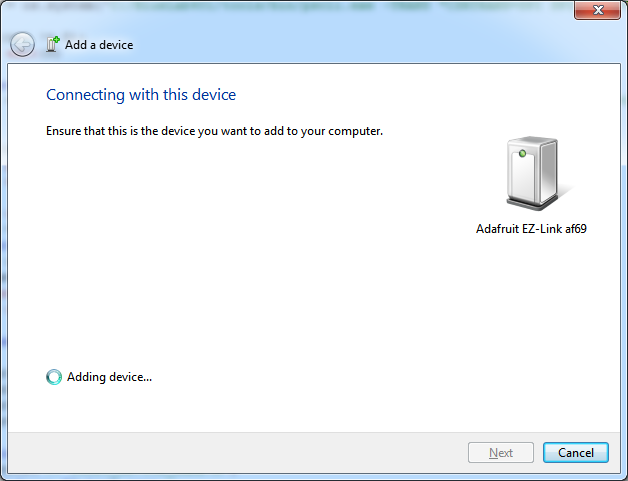
Click on it and select Next to add it
Crédit: AdaFruit Industries www.adafruit.com
Crédit: AdaFruit Industries www.adafruit.com
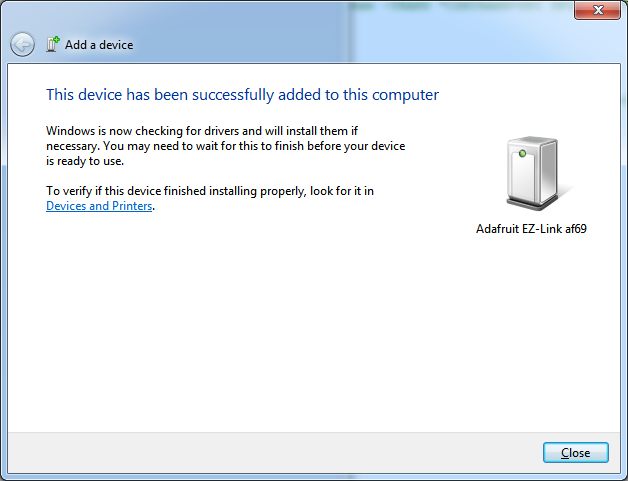
If you get asked for a pairing code, the code is 1234
That's it, you're now paired!
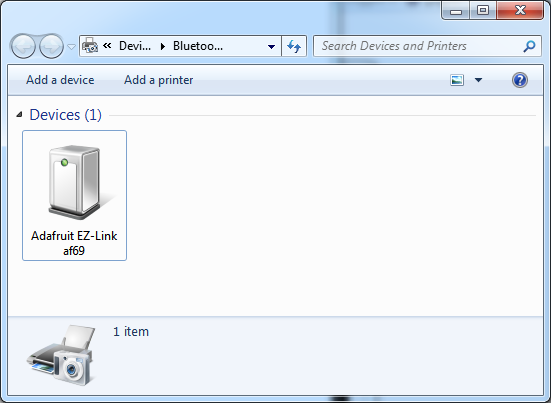
Crédit: AdaFruit Industries www.adafruit.com
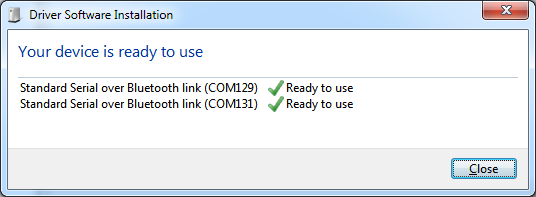
Next we will make sure we know the COM port to use. This is actually a little confusing because for some reason Windows creates two COM ports, but we only use one of them.
You may see the COM ports created by the Bluetooth driver, it'll look like this
Crédit: AdaFruit Industries www.adafruit.com
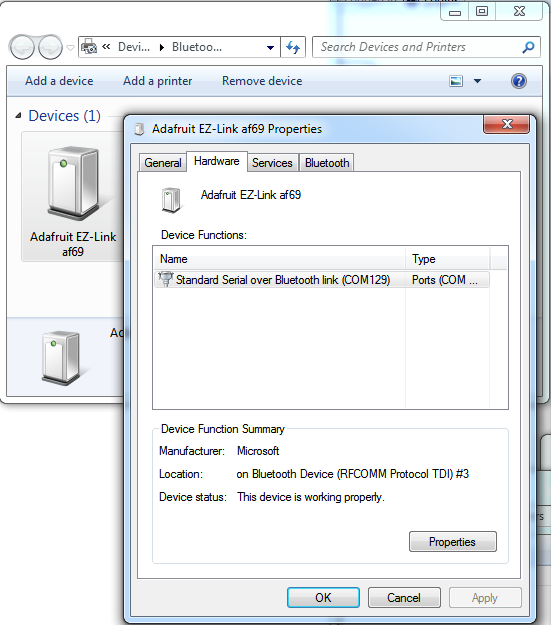
To figure out which COM port to use, go back to the Bluetooth device panel and right-click on the Adafruit EZ-Link and select Properties then the Hardware panel.
Crédit: AdaFruit Industries www.adafruit.com
You'll see that only one COM port is mentioned here, in this case its COM129. That's the port you'll use when sending data to the EZ-Link.
Mac OS X
Pairing on a Mac is pretty easy. Start by turning on Bluetooth
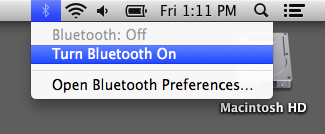
Crédit: AdaFruit Industries www.adafruit.com
Then go back to the BT menu and open the Preferences...
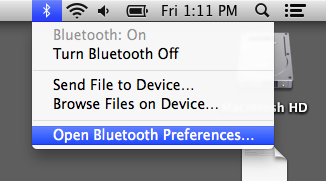
Crédit: AdaFruit Industries www.adafruit.com
It will immediately start scanning for the device, you'll see the BT address first, then eventually it will turn into the EZ-Link name
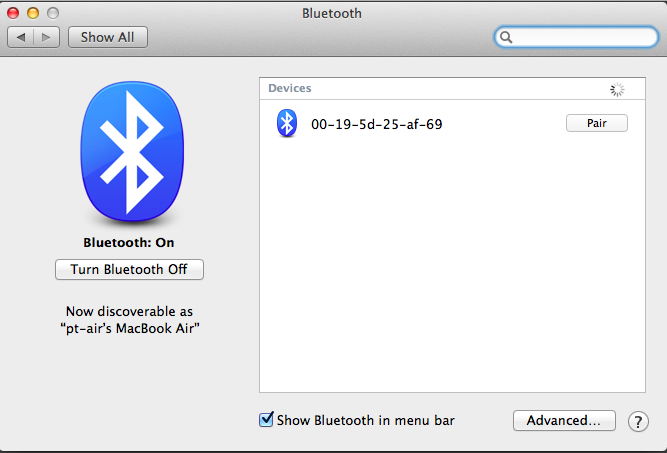
Crédit: AdaFruit Industries www.adafruit.com
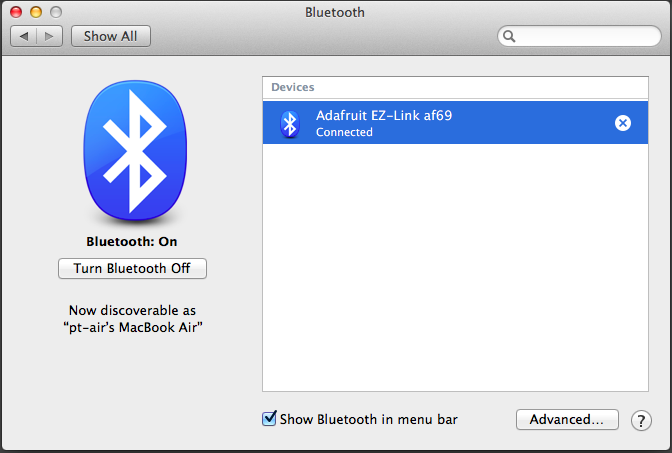
Crédit: AdaFruit Industries www.adafruit.com
That's it! You're now paired to it. If you are asked for a code, the code is 1234
Next you can figure out the name of the device by opening up a Terminal and typing in ls /dev/cu.* and looking for something like /dev/cu.AdafruitEZLinkxxxx-SPP

Crédit: AdaFruit Industries www.adafruit.com
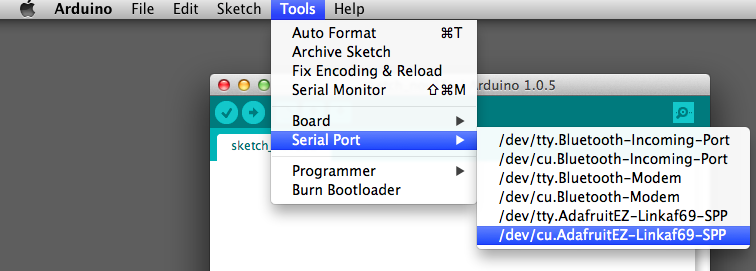
If you're using the Arduino IDE, it will show up under that name, use the cu. version not the tty. version
Crédit: AdaFruit Industries www.adafruit.com