Pi-WiringPi-Exemple-Quick2Wire
Intro
The Quick2Wire system is a series of hardware and software projects aimed at education and hobbyists, enabling easy general purpose interfacing with the Raspberry Pi.
The system comprises a main board with on-board connections for the main 8 GPIO pins off the Raspberry Pi with access to the SPI, I2C and Serial interfaces via separate connectors. The main board has one LED and one button which can be jumpered in if required. It also features a separate 3.3v regulator to power all other SPI and I2C devices to take the load off the Raspberry Pi’s own 3.3v supply. It’s supplied in kit form, so you need to be handy with a soldering iron!
These pages serve as a demonstration of using the Quick2Wire boards with the wiringPi library from the command-line, in BASH and C. There are several pages in this series and I hope they might act as a tutorial and possibly even an aid to making sure your Quick2wire boards are fully functional.
WiringPi
WiringPi is a set of C functions designed to make it easy for C and C++ programs to access the Raspberry Pi’s GPIO. There is also a utility program; gpio which you can use from the command-line to test simple GPIO operations.
- Get and install wiringPi. The instructions are here.

Source: wiringPi.com
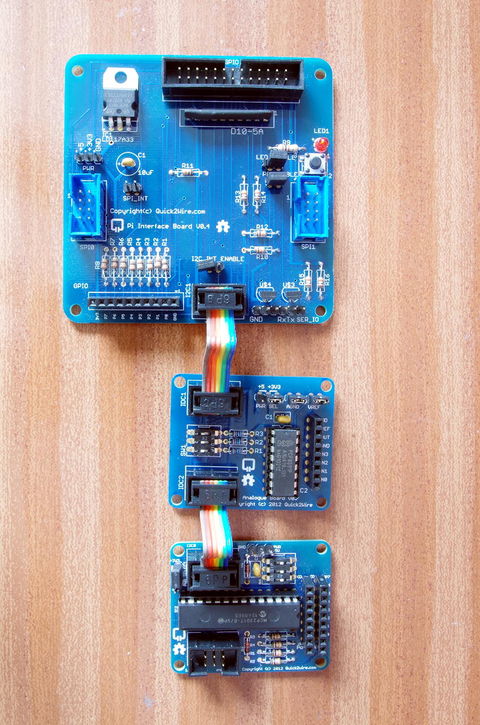
The picture above shows the main board which provides access to the Pi’s main 8 GPIO pins, with the I2C and SPI connectors and serial pins. The I2C based analog (middle) and digital (bottom) expansion boards are below the mainboard. There are no SPI expansion boards at this time. (May, 2013)
The following pages will guide you through setting it up and programming it via the shell (BASH) and using wiringPi in simple C/C++ programs.
- Installation et test de la carte principale
- Tester les modules I2C
- La carte d'extension GPIO 16 broches
- La carte d'interface analogique
Conclusion
Using the Quick2Wire boards with wiringPi should be fairly straightforward – there is nothing new in the Q2W boards that wiringPi can’t handle. The examples here are really just for guidance and hints…
Source: WiringPi.com. WiringPi est une libraire sous licence GPL écrite par Gordon Henderson. Crédit: wiringpi.com
Traduit de l'anglais par Meurisse D. pour MCHobby.be
Traduit avec l'accord de Gordon Henderson, créateur de wiringPi - Translated with authorization of Gordon Henderson, creator of wiringPi
Toute référence, mention ou extrait de cette traduction doit être explicitement accompagné du texte suivant : « Traduction par MCHobby (www.MCHobby.be) - Vente de kit et composants » avec un lien vers la source (donc cette page) et ce quelque soit le média utilisé.
L'utilisation commercial de la traduction (texte) et/ou réalisation, même partielle, pourrait être soumis à redevance. Dans tous les cas de figures, vous devez également obtenir l'accord du(des) détenteur initial des droits. Celui de MC Hobby s'arrêtant au travail de traduction proprement dit.