Différences entre versions de « Pi-VNC-Install »
| Ligne 3 : | Ligne 3 : | ||
{{traduction}} | {{traduction}} | ||
| − | {{bloc-etroit | text=SSH ( | + | {{bloc-etroit | text=SSH (voir [[PI-SSH|notre tutoriel sur SSH]]) is often all you need to control your Raspberry Pi, however sometimes it is useful to be able to remote control your Raspberry Pi using the mouse and seeing just what you would see on the screen of the Raspberry Pi. |
VNC (Virtual Network Connection) is a standard for doing just this. To use it, you have to install some software on your Pi. There are a number of VNC server applications, and the one we are going to use is called “tightvnc”. | VNC (Virtual Network Connection) is a standard for doing just this. To use it, you have to install some software on your Pi. There are a number of VNC server applications, and the one we are going to use is called “tightvnc”. | ||
Version du 30 mars 2013 à 11:32
|
|
En cours de traduction/élaboration. |
SSH (voir notre tutoriel sur SSH) is often all you need to control your Raspberry Pi, however sometimes it is useful to be able to remote control your Raspberry Pi using the mouse and seeing just what you would see on the screen of the Raspberry Pi.
VNC (Virtual Network Connection) is a standard for doing just this. To use it, you have to install some software on your Pi. There are a number of VNC server applications, and the one we are going to use is called “tightvnc”.
We can install the VNC server software using the SSH connection that we established earlier.
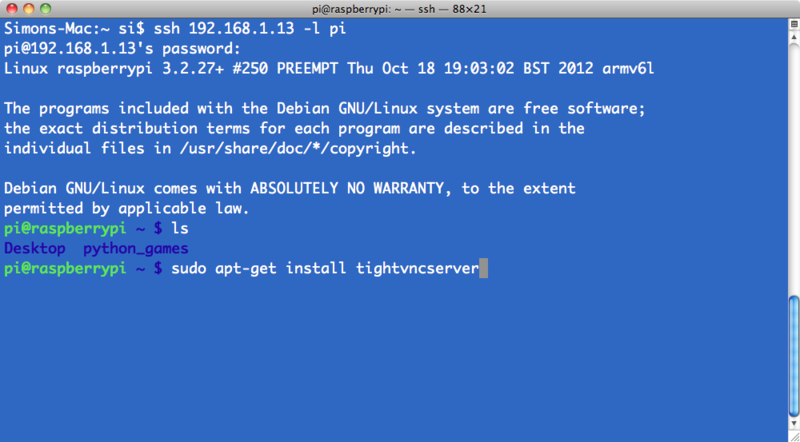
Enter the following command into your SSH terminal:
sudo apt-get update
sudo apt-get install tightvncserver
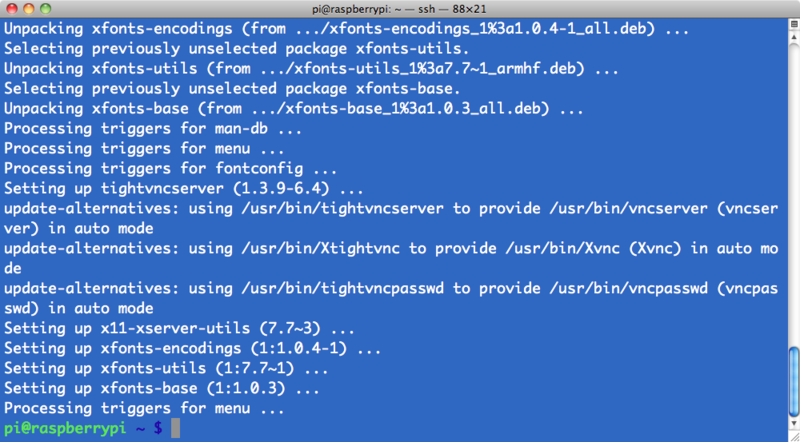
You will be prompted to confirm installation by typing “Y' and finally when installation is complete, you should see the following:
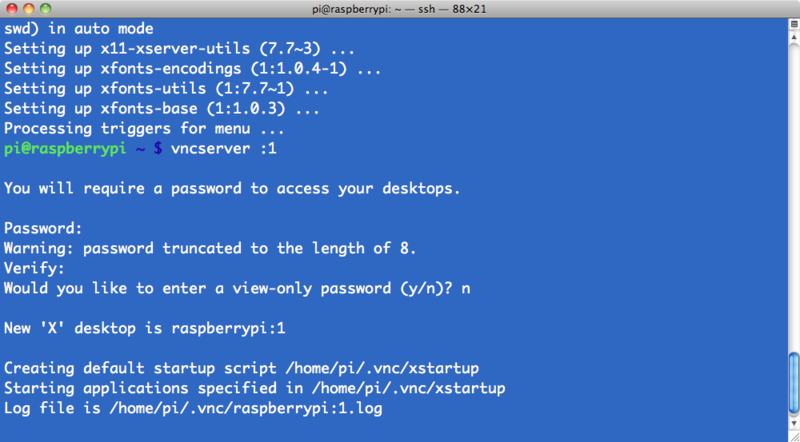
We now need to run the VNC Server, so enter the following command into your SSH window:
vncserver : 1
You will be prompted to enter and confirm a password. It would make sense to use “raspberry” for this, but passwords are limited to 8 characters, so I use “raspberr”. Note that this is the password that you will need to use to connect to the Raspberry Pi remotely.
You will also be asked if you want to create a separate “read-only” password – say no.
From now on, the only command that you need to type within your SSH to start the VNC server will be:
vncserver :1
The VNC server is now running and so we can attempt to connect to it, but first we must switch to the computer from which we want to control the Pi and setup a VNC client to connect to the Pi.
Source: [1]
Augmenté par Meurisse D pour MCHobby.
Tutoriel créé par Simon Monk pour AdaFruit Industries. Tutorial created by Simon Monk for AdaFruit Industries
Traduit avec l'autorisation d'AdaFruit Industries - Translated with the permission from Adafruit Industries - www.adafruit.com
Toute référence, mention ou extrait de cette traduction doit être explicitement accompagné du texte suivant : « Traduction par MCHobby (www.MCHobby.be) - Vente de kit et composants » avec un lien vers la source (donc cette page) et ce quelque soit le média utilisé.
L'utilisation commercial de la traduction (texte) et/ou réalisation, même partielle, pourrait être soumis à redevance. Dans tous les cas de figures, vous devez également obtenir l'accord du(des) détenteur initial des droits. Celui de MC Hobby s'arrêtant au travail de traduction proprement dit.


