Différences entre versions de « Rasp-PiGRRL-2-3D »
(→Parts) |
|||
| Ligne 18 : | Ligne 18 : | ||
{{download-box|Téléchargez les sources|http://a360.co/1JIFbDc}} | {{download-box|Téléchargez les sources|http://a360.co/1JIFbDc}} | ||
| − | == Dimensions == | + | === Dimensions === |
| − | + | * La partie supérieure fait 141mm x 91mm x 18mm | |
| − | * | + | * La partie inférieure fait 141mm x 91mm x 16mm |
| − | * | ||
{| class="wikitable" border="1" | {| class="wikitable" border="1" | ||
|- style="font-size: 90%" | |- style="font-size: 90%" | ||
| align="left" | pigrrl2-top.stl | | align="left" | pigrrl2-top.stl | ||
| − | | align="left" | | + | | align="left" | Partie supérieure du boîtier |
| align="left" | PLA/ABS | | align="left" | PLA/ABS | ||
|- style="font-size: 90%" | |- style="font-size: 90%" | ||
| align="left" | pigrrl2-bot.stl | | align="left" | pigrrl2-bot.stl | ||
| − | | align="left" | | + | | align="left" | Patie inférieure du boîtier |
| align="left" | PLA/ABS | | align="left" | PLA/ABS | ||
|- style="font-size: 90%" | |- style="font-size: 90%" | ||
| align="left" | pitft-buttons.stl | | align="left" | pitft-buttons.stl | ||
| − | | align="left" | | + | | align="left" | Boutons pour l'afficheur PiTFT |
| align="left" | Ninjaflex/TPE | | align="left" | Ninjaflex/TPE | ||
|- style="font-size: 90%" | |- style="font-size: 90%" | ||
| align="left" | dpad.stl | | align="left" | dpad.stl | ||
| − | | align="left" | D-Pad | + | | align="left" | La croix D-Pad pour le gamepad |
| align="left" | Ninjaflex/TPE | | align="left" | Ninjaflex/TPE | ||
|- style="font-size: 90%" | |- style="font-size: 90%" | ||
| align="left" | action-btns.stl | | align="left" | action-btns.stl | ||
| − | | align="left" | A,B,X | + | | align="left" | Les boutons A,B,X et Y du gamepad |
| align="left" | Ninjaflex/TPE | | align="left" | Ninjaflex/TPE | ||
|- style="font-size: 90%" | |- style="font-size: 90%" | ||
| align="left" | pause-start.stl | | align="left" | pause-start.stl | ||
| − | | align="left" | Pause | + | | align="left" | Les boutons Pause et Start du gamepad |
| align="left" | Ninjaflex/TPE | | align="left" | Ninjaflex/TPE | ||
|- style="font-size: 90%" | |- style="font-size: 90%" | ||
| align="left" | shoulder-btns.stl | | align="left" | shoulder-btns.stl | ||
| − | | align="left" | | + | | align="left" | Les boutons arrières L et R (les boutons dit d'épaulettes, ''shoulder'' en anglais) |
| align="left" | Ninjaflex/TPE | | align="left" | Ninjaflex/TPE | ||
|- style="font-size: 90%" | |- style="font-size: 90%" | ||
| align="left" | shoulder-mount.stl | | align="left" | shoulder-mount.stl | ||
| − | | align="left" | | + | | align="left" | La plaque de montage (support) pour les boutons L et R. |
| align="left" | PLA/ABS | | align="left" | PLA/ABS | ||
|} | |} | ||
| Ligne 65 : | Ligne 64 : | ||
{{asm-img|img=Rasp-PiGRRL-2-3D-07.jpg}} | {{asm-img|img=Rasp-PiGRRL-2-3D-07.jpg}} | ||
{{asm-text}} | {{asm-text}} | ||
| − | + | ||
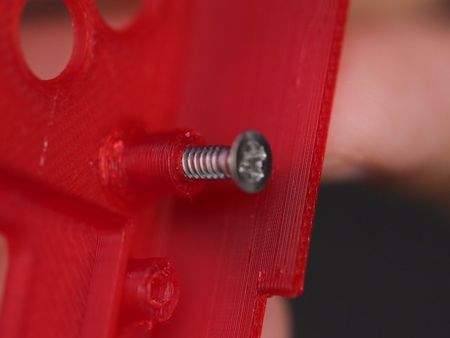
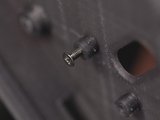
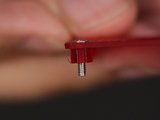
| + | Après avoir imprimé les différents éléments, you'll need to tap the standoffs with screw holes to create the threads for mounting the components. Use a #4-40 and #2-56 sized tap or use machine screws. | ||
{{asm-row|img=Rasp-PiGRRL-2-3D-08.jpg}} | {{asm-row|img=Rasp-PiGRRL-2-3D-08.jpg}} | ||
Version du 7 février 2018 à 22:04
Material Options
Crédit: AdaFruit Industries www.adafruit.com
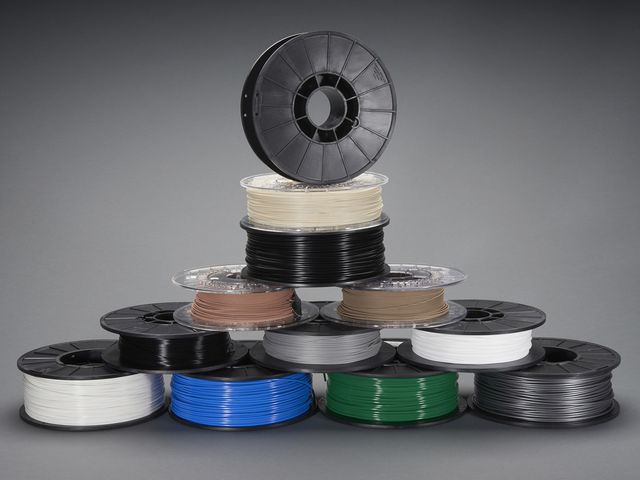
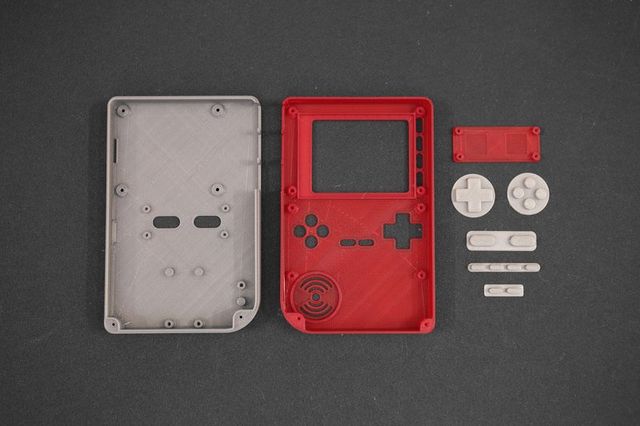
La dessus du boîtier, le dessous du boîtier et le support des boutons arrières doivent être imprimés en plastique dur comme du PLA, ABS ou autre.
Nous recommandons l'utilisation de PLA pour minimiser les déformations. ABS et autres filaments nécessite un lit chauffant.
Crédit: AdaFruit Industries www.adafruit.com
Les pièces
Téléchargez les différents éléments et imprimez les différentes pièces en suivant la suggestion de filament. Si vous n'avez pas accès à une imprimante 3D, vous pouvez utiliser le service d'impression collaboratif Freelabster (qui imprime les pièces et vous les envois).
Dimensions
- La partie supérieure fait 141mm x 91mm x 18mm
- La partie inférieure fait 141mm x 91mm x 16mm
| pigrrl2-top.stl | Partie supérieure du boîtier | PLA/ABS |
| pigrrl2-bot.stl | Patie inférieure du boîtier | PLA/ABS |
| pitft-buttons.stl | Boutons pour l'afficheur PiTFT | Ninjaflex/TPE |
| dpad.stl | La croix D-Pad pour le gamepad | Ninjaflex/TPE |
| action-btns.stl | Les boutons A,B,X et Y du gamepad | Ninjaflex/TPE |
| pause-start.stl | Les boutons Pause et Start du gamepad | Ninjaflex/TPE |
| shoulder-btns.stl | Les boutons arrières L et R (les boutons dit d'épaulettes, shoulder en anglais) | Ninjaflex/TPE |
| shoulder-mount.stl | La plaque de montage (support) pour les boutons L et R. | PLA/ABS |
Test Fit Openings
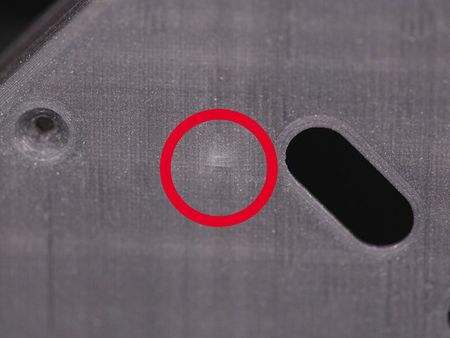
Use a hobby knife to remove any excess bits from printing. Lay the components over the standoffs to see if mounting holes line up. See if the port cutouts are in the right place. If they don't, use a filing tool to open them up.
Finishing Parts
You can smooth the parts by applying epoxy resin like Smooth-On's XTC-3D. To finish the surface, wait for it to dry and sand it down. Apply a filler primer paint and a colored top coat of spray paint to make it extra smooth.
Source: PiGRRL 2 - Make a portable Raspberry Pi 2 game console
Créé par les frères Ruiz pour AdaFruit Industries.
Traduction réalisée par Wrotny A pour MCHobby.be.
Toute référence, mention ou extrait de cette traduction doit être explicitement accompagné du texte suivant : « Traduction par MCHobby (www.MCHobby.be) - Vente de kit et composants » avec un lien vers la source (donc cette page) et ce quelque soit le média utilisé.
L'utilisation commercial de la traduction (texte) et/ou réalisation, même partielle, pourrait être soumis à redevance. Dans tous les cas de figures, vous devez également obtenir l'accord du(des) détenteur initial des droits. Celui de MC Hobby s'arrêtant au travail de traduction proprement dit.
Traduit avec l'autorisation d'AdaFruit Industries - Translated with the permission from Adafruit Industries - www.adafruit.com
