Différences entre versions de « ADX335-326-Brancher »
(Page créée avec « {{ADX335-326-NAV}} == Assembler == The board comes with all surface-mount components pre-soldered. The included header strip can be soldered on for convenient use on a brea... ») |
|||
| Ligne 28 : | Ligne 28 : | ||
* (For 3.3v microprocessors, connect the pin marked 3Vo to the 3.3v supply) | * (For 3.3v microprocessors, connect the pin marked 3Vo to the 3.3v supply) | ||
| − | [[Fichier:ADX335-326-Wire-01.jpg]] | + | [[Fichier:ADX335-326-Wire-01.jpg|450px]] |
=== Connecter X,Y,Z === | === Connecter X,Y,Z === | ||
Connectez les sorties de signal X, Y et Z sur les entrées analogiques comme présenté ci-dessous: | Connectez les sorties de signal X, Y et Z sur les entrées analogiques comme présenté ci-dessous: | ||
| − | [[Fichier:ADX335-326-Wire-02.jpg]] | + | [[Fichier:ADX335-326-Wire-02.jpg|450px]] |
=== Utiliser la référence de tension === | === Utiliser la référence de tension === | ||
| Ligne 40 : | Ligne 40 : | ||
{{ambox-stop|text=If you connect an external voltage reference to the AREF pin, you must set the analog reference to EXTERNAL before calling analogRead() (e.g. in your setup() function). Otherwise, you will short the internal reference with the external reference, possibly damaging your Arduino board. }} | {{ambox-stop|text=If you connect an external voltage reference to the AREF pin, you must set the analog reference to EXTERNAL before calling analogRead() (e.g. in your setup() function). Otherwise, you will short the internal reference with the external reference, possibly damaging your Arduino board. }} | ||
| − | [[Fichier:ADX335-326-Wire-03.jpg]] | + | [[Fichier:ADX335-326-Wire-03.jpg|450px]] |
{{ADX335-326-TRAILER}} | {{ADX335-326-TRAILER}} | ||
Version du 10 juin 2013 à 12:15
Assembler
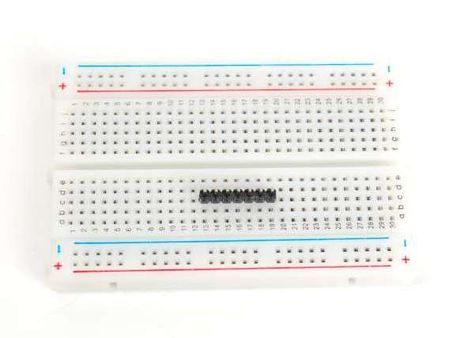
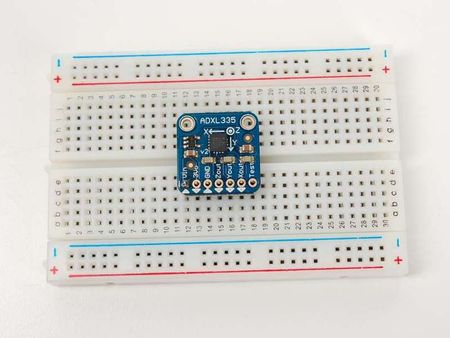
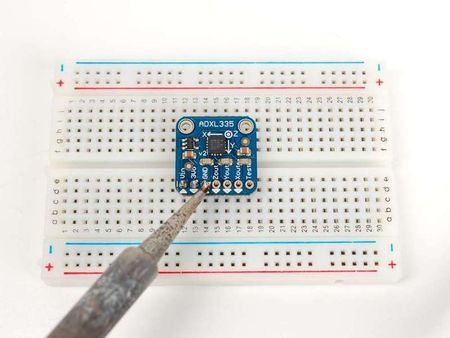
The board comes with all surface-mount components pre-soldered. The included header strip can be soldered on for convenient use on a breadboard or with 0.1" connectors. However, for applications subject to extreme accelerations, shock or vibration, locking connectors or direct soldering is advised.
Raccordements
L'alimentation
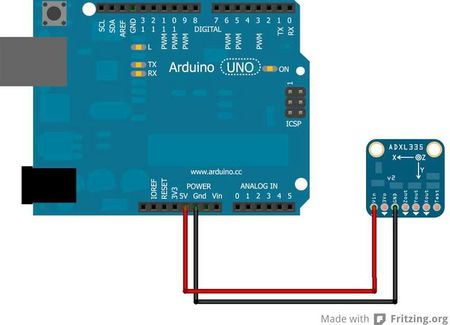
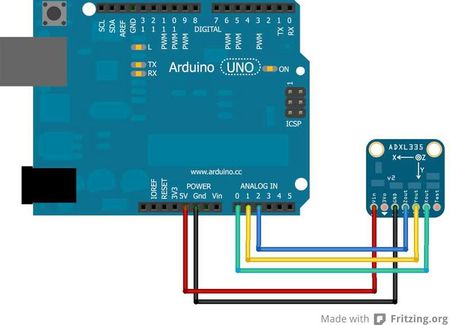
Connect the Power:
- Connect the GND pin to GND on the Arduino.
- Connect the VIN pin to the 5v pin on the Arduino.
- (For 3.3v microprocessors, connect the pin marked 3Vo to the 3.3v supply)
Connecter X,Y,Z
Connectez les sorties de signal X, Y et Z sur les entrées analogiques comme présenté ci-dessous:
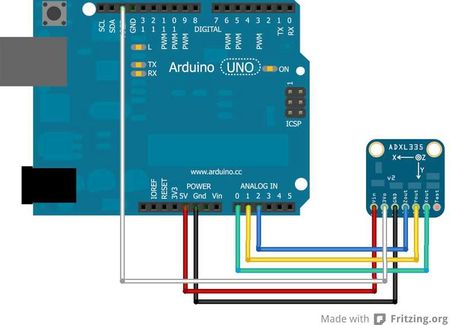
Utiliser la référence de tension
For the best possible accuracy and precision, you can use the output of the accelerometer boards voltage regulator as the analog reference for the Arduino. Connect the 3Vo pin on the accelerometer board to the AREF pin on the Arduino.
| If you connect an external voltage reference to the AREF pin, you must set the analog reference to EXTERNAL before calling analogRead() (e.g. in your setup() function). Otherwise, you will short the internal reference with the external reference, possibly damaging your Arduino board. |
Réalisé par Bill Earl Pour AdaFruit Insdustries.
Source: [1]
Traduit avec l'autorisation d'AdaFruit Industries - Translated with the permission from Adafruit Industries - www.adafruit.com
Toute référence, mention ou extrait de cette traduction doit être explicitement accompagné du texte suivant : « Traduction par MCHobby (www.MCHobby.be) - Vente de kit et composants » avec un lien vers la source (donc cette page) et ce quelque soit le média utilisé.
L'utilisation commercial de la traduction (texte) et/ou réalisation, même partielle, pourrait être soumis à redevance. Dans tous les cas de figures, vous devez également obtenir l'accord du(des) détenteur initial des droits. Celui de MC Hobby s'arrêtant au travail de traduction proprement dit.
