Bluefruit-LE-Shield-ATCommand
|
|
En cours de traduction/élaboration. |
Croquis ATCommand
The ATCommand example allows you to execute AT commands from your sketch, and see the results in the Serial Monitor. This can be useful for debugging, or just testing different commands out to see how they work in the real world. It's a good one to start with!
Ouvrir le croquis
To open the ATCommand sketch, click on the File > Examples > Adafruit_BluefruitLE_nRF51 folder in the Arduino IDE and select atcommand:
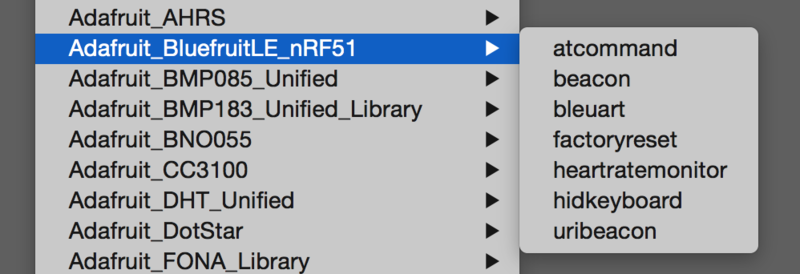
Crédit: AdaFruit Industries www.adafruit.com
This will open up a new instance of the example in the IDE, as shown below:
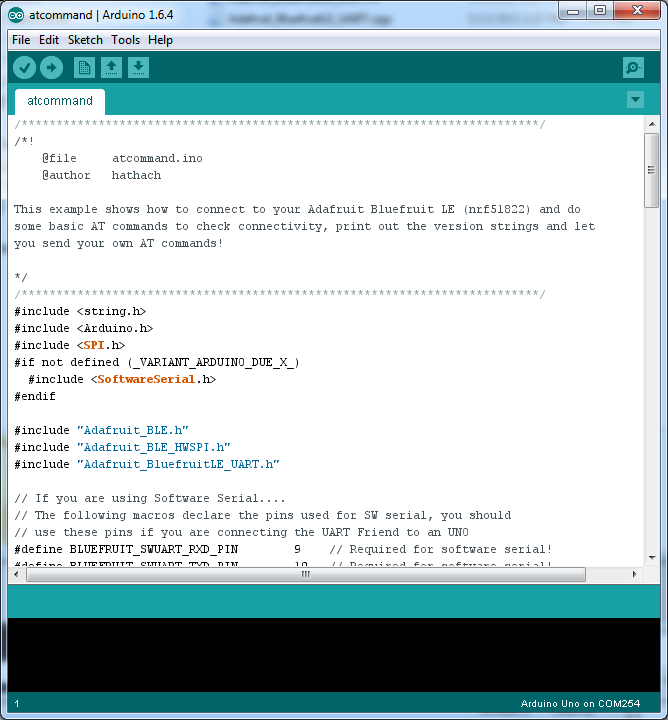
Crédit: AdaFruit Industries www.adafruit.com
Configuration
Check the Configuration! page earlier to set up the sketch for Software/Hardware UART or Software/Hardware SPI. The default is hardware SPI
If using software or hardware Serial UART:
- This tutorial does not need to use the MODE pin, make sure you have the mode switch in CMD mode if you do not configure & connect a MODE pin
- Don't forget to also connect the CTS pin on the Bluefruit to ground if you are not using it! (The Flora has this already done)
Exécuter le croquis
Once you upload the sketch to your board (via the arrow-shaped upload icon), and the upload process has finished, open up the Serial Monitor via Tools > Serial Monitor, and make sure that the baud rate in the lower right-hand corner is set to 115200:
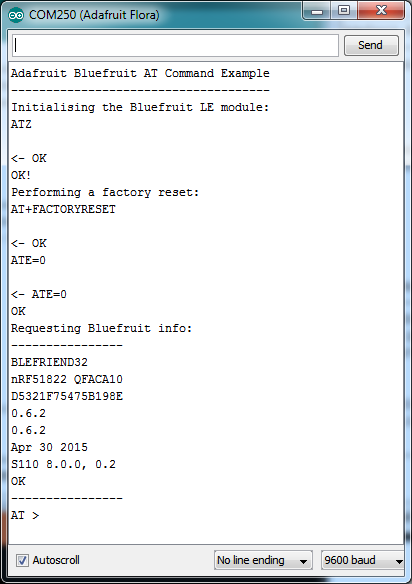
Crédit: AdaFruit Industries www.adafruit.com
To send an AT command to the Bluefruit LE module, enter the command in the textbox at the top of the Serial Monitor and click the Send button
![]()
Crédit: AdaFruit Industries www.adafruit.com
The response to the AT command will be displayed in the main part of the Serial Monitor. The response from "ATI" is shown below:
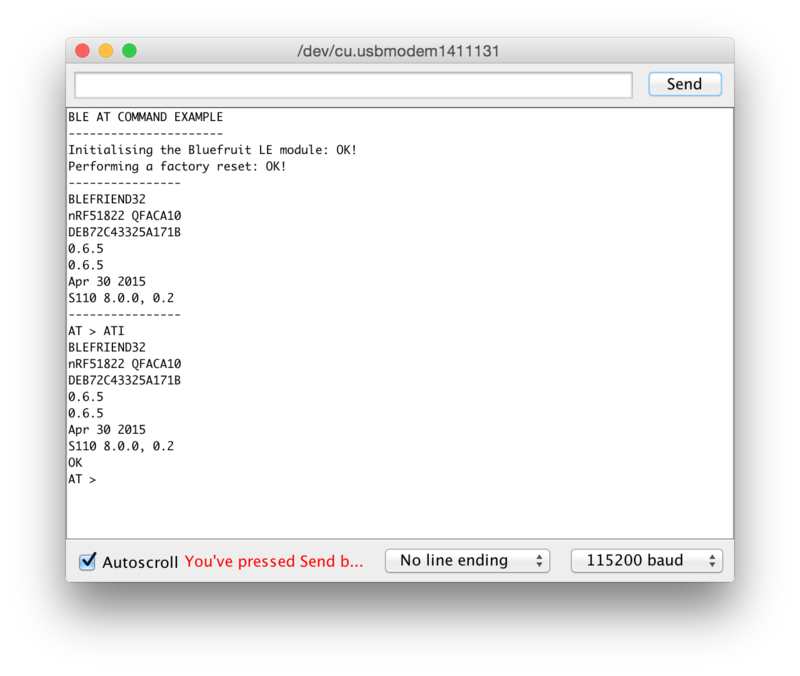
Crédit: AdaFruit Industries www.adafruit.com
You can do pretty much anything at this prompt, with the AT command set. Try AT+HELP to get a list of all commands, and try out ones like AT+HWGETDIETEMP (get temperature at the nRF51822 die) and AT+HWRANDOM (generate a random number)
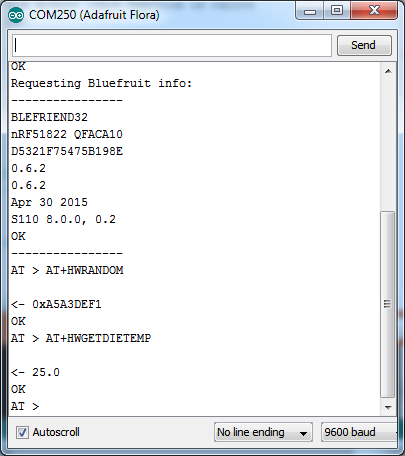
Crédit: AdaFruit Industries www.adafruit.com
Basé sur "Bluefruit LE Shield" d'Adafruit Industries, écrit par
Kevin Townsend - Traduit en Français par shop.mchobby.be CC-BY-SA pour la traduction
Toute copie doit contenir ce crédit, lien vers cette page et la section "crédit de traduction".
Based on "Bluefruit LE Shield" from Adafruit Industries, written by
Kevin Townsend - Translated to French by shop.mchobby.be CC-BY-SA for the translation
Copies must includes this credit, link to this page and the section "crédit de traduction" (translation credit).
Traduit avec l'autorisation d'AdaFruit Industries - Translated with the permission from Adafruit Industries - www.adafruit.com