Différences entre versions de « Bluefruit-LE-Shield-HIDKeyboard »
| Ligne 34 : | Ligne 34 : | ||
{{ambox-stop|text=Lorsque vous n'avez plus besoin de l'appairage d'un module, ou si vous désirez re-appairer le périphérique Bluefruit LE sur un autre appareil, alors il faut effacer les informations d'appairage stocké sur le téléphone ou ordinateu... sinon il ne sera pas possible de le connecter avec un nouveau périphérique! }} | {{ambox-stop|text=Lorsque vous n'avez plus besoin de l'appairage d'un module, ou si vous désirez re-appairer le périphérique Bluefruit LE sur un autre appareil, alors il faut effacer les informations d'appairage stocké sur le téléphone ou ordinateu... sinon il ne sera pas possible de le connecter avec un nouveau périphérique! }} | ||
| − | == Android == | + | === Android === |
| − | + | Pour lier le clavier (''keyboard'') sur un périphérique Android compatible BLE, rendez-vous dans l'application '''Paramètres''' (''Settings'' en anglais) et cliquez sur l'icon '''Bluetooth'''. | |
| − | {{ambox|text= | + | {{ambox|text=Ces captures d'écran son basées sur un Android 5.0 fonctionnant sur un Nexus 7 2013. L'apparence peut varier d'un périphérique à l'autre et d'une version de l'OS à l'autre.}} |
{{ADFImage|Bluefruit-LE-Shield-HIDKeyboard-20.jpg}} | {{ADFImage|Bluefruit-LE-Shield-HIDKeyboard-20.jpg}} | ||
| − | + | Dans le volet de configuration Bluetooth **** setting panel you should see the Bluefruit LE module advertising itself as '''Bluefruit Keyboard''' under the 'Available devices' list: | |
{{ADFImage|Bluefruit-LE-Shield-HIDKeyboard-21.jpg}} | {{ADFImage|Bluefruit-LE-Shield-HIDKeyboard-21.jpg}} | ||
Version du 26 mai 2017 à 14:19
|
|
En cours de traduction/élaboration. |
Le croquis HIDKeyboard
L'exemple HIDKeyboard vous montre comment utiliser les commandes AT pour la fonctionnalité HID keyboard afin d'envoyer des données clavier vers n'importe quel périphérique Android ou iOS (supportant BLE). Cela fonctionne également avec les autres périphériques supportant la spécification "BLE HID peripherals".
Ouvrir le croquis
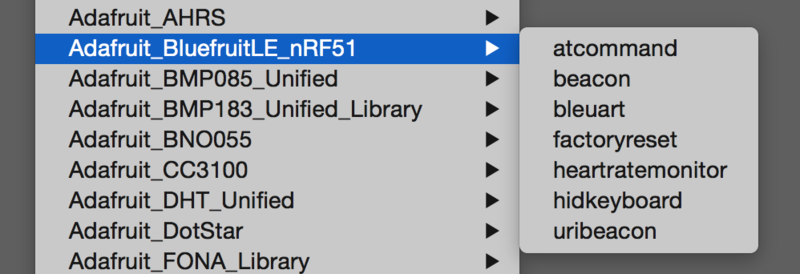
Pour ouvrir le croquis ATCommand, cliquez sur le menu Fichiers > Exemples > Adafruit_BluefruitLE_nRF51 dans Arduino IDE puis sélectionnez hidkeyboard:
Crédit: AdaFruit Industries www.adafruit.com
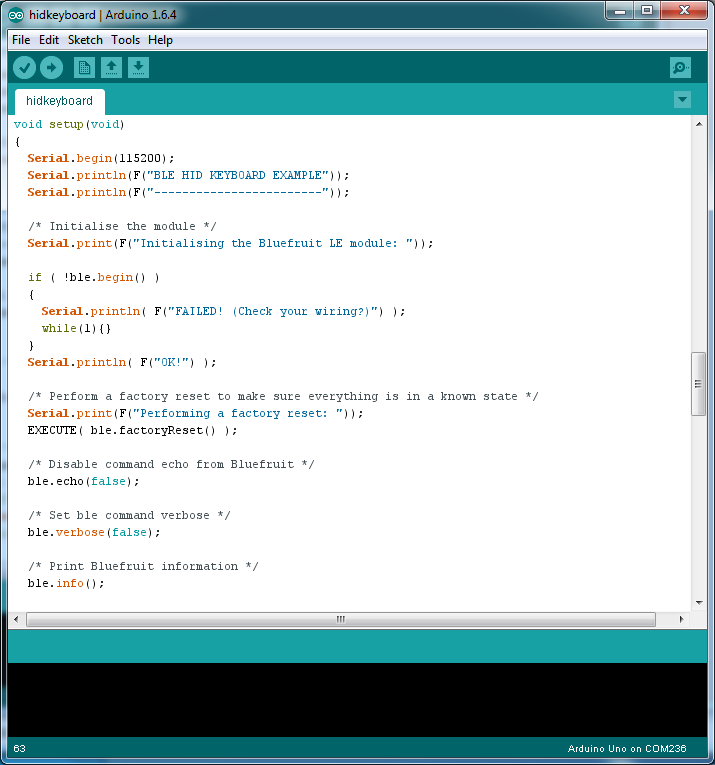
Cela ouvrira l'exemple dans l'environnement de développement, comme visible ci-dessous:
Crédit: AdaFruit Industries www.adafruit.com
Configuration
Vérifiez la page Configuration présenter plus tôt dans le tutoriel! Il est important de configurer le croquis pour utiliser soit l'UART Logiciel/Matériel, soit le bus SPI Logiciel/Matériel correspondant à votre plateforme. Par défaut, le croquis utilise le bus SPI matériel
Si vous utilisez le port série/UART logiciel ou matériel:
- Ce tutoriel ne requière pas l'utilisation de la broche MODE, assurez-vous d'avoir l'interrupteur en position CMD si vous ne configurer pas (et ne connectez pas) la broche MODE.
- N'oubliez pas de connecter la broche CTS sur la masse/GND du Bluefruit si vous n'utilisez pas le signal CTS! (Le Flora l'a déjà branché à la masse)
Exécuter le croquis
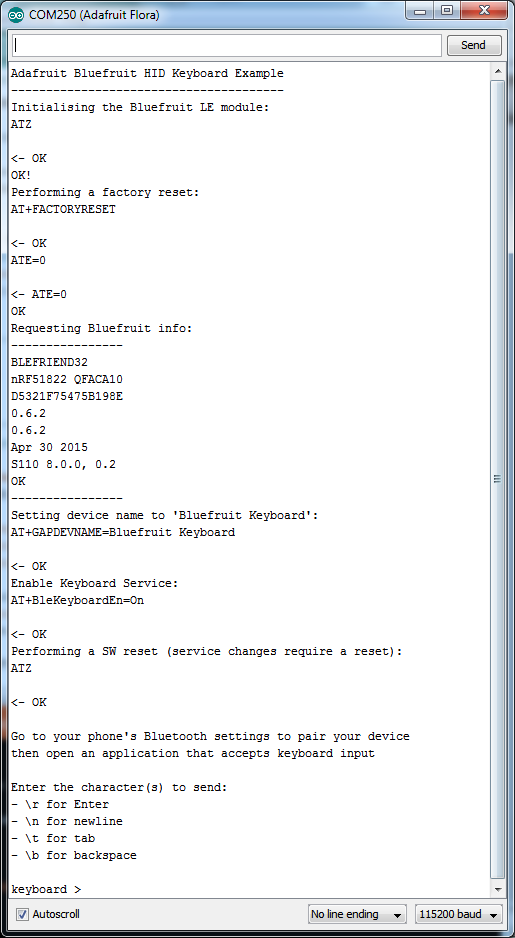
Une fois le croquis téléversé sur votre carte Arduino, vous pouvez ouvrir le moniteur série via le menu Outils > Moniteur série. Assurez-vous que le débit (Baud rate) soit configuré sur 115200 bauds (en bas à droite):
Crédit: AdaFruit Industries www.adafruit.com
Lier le clavier HID
Avant de pouvoir utiliser le clavier "HID keyboard", il sera nécessaire de le lié/l'appairer avec votre téléphone ou PC. Le mécanisme d'appairage (bonding en anglais) permet d'établir une connexion permanente entre les deux périphérique. Cela signifie que dès que votre téléphone ou PC redétecte ce module Bluefruit LE module bien précis alors il est connecté automatiquement.
La procédure exacte à utilisé pour faire l'appairage varie d'une plateforme à l'autre.
| Lorsque vous n'avez plus besoin de l'appairage d'un module, ou si vous désirez re-appairer le périphérique Bluefruit LE sur un autre appareil, alors il faut effacer les informations d'appairage stocké sur le téléphone ou ordinateu... sinon il ne sera pas possible de le connecter avec un nouveau périphérique! |
Android
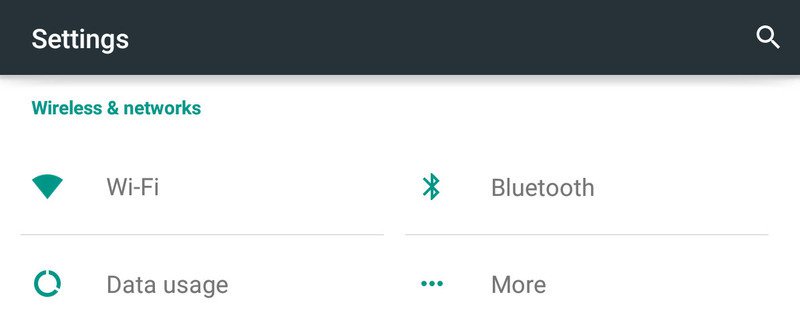
Pour lier le clavier (keyboard) sur un périphérique Android compatible BLE, rendez-vous dans l'application Paramètres (Settings en anglais) et cliquez sur l'icon Bluetooth.
| Ces captures d'écran son basées sur un Android 5.0 fonctionnant sur un Nexus 7 2013. L'apparence peut varier d'un périphérique à l'autre et d'une version de l'OS à l'autre. |
Crédit: AdaFruit Industries www.adafruit.com
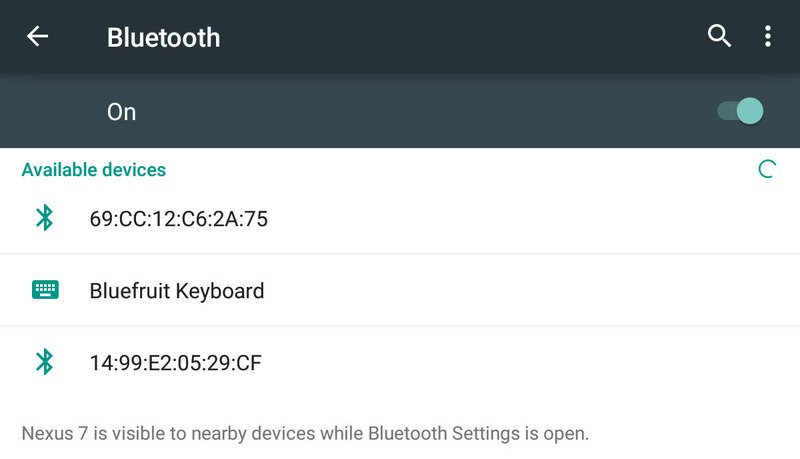
Dans le volet de configuration Bluetooth **** setting panel you should see the Bluefruit LE module advertising itself as Bluefruit Keyboard under the 'Available devices' list:
Crédit: AdaFruit Industries www.adafruit.com
Tapping the device will start the bonding process, which should end with the Bluefruit Keyboard device being moved to a new 'Paired devices' list with 'Connected' written underneath the device name:

Crédit: AdaFruit Industries www.adafruit.com
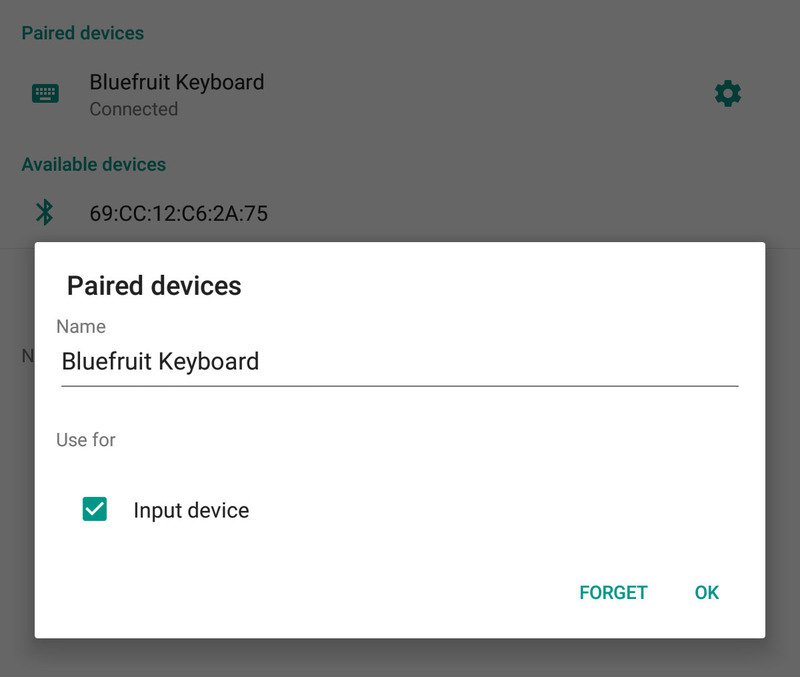
To delete the bonding information, click the gear icon to the right of the device name and the click the Forget button:
Crédit: AdaFruit Industries www.adafruit.com
iOS
To bond the keyboard on an iOS device, go to the Settings application on your phone, and click the Bluetooth menu item.
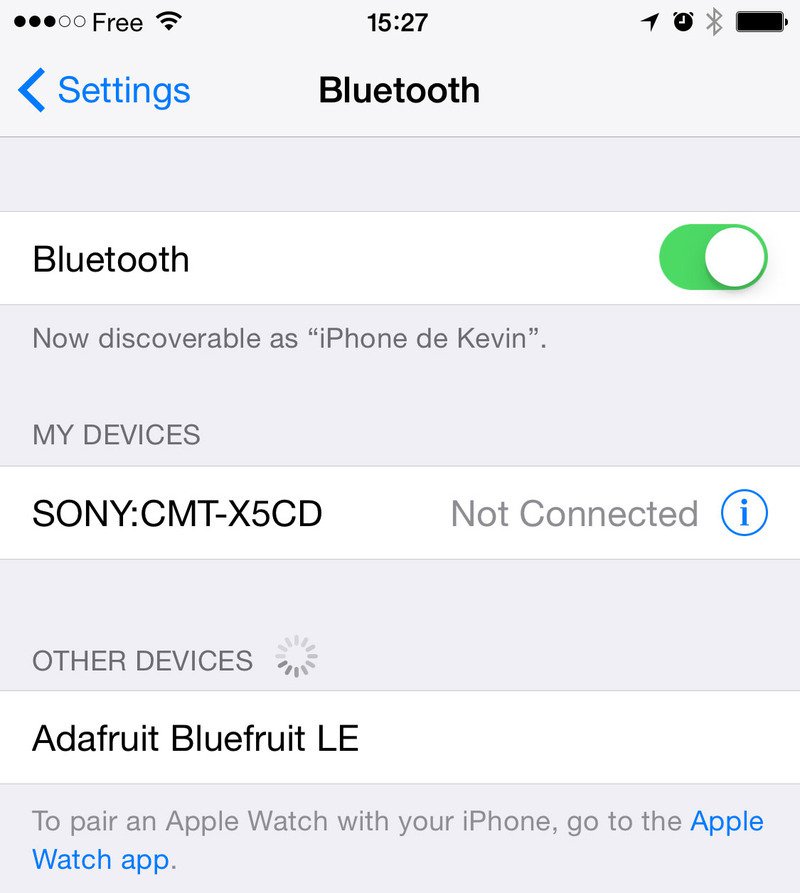
The keyboard should appear under the OTHER DEVICES list:
Crédit: AdaFruit Industries www.adafruit.com
Once the bonding process is complete the device will be moved to the MY DEVICES category, and you can start to use the Bluefruit LE module as a keyboard:

Crédit: AdaFruit Industries www.adafruit.com
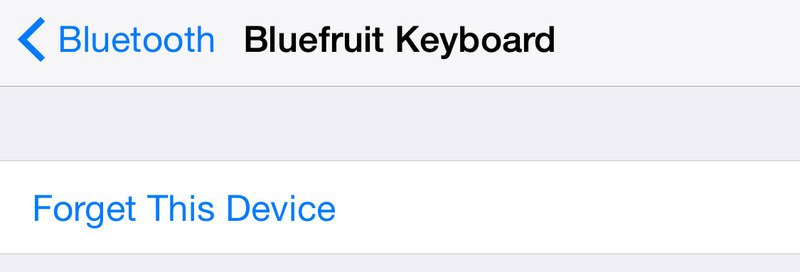
To unbond the device, click the 'info' icon and then select the Forget this Device option in the menu:
Crédit: AdaFruit Industries www.adafruit.com
OS X
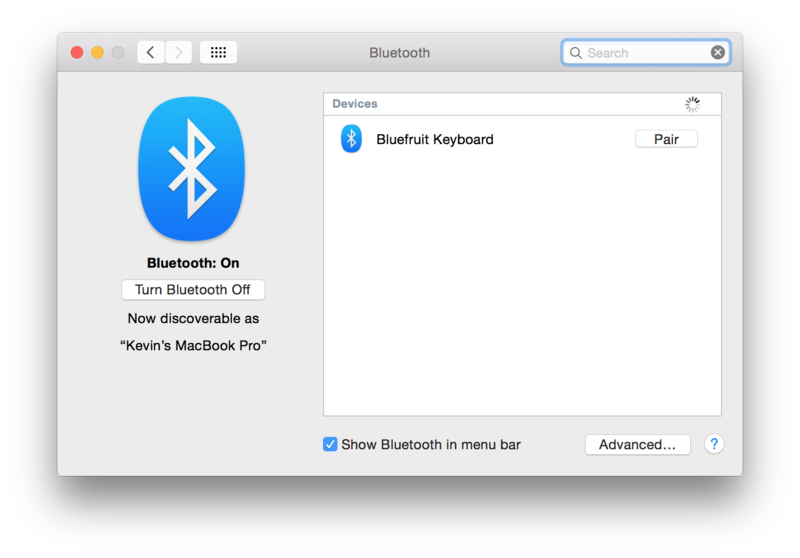
To bond the keyboard on an OS X device, go to the Bluetooth Preferences window and click the Pair button beside the Bluefruit Keyboard device generated by this example sketch:
Crédit: AdaFruit Industries www.adafruit.com
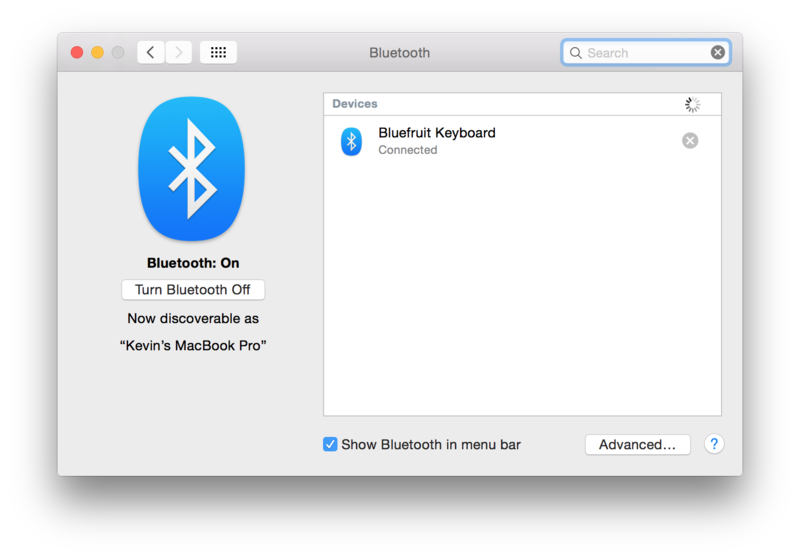
To unbond the device once it has been paired, click the small 'x' icon beside Bluefruit Keyboard:
Crédit: AdaFruit Industries www.adafruit.com
... and then click the Remove button when the confirmation dialogue box pops up:

Crédit: AdaFruit Industries www.adafruit.com
Basé sur "Bluefruit LE Shield" d'Adafruit Industries, écrit par
Kevin Townsend - Traduit en Français par shop.mchobby.be CC-BY-SA pour la traduction
Toute copie doit contenir ce crédit, lien vers cette page et la section "crédit de traduction".
Based on "Bluefruit LE Shield" from Adafruit Industries, written by
Kevin Townsend - Translated to French by shop.mchobby.be CC-BY-SA for the translation
Copies must includes this credit, link to this page and the section "crédit de traduction" (translation credit).
Traduit avec l'autorisation d'AdaFruit Industries - Translated with the permission from Adafruit Industries - www.adafruit.com