Différences entre versions de « Ecran tactile 2.8" TFT »
| Ligne 75 : | Ligne 75 : | ||
== Librairie Adafruit GFX == | == Librairie Adafruit GFX == | ||
| − | + | La libraire TFT LCD d'AdaFruit est basé sur la librairie graphique "Adafruit GFX graphics core". GFX dispose de nombreuses fonctions prêt à l'emploi qui devraient vous aider à démarrer vos projets. Its not exhaustive and we'll try to update it if we find a really useful function. Right now it supports pixels, lines, rectangles, circles, round-rects, triangles and printing text as well as rotation. | |
[http://www.ladyada.net/wiki/tutorials/gfx Check out the GFX tutorial for detailed information about what is supported and how to use it!] | [http://www.ladyada.net/wiki/tutorials/gfx Check out the GFX tutorial for detailed information about what is supported and how to use it!] | ||
Version du 13 juin 2012 à 18:33
|
|
En cours de traduction
|
Présentation
Quel magnifique produit que le "2.8" TFT touch screen shield" d'AdaFuit
Agrémentez votre Arduino avec ce magnifique shield écran tactile de grande taille incluant un lecteur de carte microSD. Cet écran TFT est grand (2.8" de diagonale) lumineux (rétro éclairage à 4 LED super-brillantes), coloré (262.000 couleurs, 18 bits) et assignation individuelle de chaque point (pixel) des 240x320 pixels disponibles. Cet écran dispose d'une résolution bien supérieure aux affichages noir et blanc 128x64 beaucoup plus répandu sur le marche. En bonus, cet écran est déjà équipé d'un écran tactile résistif, vous pouvez donc détecter la pression d'un doigt partout sur cet écran.
Ce shield est complètement assemblé, testé et il est prêt à l'emploi. Pas de raccordement, pas de soudures! Branchez le simplement sur votre Arduino et chargez la librairie AdaFruit correspondante - vous serez productif en moins de 10 minutes!
Cet écran tactile dispose de son propre contrôleur incluant sa propre une mémoire tampon (RAM buffering), le micro-controleur n'a donc presque rien à faire.
Ce shield nécessite beaucoup de broches pour fonctionner: 12 pin au total pour l'affichage, et 13 si vous utilisez le lecteur de carte MicroSD (voir la foire aux questions à ce sujet)
Bien entendu, nous n'allons pas vous laisser avec une fiche technique et "Bonne Chance pour la suite" - AdaFruit à écrit une librairie graphique open-source capable de dessiner des pixels(point), lignes, rectangles, cercles et textes. AdaFruit fournit également un librairie tactile pour détecter les coordonées x, y et z (la pression) ainsi que des exemples de code met en pratique tous ces éléments. Le code est écrit pour Arduino et peut être porté assez facilement vers votre micro-contrôleur favoris!
Si vous voulez acheter cet article, il est disponible chez MC Hobby.
Caractéristiques
- Affichage LCD de 2.8" de diagonale (TFT)
- Résolution de 240x320 points, couleurs 18-bits (262.000 couleurs)
- Contrôleur ILI9325 (fiche technique - datasheet) ou ILI9328 (fiche technique - datasheet) incluant une mémoire vidéo tampon (RAM)
- Interface digital 8 bits, plus 4 lignes de contrôle.
- Utilise les broches/pins digitales de 5 à 13 et analogique de 0 à 3.
- Ce qui signifie que vous pouvez utiliser les broches/pins digitales 2, 3 et analogique 4 et 5. La broche 12 est disponible si vous n'utilisez pas la carte microSD
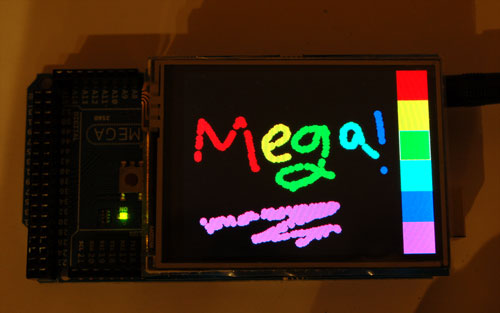
- Fonctionne avec un Arduino '328 (Mega pas encore supporté)
- 5V compatible! Commandable avec une logique 3.3V ou 5V
- Régulateur LDO 3.3V - 300mA intégré (Low-Drop Out = à faibles pertes).
- Rétro éclairage à 4 LEDs blanches. Actif par défaut mais vous pouvez connecter un transistor sur la pin digitale pour contrôler le rétroéclairage.
- Ecran résistif 4-fils
FAQ: Foire Aux Questions
Pourquoi utiliser l'interface parallèle?
En consultant la fiche technique, je remarque qu'une interface SPI est disponible. Pourquoi utiliser vous l'interface parallèle? Une interface SPI utiliserait moins de pins! Même si le contrôleur de l'écran supporte un SPI, AdaFruit n'as pas encore trouvé d'écran capable d'en tirer profit - ces broches ne sont simplement pas disponibles sur le connecteur de l'écran. Par ailleurs, SPI serait incroyablement lent pour un écran aussi large (ce serait terriblement frustrant!). Si vous désirez des afficheurs SPI, MC Hobby peut vous proposer Shield LCD RGB - 2 pins - AFFICHAGE NEGATIF. Vous pouvez également consulter le catalogue "afficheur" d'AdaFruit, ils supportent presque tous des protocoles SPI (ou similaire)!... nous nous ferons un plaisir de les importer sur demande.
Comment accéder aux broches libres?
All the pins are used! How can I connect anything to the Arduino??
We suggest using a protoshield (with stacking headers) or a proto-screwshield to access the unused pins (2, 3, and analog 4 and 5). You can connect various i2c sensors or analog sensors to analog 4&5. You can also connect an i2c port expander to get more I/O pins. If you desperately need more pins, and you're careful, you can use the 8 datapins while the TFT isn't being written to - they are high-z and unused as long as the WR and RD pins are high
Démarrer sans assemblage
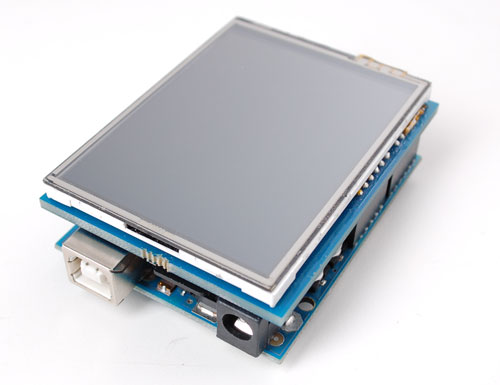
Ce shield est vraiment facile à utiliser. Il n'y a qu'a le raccorder et c'est parti.
Because the TFT is exactly the same size as an Arduino, we preassemble the shield in the factory. To use, simply place it onto your Arduino. No wiring, no soldering!
Test du LCD
AdaFruit fournit une librairie prêt à l'emploi incluant des exemples de code utilisable avec ces TFTs. Cette librairie n'est pas incroyablement rapide, ni fortement optimisée mais c'est un bon point de départ. Elle peut être facilement portée vers d'autres microcontroleurs. Nous partons cependant du principe que vous utilisez un Arduino.
Visitez le dépôt github d'AdaFruit et cliquez sur le bouton Downloads (dans le coin en haut a droite) pour télécharger l'archive Zip contenant la librairie et les exemples. Décompressez le répertoire qu'elle contient et renommez le TFTLCD. Assurez vous que le répertoire contienne bien les fichiers .cpp et .h. Ensuite, copier le répertoire dans votre répertoire_des_sketchs_arduino/libraries . LadyAda vous propose un tutoriel plus détaillé (en anglais).
Vous aurez également besoin de la librarie "GFX graphics core" disponible dans ce dépôt GitHub. Cliquez sur le bouton Downloads en haut à droite pour télécharger l'Archive Zip (incluant la librarie et les exemples). Décompressez le répertoire qu'elle contient et renommez le Adafruit_GFX. Assurez-vous que le répertoire contienne les fichier cpp and .h. Ensuite, copier le répertoire dans votre répertoire_des_sketchs_arduino/libraries .
|
|
Il y a une étape complémentaire pour ce shield! Ouvrez le fichier TFTLCD.h dans le répertoire libraries et décommentre la ligne en haut du fichier qui indique: |
//comment or uncomment the next line for special pinout!
#define USE_ADAFRUIT_SHIELD_PINOUT
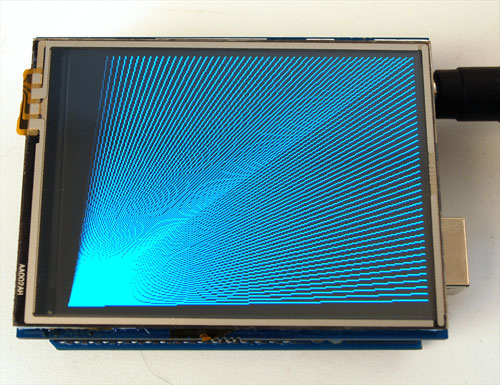
Redémarrez votre environnement Arduino. Vous devriez constater un nouveaux répertoire example (d'exemple) portant le nom TFTLCD. A l'intérieur de ce dernier, il y a un exemple nommé graphicstest. Chargez ce sketch sur votre Arduino. Vous constaterez que le TFT affiche une série de tests graphiques.
Librairie Adafruit GFX
La libraire TFT LCD d'AdaFruit est basé sur la librairie graphique "Adafruit GFX graphics core". GFX dispose de nombreuses fonctions prêt à l'emploi qui devraient vous aider à démarrer vos projets. Its not exhaustive and we'll try to update it if we find a really useful function. Right now it supports pixels, lines, rectangles, circles, round-rects, triangles and printing text as well as rotation.
Check out the GFX tutorial for detailed information about what is supported and how to use it!
DODO: A TRADUIRE tutorial
Exemple: le Paint tactile
The LCD has a 2.8" 4-wire resistive touch screen glued onto it. You can use this for detecing finger-presses, stylus', etc. You'll need 4 pins to talk to the touch panel but we reuse some of the pins for the TFT LCD! This is because the resistance of the panel is high enough that it doesn't interfere with the digital input/output and we can query the panel in between TFT accesses, when the pins are not being used.
Visit our github repository and click on the Downloads button in the top right corner to download a zip of the library and examples. Uncompress the folder and rename it TouchScreen make sure that inside that folder is the cpp and .h files. Then copy it to your arduinosketchfolder/libraries folder. See our tutorial for more details.
DODO: A TRADUIRE tutorial
We connect the 4 pins as follows:
- Y+ is connected to Analog 1
- Y- is connected to Digital 7
- X+ is connected to Digital 6
- X- is connected to Analog 2
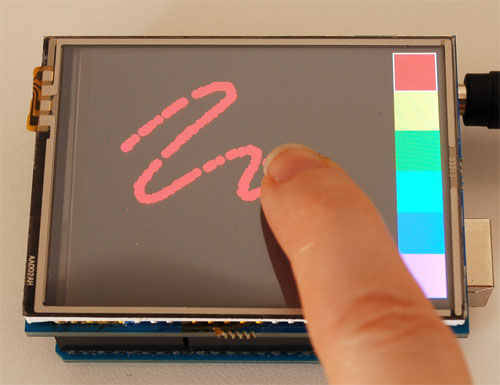
Now start up the tftpaint_shield example in the TFTLCD library. The right hand side will have 'color boxes' you can press to select which color you want to draw with. If you press the area to the left where the screen ends, it will erase the screen.
|
|
The touch screen is made of a thin glass sheet, and its very fragile - a small crack or break will make the entire touch screen unusable. Don't drop or roughly handle the TFT and be especially careful of the corners and edges. When pressing on the touchscreen, sometimes people can use the tip of their fingers, or a fingernail. If you don't find the touchscreen responds well to your fingers, you can use a rounded stylus which will certainly work. Do not press harder and harder until the screen cracks! |
Images depuis la Carte SD
There is a built in microSD card slot into the shield, and we can use that to load bitmap images! You will need a microSD card formatted FAT16 or FAT32 (they almost always are by default)
|
|
The SD card socket shares pins with the TFT, so many of the 'default' example sketches for the SD card will not work without following the initialization steps in this sketch. Before assuming that the TFT shield is broken because the default SD examples wont work, run this BMP drawing sketch. If you need to use the microSD card holder look carefully at the example sketch to see the steps to initialize the card and TFT in order |
You'll also need to download our SD library modifyied to allow faster reads (these changes will be added to arduino v23) but for now you can download the new library here. Download the library by clicking the Downloads button and uncompressing the folder. Replace the files in your ArduinoIDE/libraries/SD folder and restart the IDE.
FOR MEGA ARDUINOS edit the SD/utility/Sd2Card.h file after installing and uncomment the line that says #define MEGA_SOFT_SPI 1 to allow the Mega to use the same pinout for SD cards as the Classic Arduinos
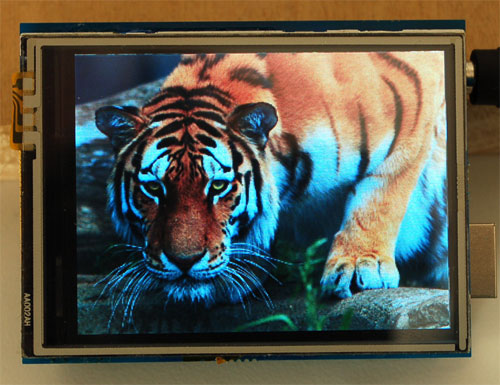
Download this tiger bitmap and save it to the microsd card! (Image by Shane Gorski )
Start up the IDE and select the tftbmp_shield sketch. Upload it to your Arduino to see the tiger!
Start up the IDE and select the tftbmp_shield sketch. Upload it to your Arduino to see the tiger!
To make new bitmaps, make sure they are less than 240 by 320 pixels and save them in 24-bit BMP format! They must be in 24-bit format, even if they are not 24-bit color as that is the easiest format for the Arduino. You can rotate images using the setRotation() procedure.
Contrôler le rétro-éclairage
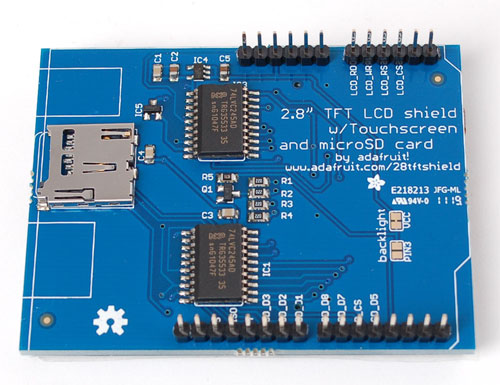
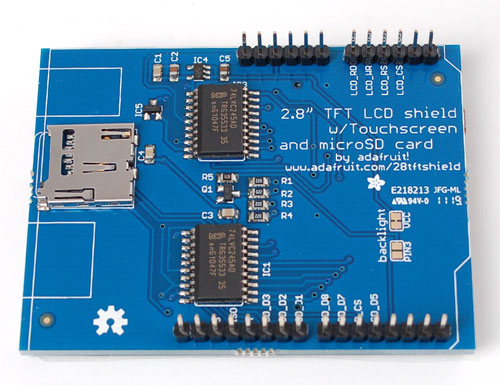
By default, we assume you'll want the backlight on all the time. However, you may want to PWM control or otherwise turn off the LED backlight to save power. You can do this with a simple hack. On the back, look for the two backlight jumpers. Cut the trace between the VCC jumper using a sharp knife and then solder the jumper labeled Pin 3. Then you can use Digital 3 to control the backlight
Ressources
- Fichier Eagle & Schéma
- La librairie Touch screen
- La librairie TFT LCD
- La librairie SD card (dernière version)
- Source: cet Article.
Où Acheter
L’Écran tactile 2.8" TFT est disponible chez MC Hobby.
Toute référence, mention ou extrait de cette traduction doit être explicitement accompagné du texte suivant : « Traduction par MCHobby (www.MCHobby.be) - Vente de kit et composants » avec un lien vers la source (donc cette page) et ce quelque soit le média utilisé.
L'utilisation commercial de la traduction (texte) et/ou réalisation, même partielle, pourrait être soumis à redevance. Dans tous les cas de figures, vous devez également obtenir l'accord du(des) détenteur initial des droits. Celui de MC Hobby s'arrêtant au travail de traduction proprement dit.
Traduit avec l'autorisation d'AdaFruit Industries - Translated with the permission from Adafruit Industries - www.adafruit.com
