Différences entre versions de « Pi-Zero-Headless-Configuration »
(Page créée avec « {{Pi-Zero-Headless-NAV}} x {{Pi-Zero-Headless-TRAILER}} ») |
|||
| Ligne 1 : | Ligne 1 : | ||
{{Pi-Zero-Headless-NAV}} | {{Pi-Zero-Headless-NAV}} | ||
| − | + | {{traduction}} | |
| + | == Mise-à-jour == | ||
| + | Where you go next is entirely up to you and what your plans are. However, it's a good idea to start by running a system update first. Connect to the pi via ssh and run the following commands: | ||
| + | |||
| + | <syntaxhighlight lang="python"> | ||
| + | sudo apt-get update | ||
| + | sudo apt-get upgrade | ||
| + | </syntaxhighlight> | ||
| + | |||
| + | Both commands may take a while to complete. Raspbian Lite is a pretty minimal install, so your next steps are probably to install a bunch of packages. By running the above first, you will make sure to bring in the most up to date versions. | ||
| + | |||
| + | == System Configuration == | ||
| + | General system configuration is done by running the '''raspi-config''' utility. | ||
| + | |||
| + | <syntaxhighlight lang="python"> | ||
| + | sudo raspi-config | ||
| + | </syntaxhighlight> | ||
| + | |||
| + | {{ADFImage|Pi-Zero-Headless-Configuration-01.png|640px}} | ||
| + | |||
| + | This will bring up the main menu. | ||
| + | |||
| + | {{ADFImage|Pi-Zero-Headless-Configuration-02.png|640px}} | ||
| + | |||
| + | This is a good time to change the password to something other than the default. | ||
| + | |||
| + | You can also do other things like change the time zone, keyboard layout, hostname, etc. | ||
| + | |||
| + | == Enable SPI and I2C == | ||
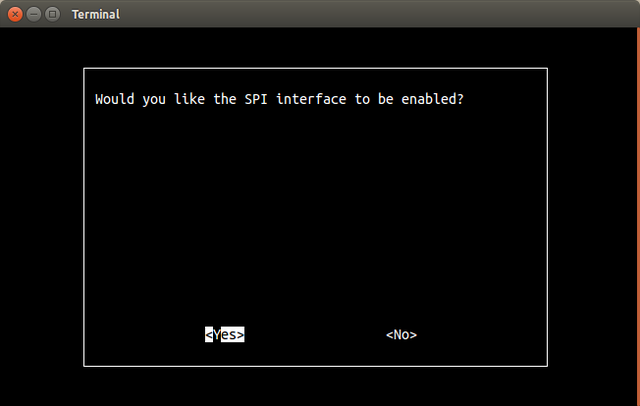
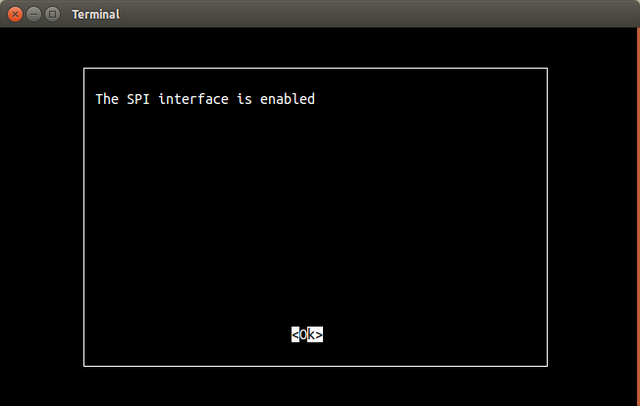
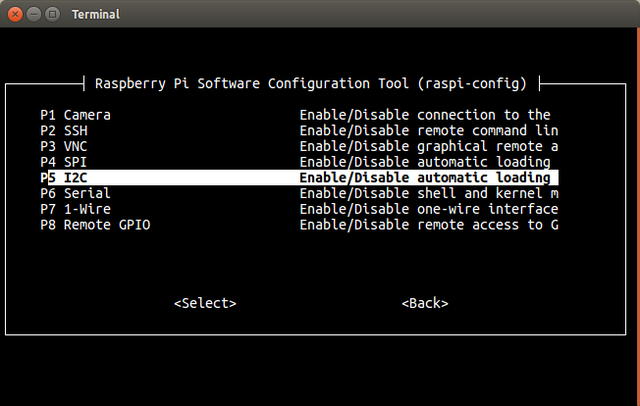
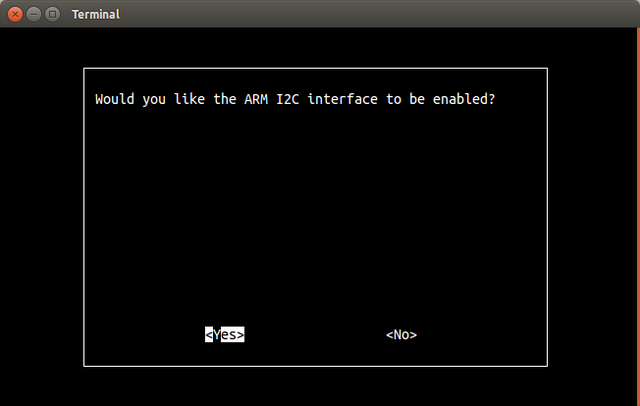
| + | These are both used in a lot of projects but are disabled by default. It's a good idea to enable them now so you don't waste time later wondering why it's not working. | ||
| + | |||
| + | === SPI === | ||
| + | {{ADFImage|Pi-Zero-Headless-Configuration-03.png|640px}} | ||
| + | |||
| + | {{ADFImage|Pi-Zero-Headless-Configuration-04.png|640px}} | ||
| + | |||
| + | {{ADFImage|Pi-Zero-Headless-Configuration-05.png|640px}} | ||
| + | |||
| + | {{ADFImage|Pi-Zero-Headless-Configuration-06.png|640px}} | ||
| + | |||
| + | === I2C === | ||
| + | {{ADFImage|Pi-Zero-Headless-Configuration-07.png|640px}} | ||
| + | |||
| + | {{ADFImage|Pi-Zero-Headless-Configuration-08.png|640px}} | ||
| + | |||
| + | {{ADFImage|Pi-Zero-Headless-Configuration-09.png|640px}} | ||
| + | |||
{{Pi-Zero-Headless-TRAILER}} | {{Pi-Zero-Headless-TRAILER}} | ||
Version du 22 janvier 2018 à 04:34
|
|
En cours de traduction/élaboration. |
Mise-à-jour
Where you go next is entirely up to you and what your plans are. However, it's a good idea to start by running a system update first. Connect to the pi via ssh and run the following commands:
sudo apt-get update
sudo apt-get upgrade
Both commands may take a while to complete. Raspbian Lite is a pretty minimal install, so your next steps are probably to install a bunch of packages. By running the above first, you will make sure to bring in the most up to date versions.
System Configuration
General system configuration is done by running the raspi-config utility.
sudo raspi-config
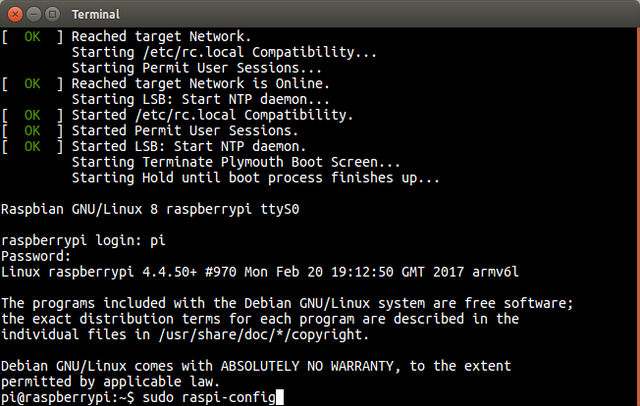
Crédit: AdaFruit Industries www.adafruit.com
This will bring up the main menu.
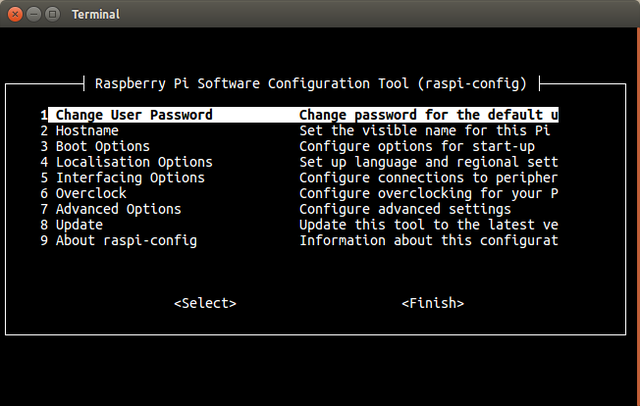
Crédit: AdaFruit Industries www.adafruit.com
This is a good time to change the password to something other than the default.
You can also do other things like change the time zone, keyboard layout, hostname, etc.
Enable SPI and I2C
These are both used in a lot of projects but are disabled by default. It's a good idea to enable them now so you don't waste time later wondering why it's not working.
SPI
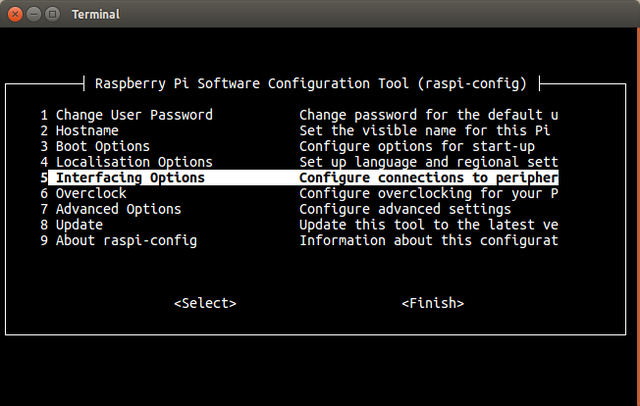
Crédit: AdaFruit Industries www.adafruit.com
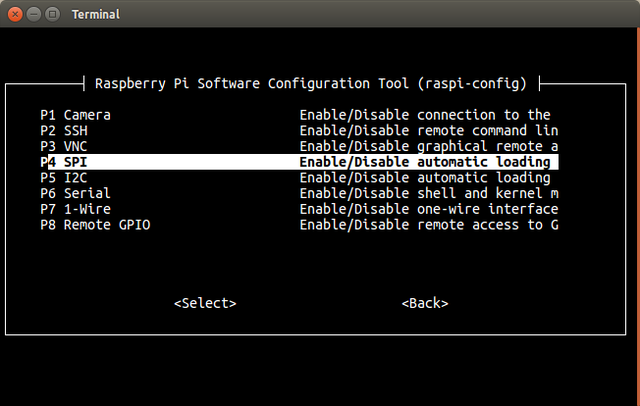
Crédit: AdaFruit Industries www.adafruit.com
Crédit: AdaFruit Industries www.adafruit.com
Crédit: AdaFruit Industries www.adafruit.com
I2C
Crédit: AdaFruit Industries www.adafruit.com
Crédit: AdaFruit Industries www.adafruit.com
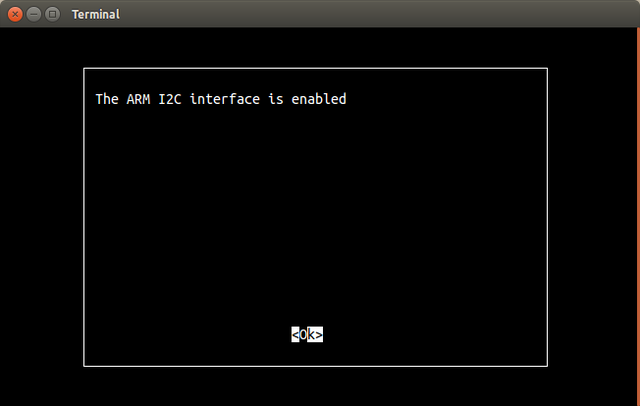
Crédit: AdaFruit Industries www.adafruit.com
Source: Raspberry Pi Zero Headless Quick Start
Tutoriel créé par Carter Nelson pour AdaFruit Industries. Tutorial created by Carter Nelson for AdaFruit Industries.
Toute référence, mention ou extrait de cette traduction doit être explicitement accompagné du texte suivant : « Traduction par MCHobby (www.MCHobby.be) - Vente de kit et composants » avec un lien vers la source (donc cette page) et ce quelque soit le média utilisé.
L'utilisation commercial de la traduction (texte) et/ou réalisation, même partielle, pourrait être soumis à redevance. Dans tous les cas de figures, vous devez également obtenir l'accord du(des) détenteur initial des droits. Celui de MC Hobby s'arrêtant au travail de traduction proprement dit.
Traduit avec l'autorisation d'AdaFruit Industries - Translated with the permission from Adafruit Industries - www.adafruit.com