RASP-PLEX-MEDIA-SERVER-Disque
Ce qui nous intéresse le plus sur un serveur Plex c'est une collection de media (la bibliothèque, "library" en anglais).
La carte micro SD du Raspberry Pi est relativement petite... difficile d'envisager le stockage d'une bibliothèque média sur celle-ci. Nous allons plutôt utiliser un disque dur USB externe et y stocker nos médias.
Branchez votre lecteur USB. Il ne se passera rien dans Plex jusqu'à ce que nous attachions (mount) le lecteur sur le système. Dans Linux, monter (attacher) un lecteur signifie qu'il est prêt à l'emploi.
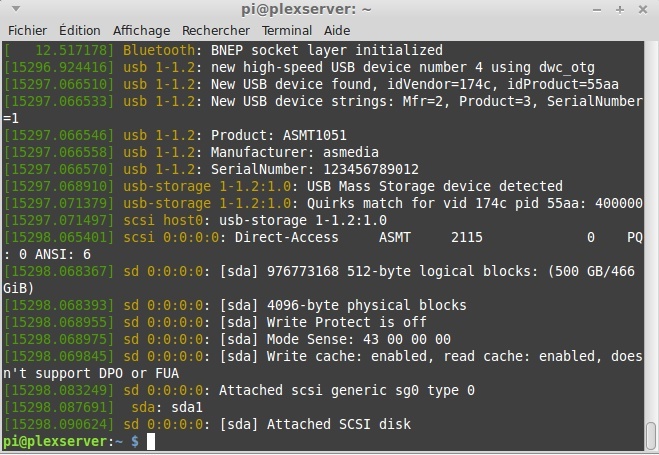
Branchez votre disque dur et saisissez -immédiatement après- la commande suivante dans un terminal
dmesg
Vous y verrez apparaître beaucoup de texte indiquant la détection d'un périphérique USB, l'identification d'un disque dur USB et l'identification du périphérique dans le système (dans les dernières lignes, nous pouvons identifier sda1, le disque sera associé au périphérique /dev/sda1.
So now lets create somewhere to link our hard drive to the Raspberry Pi this will be a directory called “library”. In the terminal type
sudo mkdir /mnt/library
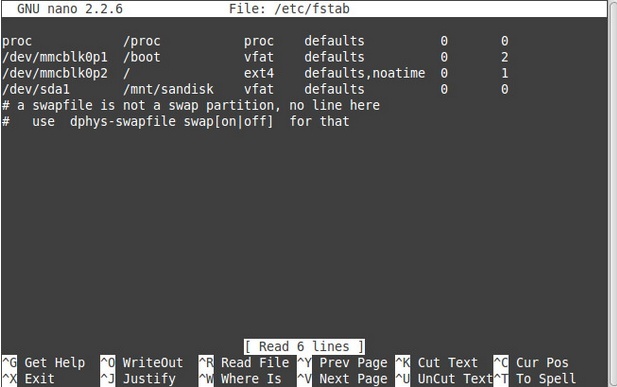
Now we shall open a text editor and add a line of code to mount the drive on boot. For our drive we used a FAT32 formatted drive. As this is the only USB drive it will be given the assignment “sda” and if the drive has one partition, where our data is stored, then it will be “1”. This gives us the location of our media which is “sda1”.
sudo nano /etc/fstab
So now we shall mount our drive, got to the last line which starts with a “/” and make a new line under it. Enter the following and try and keep your spacing similar to those above.
/dev/sda1 /mnt/library vfat defaults 0 0
To save your work press CTRL + O followed by Enter. Then to exit press CTRL + X.
Reboot your Raspberry Pi.
sudo reboot
Once the Pi has booted back up navigate to your content by typing.
cd /mnt/library
Now we need to see where our content is, so to find it type
ls
You should see lots of directories and files, just as you arranged them on your main computer.
Our next step involves enabling access to the files for any user. As our server will be in our home we shall enable access to all of the content for all of the users. Typically this is not the done thing for big servers in production but for our server this is fine. So to enable access we need to type
sudo chmod 777 -R /mnt/library
On a Raspberry Pi 2 this took a few minutes to complete, but thanks to the Pi 3 and its new processor this time is greatly reduced. But the time will vary depending on the amount of files in your library.
So now that we our drive ready to serve our media, let's start using it!
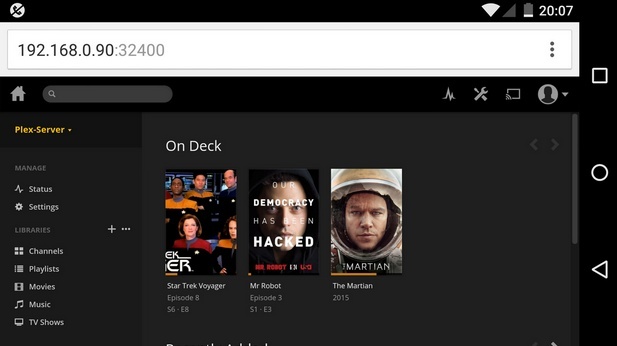
Back to our laptop/PC and open your web browser to your Plex Media Server.
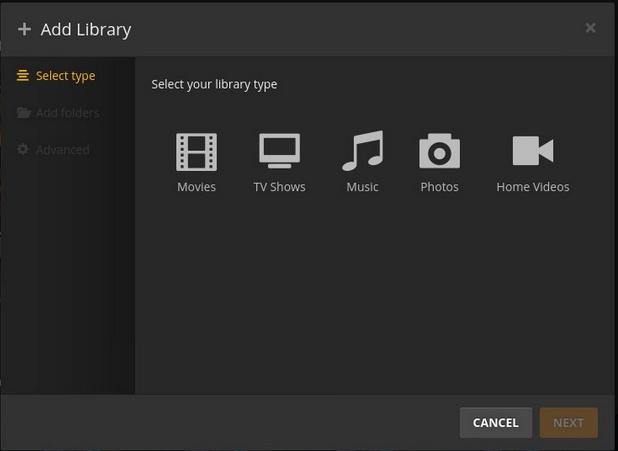
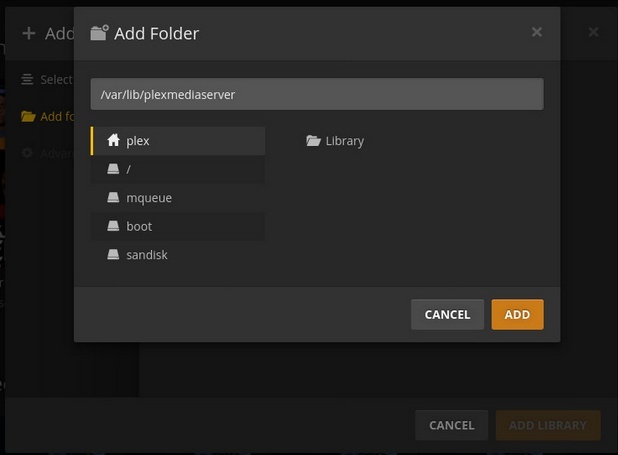
You will be prompted to add a library, so go ahead and do so. Now which library you add depends on what you have. I chose to add a couple of TV series. When ready click on “Add Library” to import the media.
x
Source: A more powerful Plex media server using Raspberry Pi 3 créé par biglesp et posté sur element14 community
Traduit libre et augmentée par Meurisse D. pour MCHobby SPRL
Toute référence, mention ou extrait de cette traduction doit être explicitement accompagné du texte suivant : « Traduction par MCHobby (www.MCHobby.be) - Vente de kit et composants » avec un lien vers la source (donc cette page) et ce quelque soit le média utilisé.
L'utilisation commercial de la traduction (texte) et/ou réalisation, même partielle, pourrait être soumis à redevance. Dans tous les cas de figures, vous devez également obtenir l'accord du(des) détenteur initial des droits. Celui de MC Hobby s'arrêtant au travail de traduction proprement dit.
