Différences entre versions de « RASP-PLEX-MEDIA-SERVER-Reseau »
| Ligne 124 : | Ligne 124 : | ||
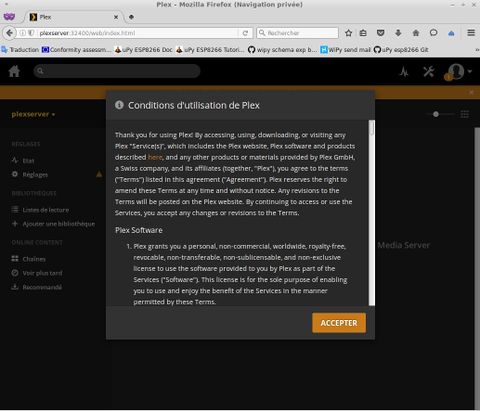
Cela offrira l'accès au logiciel Plex Media et où il faudra accepter les conditions d'utilisation (voyez la note ci-dessous concernant le login). | Cela offrira l'accès au logiciel Plex Media et où il faudra accepter les conditions d'utilisation (voyez la note ci-dessous concernant le login). | ||
| − | [[Fichier:RASP-PLEX-MEDIA-SERVER-Reseau-50.jpg]] | + | [[Fichier:RASP-PLEX-MEDIA-SERVER-Reseau-50.jpg|480px]] |
=== Login et Mot de passe === | === Login et Mot de passe === | ||
Version du 3 juillet 2016 à 22:14
Connexion Réseau
|
|
En cours de traduction/élaboration. |
With the Raspberry Pi 3 we saw the introduction of built in WIFI! Yes we no longer need USB dongles to connect. The WIFI chip on the Pi 3 is a BCM43438 which is rated up to Wireless N which gives us plenty of bandwidth to stream video over WIFI.
Connexion sur le WiFi
| Cette étape est optionnelle et peut être ignoré si vous utilisez la connexion filaire via Ethernet |
Connecting to WIFI from the terminal is rather easy, but looks rather scary!
Firstly we need to find out the name of our router, the SSID.
In a terminal type
sudo iwlist wlan0 scan
Look for the name of your router. It should look something like this, replace MY_ROUTER with the name of your router.
ESSID:"MY_ROUTER"
Next look through the text for your router and see if you can spot a line similar to this.
IE: IEEE 802.11i/WPA2 Version 1
So now we need to add our network details to a file called wpa-supplicant, in the terminal type.
sudo nano /etc/wpa_supplicant/wpa_supplicant.conf
In the text editor, navigate to the bottom of the text and add the following. Obviously change the ssid and psk to match the name of your router and the password you use to get online.
network={
  ssid="MY_ROUTER"
  psk="THE PASSWORD YOUUSE TO CONNECT TO THE ROUTER"
}
Save your work by pressing CTRL + O then press Enter. Next Press CTRL + X to exit the editor.
The changes should be automatic, but it is prudent to make sure by typing the next two lines one after another.
sudo ifdown wlan0
sudo ifup wlan0
You can check your IP address by typing
ifconfig wlan0
Your IP address should pop up for the interface wlan0, which is our WIFI card.
The best test to check that this works is to reboot your Raspberry Pi and see if it auto connects to the WIFI. To reboot type.
sudo reboot
Fixer l'adresse IP du Pi
To ensure that we can discover our Pi on a network we will now fix the IP address of the Pi.
First we need to find out the IP address, in the terminal type.
hostname -I
| Prenez note de l'adresse IP |
Now let's fix the IP address, in the terminal type
sudo nano /boot/cmdline.txt
At the very end of the line we will add the IP address that we earlier wrote down. So type
ip=L'ADRESSE IP QUE VOUS AVEZ NOTéE
With the IP entered press CTRL + O, then Enter to save your changes.
Now press CTRL + X to close the file.
Now reboot your Pi to make the changes permanent.
sudo reboot
With your Pi rebooted we shall now test that we can access the Plex server. On your laptop or desktop PC open a web browser and type your IP address followed by :32400/web so for example I typed.
192.168.0.90:32400/web
Se connecter sur le serveur Plex
Une fois la configuration réseau terminée, vous pouvez vous connecter sur votre Plex serveur à l'aide de votre navigateur Internet.
Ouvrez un navigateur internet sur votre ordinateur portable ou PC de bureau et saisissez votre Adresse IP comme suit:
http://192.168.0.90:32400/web
Si vous avez modifié le nom de votre rapsberry-pi (le Hostname comme suggéré en début de tutoriel).
http://plexserver:32400/web
Les conditions d'utilisation
Cela offrira l'accès au logiciel Plex Media et où il faudra accepter les conditions d'utilisation (voyez la note ci-dessous concernant le login).
Login et Mot de passe
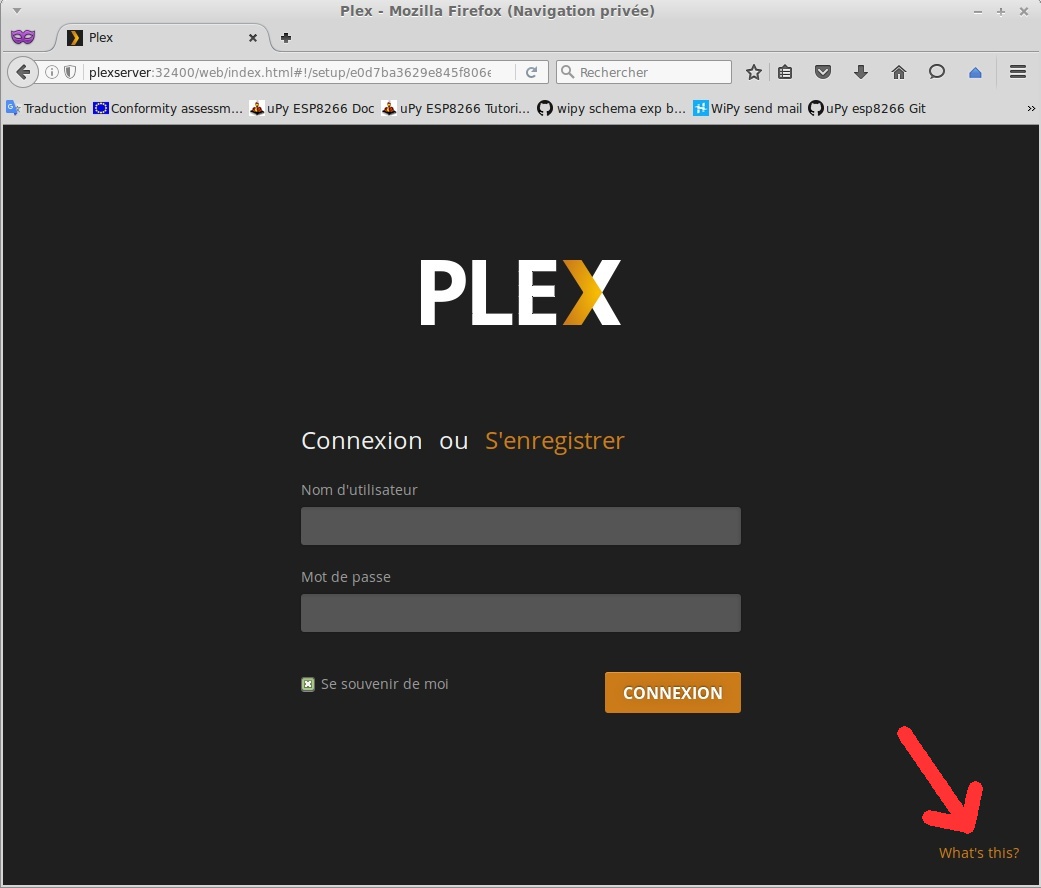
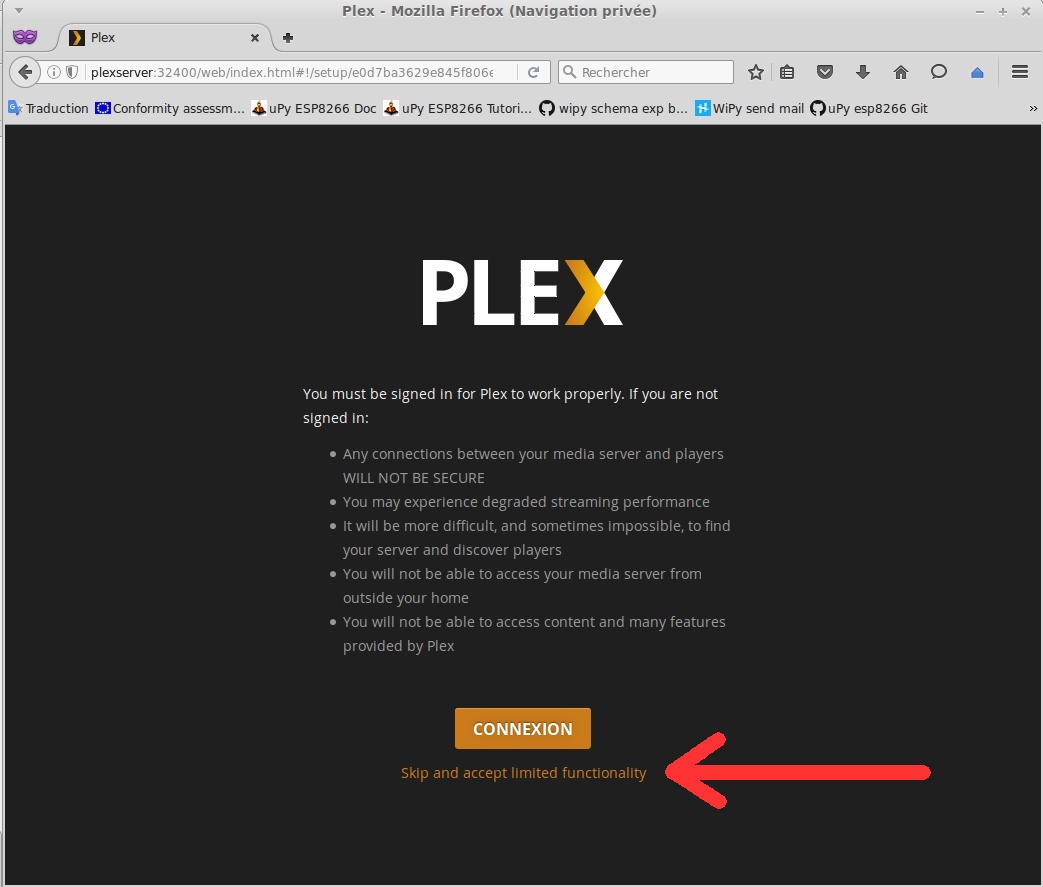
A votre première connexion, l'interface vous demande de saisir votre login et mot de passe. Cette étape n'est pas obligatoire si vous n'utilisez pas de connexion à distance. Cliquez sur le lien "what is this" en bas à droite de la page puis ignorer l'enregistrement.
L'interface
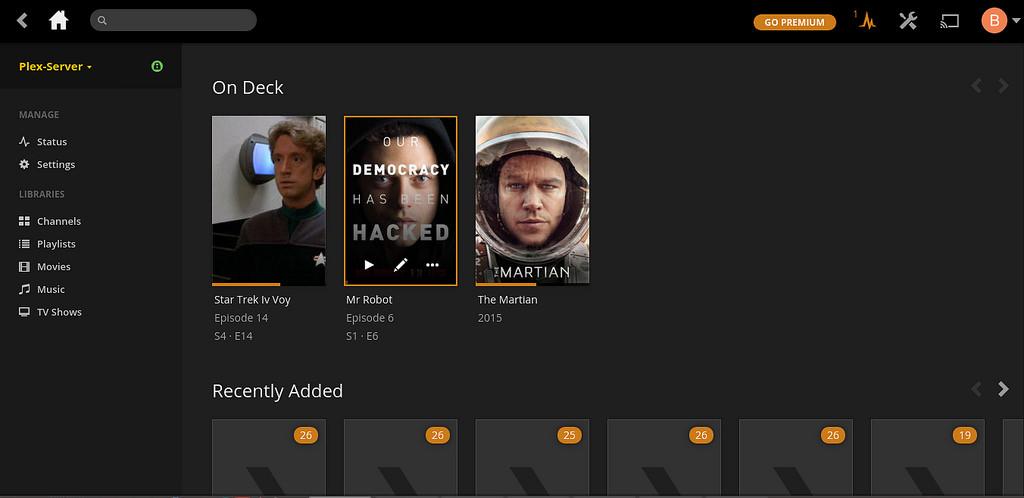
Une fois Plex chargé sur votre navigateur, il ne faudra pas longtemps pour vous familiariser avec l'interface.
Source: A more powerful Plex media server using Raspberry Pi 3 créé par biglesp et posté sur element14 community
Traduit libre et augmentée par Meurisse D. pour MCHobby SPRL
Toute référence, mention ou extrait de cette traduction doit être explicitement accompagné du texte suivant : « Traduction par MCHobby (www.MCHobby.be) - Vente de kit et composants » avec un lien vers la source (donc cette page) et ce quelque soit le média utilisé.
L'utilisation commercial de la traduction (texte) et/ou réalisation, même partielle, pourrait être soumis à redevance. Dans tous les cas de figures, vous devez également obtenir l'accord du(des) détenteur initial des droits. Celui de MC Hobby s'arrêtant au travail de traduction proprement dit.


