Différences entre versions de « RASP-PYGAME-GUI-PygameUI-GPIO »
| Ligne 3 : | Ligne 3 : | ||
{{traduction}} | {{traduction}} | ||
| − | == | + | == Installation == |
We're now going to improve the UI by introducing a widget framework [https://github.com/fictorial/pygameui PygameUI]. | We're now going to improve the UI by introducing a widget framework [https://github.com/fictorial/pygameui PygameUI]. | ||
Version du 11 juillet 2016 à 10:17
|
|
En cours de traduction/élaboration. |
Installation
We're now going to improve the UI by introducing a widget framework PygameUI.
Update your version of distribute:
sudo easy_install -U distribute
Install PygameUI:
sudo pip install pygameui
PygameUI by default uses, IMO, a rather ugly font. If you want to change this you can simply copy a couple of True Type fonts into the pygameui resources directory.
You can find all the ttf files already on your Raspberry Pi with this command:
sudo find / -type f -name '*.ttf'
Now just copy a regular and a bold font over the existing ones in the resource directory. You may want to backup the originals just in case.
cd /usr/local/lib/python2.7/dist-packages/pygameui/resources/fonts
sudo mv bold.ttf bold.old
sudo mv regular.ttf regular.old
sudo cp /usr/share/fonts/truetype/freefont/FreeSans.ttf regular.ttf
sudo cp /usr/share/fonts/truetype/freefont/FreeSansBold.ttf bold.ttf
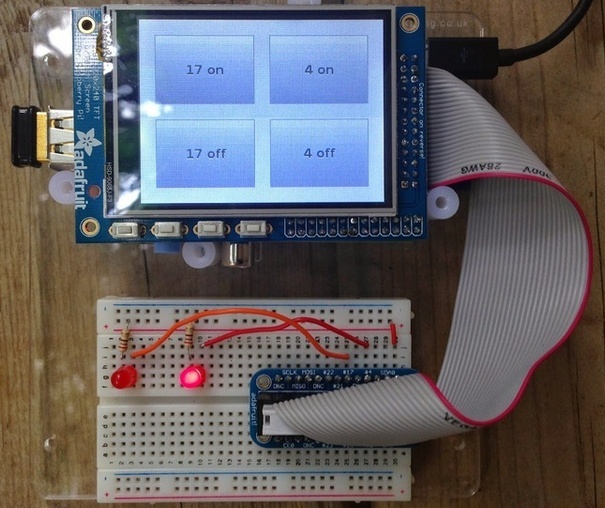
This example controls GPIO #17 and #4 as before but now we're using the new framework.

Crédit: AdaFruit Industries www.adafruit.com
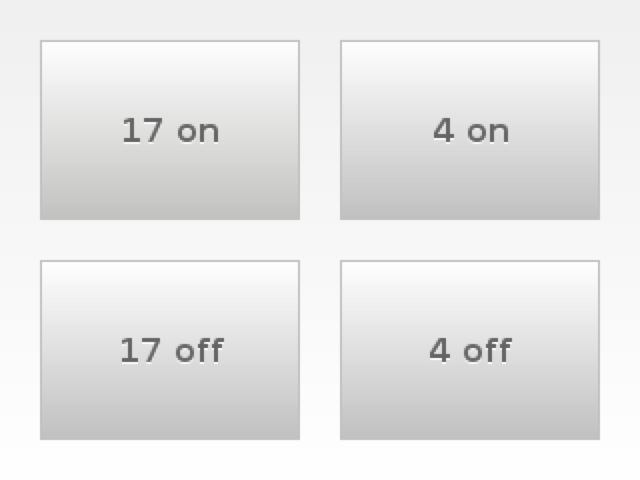
The widget rendering and touchscreen events are handled by PygameUI. The PiTft class defines the buttons to draw on screen and the click event to be fired when a button is pressed.

Crédit: AdaFruit Industries www.adafruit.com
Démarrer
At the top here we've now imported the pygameui library. We use it quite a bit later on so ui is a nice short alias for it.
The other key addition here is Modèle:Https://docs.python.org/2/library/logging.html logging. When using more libraries and frameworks it's very useful to set up logging so you can see the output in a file or, in this case, on the console. We're also able to configure the logger into DEBUG mode so we can really see what's going on underneath our code and troubleshoot if needs be.
import pygame
import os
import pygameui as ui
import logging
import RPi.GPIO as GPIO

#Setup the GPIOs as outputs - only 4 and 17 are available
GPIO.setmode(GPIO.BCM)
GPIO.setup(4, GPIO.OUT)
GPIO.setup(17, GPIO.OUT)

log_format = '%(asctime)-6s: %(name)s - %(levelname)s - %(message)s'
console_handler = logging.StreamHandler()
console_handler.setFormatter(logging.Formatter(log_format))
logger = logging.getLogger()
logger.setLevel(logging.DEBUG)
logger.addHandler(console_handler)

os.putenv('SDL_FBDEV', '/dev/fb1')
os.putenv('SDL_MOUSEDRV', 'TSLIB')
os.putenv('SDL_MOUSEDEV', '/dev/input/touchscreen')
Définition de l'interface utilisateur
For some hints on how to use widgets within the framework take a look at the kitchen sink (pygameui-kitchensink.py) script.
The basic principle is that you define a class that inherits from ui.Scene and in the __init__ method you define all the widgets. A Scene is the full window, in our case the entire display (320,240).
Each button's position and size is defined using a ui.Rect and a text label is also supplied. An on_clicked handler is then assigned - this handler is called when the button is clicked. In our case this is the gpi_button method.
The gpi_button method simply looks at the label of the button that's been clicked to determine which GPIO to set on or off.
MARGIN = 20

class PiTft(ui.Scene):
    def __init__(self):
        ui.Scene.__init__(self)

        self.on17_button = ui.Button(ui.Rect(MARGIN, MARGIN, 130, 90), '17 on')
        self.on17_button.on_clicked.connect(self.gpi_button)
        self.add_child(self.on17_button)

        self.on4_button = ui.Button(ui.Rect(170, MARGIN, 130, 90), '4 on')
        self.on4_button.on_clicked.connect(self.gpi_button)
        self.add_child(self.on4_button)

        self.off17_button = ui.Button(ui.Rect(MARGIN, 130, 130, 90), '17 off')
        self.off17_button.on_clicked.connect(self.gpi_button)
        self.add_child(self.off17_button)

        self.off4_button = ui.Button(ui.Rect(170, 130, 130, 90), '4 off')
        self.off4_button.on_clicked.connect(self.gpi_button)
        self.add_child(self.off4_button)

    def gpi_button(self, btn, mbtn):
        logger.info(btn.text)

        if btn.text == '17 on':
            GPIO.output(17, False)
        elif btn.text == '4 on':
            GPIO.output(4, False)
        elif btn.text == '17 off':
            GPIO.output(17, True)
        elif btn.text == '4 off':
            GPIO.output(4, True)

ui.init('Raspberry Pi UI', (320, 240))
pygame.mouse.set_visible(False)
ui.scene.push(PiTft())
La boucle principale
This is a key point. The main loop of you program is now taken care of by pygameui. The control has been inverted - we've supplied pygameui with code to call when certain user actions occur.
The pygameui main loop is started with this final line of code:
ui.run()
As usual, you can run this from the pygamelcd project:
sudo python test4.py
Source: Raspberry Pi Pygame UI basics créé par by Jeremy Blythe pour www.adafruit.com
Traduit par Meurisse D. pour MCHobby SPRL Toute référence, mention ou extrait de cette traduction doit être explicitement accompagné du texte suivant : « Traduction par MCHobby (www.MCHobby.be) - Vente de kit et composants » avec un lien vers la source (donc cette page) et ce quelque soit le média utilisé.
L'utilisation commercial de la traduction (texte) et/ou réalisation, même partielle, pourrait être soumis à redevance. Dans tous les cas de figures, vous devez également obtenir l'accord du(des) détenteur initial des droits. Celui de MC Hobby s'arrêtant au travail de traduction proprement dit.
Traduit avec l'autorisation d'AdaFruit Industries - Translated with the permission from Adafruit Industries - www.adafruit.com