Différences entre versions de « Rasp-Hack-GPIO Configure GPIO »
(Page créée avec « {{Rasp-Hack-GPIO-NAV}} {{Rasp-Hack-GPIO-TRAILER}} ») |
|||
| Ligne 1 : | Ligne 1 : | ||
{{Rasp-Hack-GPIO-NAV}} | {{Rasp-Hack-GPIO-NAV}} | ||
| + | |||
| + | |||
| + | The GPIO pins can be used as both digital outputs and digital inputes. As digital outputs, you can write programs that turn a particular pin HIGH or LOW. Setting it HIGH sets it to 3.3V setting it LOW sets it to 0V. To drive an LED from one of these pins, you need a 1kΩ resistor in series with the LED as the GPIO pins can only manage a small amount of power. | ||
| + | |||
| + | If you use a pin as a digital input, then you can connect switches and simple sensors to a pin and then be able to check whether it is | ||
| + | |||
| + | Some Adafruit projects that use just GPIO. | ||
| + | |||
| + | * http://learn.adafruit.com/raspberry-pi-e-mail-notifier-using-leds | ||
| + | * http://learn.adafruit.com/playing-sounds-and-using-buttons-with-raspberry-pi | ||
| + | * http://learn.adafruit.com/basic-resistor-sensor-reading-on-raspberry-pi | ||
| + | |||
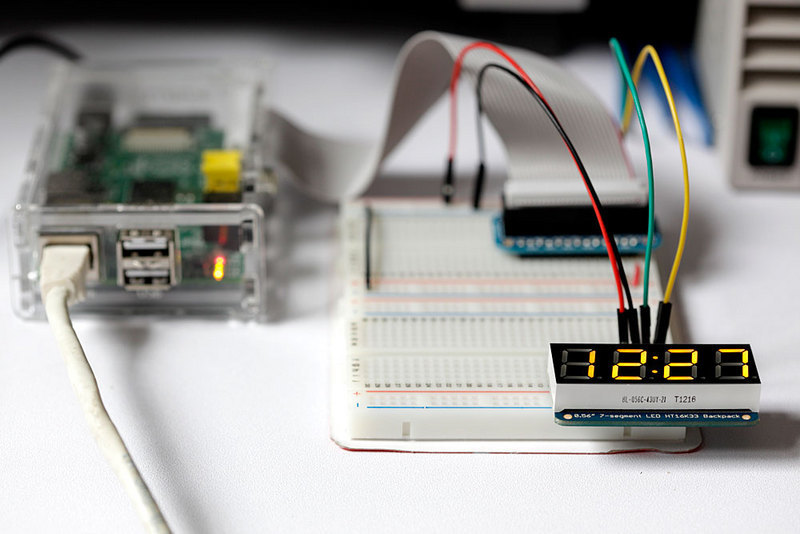
| + | [[Fichier:Rasp-Hack-GPIO-LedBackpack.jpg]] | ||
| + | |||
| + | To program the GPIO ports in Python, we need to install a very useful Python 2 library called Rpi.GPIO. This module gives us a simple to use Python library that will let us control the GPIO pins. | ||
| + | |||
| + | The installation process for this is the same whether you are using Raspbian or Occidentalis. In actual fact, some versions of Raspbian include this library, but these instructions will also have the effect of updating to the latest version, which is worth doing. | ||
| + | |||
| + | <nowiki>sudo apt-get update</nowiki> | ||
| + | |||
| + | To install RPi.GPIO, you first need to install the Python Development toolkit that RPi.GPIO requires. | ||
| + | |||
| + | To do this enter the following command into LXTerminal: | ||
| + | |||
| + | <nowiki>sudo apt-get install python-dev</nowiki> | ||
| + | |||
| + | Then to install Rpi.GPIO itself type: | ||
| + | Copy Code | ||
| + | |||
| + | <nowiki>sudo apt-get install python-rpi.gpio</nowiki> | ||
| + | |||
| + | You will probably be prompted to confirm by entering 'Y'. | ||
| + | |||
| + | Thats all there is to it. You are ready to try some of the projects I mentioned at the top of this section. | ||
{{Rasp-Hack-GPIO-TRAILER}} | {{Rasp-Hack-GPIO-TRAILER}} | ||
Version du 14 janvier 2013 à 12:13
The GPIO pins can be used as both digital outputs and digital inputes. As digital outputs, you can write programs that turn a particular pin HIGH or LOW. Setting it HIGH sets it to 3.3V setting it LOW sets it to 0V. To drive an LED from one of these pins, you need a 1kΩ resistor in series with the LED as the GPIO pins can only manage a small amount of power.
If you use a pin as a digital input, then you can connect switches and simple sensors to a pin and then be able to check whether it is
Some Adafruit projects that use just GPIO.
- http://learn.adafruit.com/raspberry-pi-e-mail-notifier-using-leds
- http://learn.adafruit.com/playing-sounds-and-using-buttons-with-raspberry-pi
- http://learn.adafruit.com/basic-resistor-sensor-reading-on-raspberry-pi
To program the GPIO ports in Python, we need to install a very useful Python 2 library called Rpi.GPIO. This module gives us a simple to use Python library that will let us control the GPIO pins.
The installation process for this is the same whether you are using Raspbian or Occidentalis. In actual fact, some versions of Raspbian include this library, but these instructions will also have the effect of updating to the latest version, which is worth doing.
sudo apt-get update
To install RPi.GPIO, you first need to install the Python Development toolkit that RPi.GPIO requires.
To do this enter the following command into LXTerminal:
sudo apt-get install python-dev
Then to install Rpi.GPIO itself type: Copy Code
sudo apt-get install python-rpi.gpio
You will probably be prompted to confirm by entering 'Y'.
Thats all there is to it. You are ready to try some of the projects I mentioned at the top of this section.
Source: GPIO Setup, créé par Simon Monk pour AdaFruit Industries.
Traduit et augmenté par Meurisse D. pour MCHobby.be, également basé sur des informations provenant du GitHub RaspberryPi
Traduit avec l'autorisation d'AdaFruit Industries - Translated with the permission from Adafruit Industries - www.adafruit.com
Toute référence, mention ou extrait de cette traduction doit être explicitement accompagné du texte suivant : « Traduction par MCHobby (www.MCHobby.be) - Vente de kit et composants » avec un lien vers la source (donc cette page) et ce quelque soit le média utilisé.
L'utilisation commercial de la traduction (texte) et/ou réalisation, même partielle, pourrait être soumis à redevance. Dans tous les cas de figures, vous devez également obtenir l'accord du(des) détenteur initial des droits. Celui de MC Hobby s'arrêtant au travail de traduction proprement dit.
