Rasp-PiGRRL-2-Sortie-Audio
|
|
En cours de traduction/élaboration. |
Introduction

Crédit: AdaFruit Industries www.adafruit.com
Prep Wires for Rasp Pi Audio
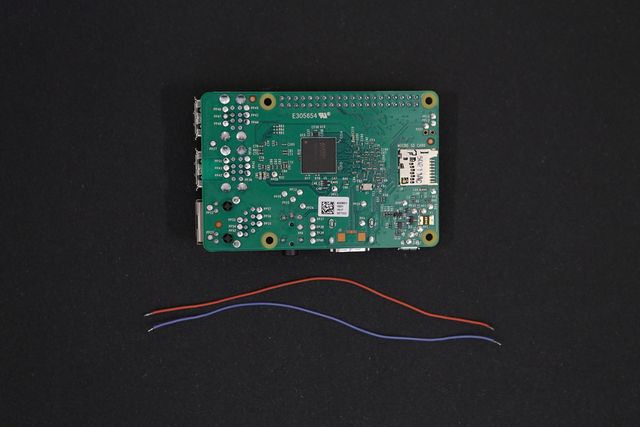
To connect the amp to the Raspberry Pi 2, we'll need two wires. Cut two pieces of 30AWG wires to about 10cm in length. Strip and tin the tips of each wire.

Crédit: AdaFruit Industries www.adafruit.com
Prep Raspberry Pi Audio Pins
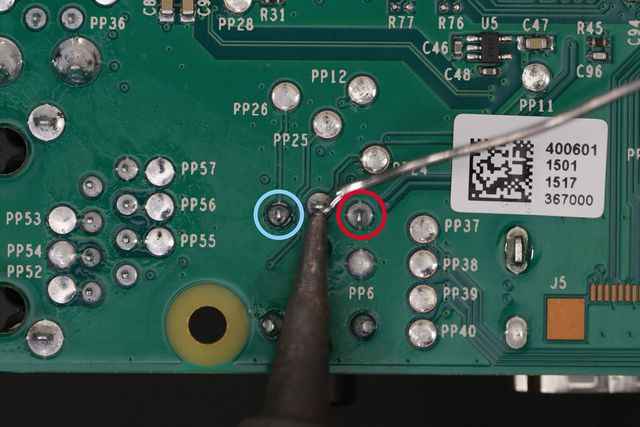
On the bottom of the Raspberry Pi 2 PCB, locate the audio jack and inspect the three pin connected to the component.
Take note of the two circles highlighting the pins. The left pin (blue) will connect to the negative pin on the amp, while the right pin (red) connects to the positive pin. The middle pin does not need to be tinned (disregard the tinning in the photo).
Place the tip of the soldering iron over the pin and apply a small amount of solder. This will make connecting wires to the audio amp much easier.

Crédit: AdaFruit Industries www.adafruit.com
Connect Wires to Raspberry Pi
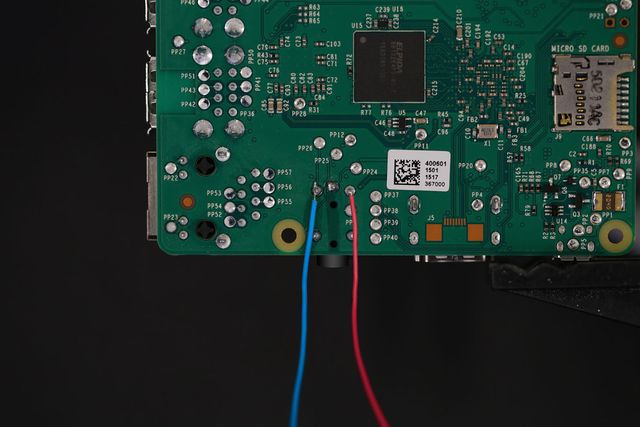
Solder the new wires to the pins on the bottom of the Raspberry Pi. The negative(blue) wire connects to the left pin, while the positive(ed) wire connects to the right pin.

Crédit: AdaFruit Industries www.adafruit.com
Connect Wires to Amp
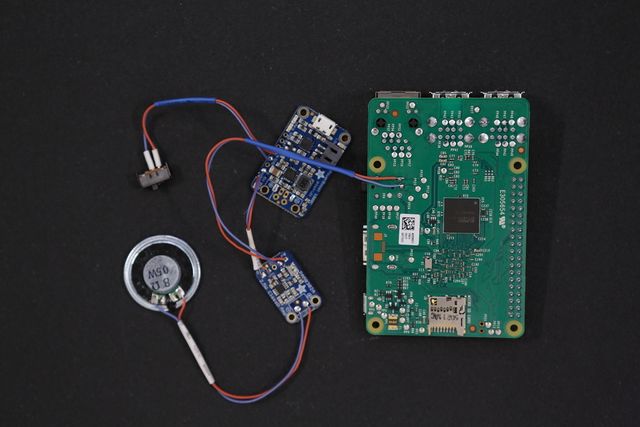
Solder the negative (blue) wire to the A– pin on the amp, and the positive (red) wire to the A+ pin on the amp.
|
|
En cours de traduction/élaboration. |
No class registered in CONVERSION_CLASS for section build-alert alert-danger
<div class="alert">
<i class='fa fa-exclamation-circle'></i>
Audio Connection Confusion? You may notice the audio connections in the photo above are reserved. This photo is intended for the Pi 1 Model B+ (not the 2 or 3). Be sure to follow the first set of photos if you're using the Pi 2 or 3. If your using the Pi 1 Model B+, then reference the photo above.
Source: PiGRRL 2 - Make a portable Raspberry Pi 2 game console
Créé par les frères Ruiz pour AdaFruit Industries.
Traduction réalisée par Wrotny A pour MCHobby.be.
Toute référence, mention ou extrait de cette traduction doit être explicitement accompagné du texte suivant : « Traduction par MCHobby (www.MCHobby.be) - Vente de kit et composants » avec un lien vers la source (donc cette page) et ce quelque soit le média utilisé.
L'utilisation commercial de la traduction (texte) et/ou réalisation, même partielle, pourrait être soumis à redevance. Dans tous les cas de figures, vous devez également obtenir l'accord du(des) détenteur initial des droits. Celui de MC Hobby s'arrêtant au travail de traduction proprement dit.
Traduit avec l'autorisation d'AdaFruit Industries - Translated with the permission from Adafruit Industries - www.adafruit.com