ENG-CANSAT-ARDUINO
Getting prepared for a Training
Installing the Arduino IDE environment + dependencies would involve more than 220 Mb download (100 Mb for Arduino, 120 Mb for Arduino SAMD support, 20 Mb for Adafruit SAMD support).
It is important to get prepared before the training. It is not possible to rely on the guest network to download such amount of data for each of the participant.
So, if you intend to follow a training, get prepared by downloading and installing the complete environment as suggested here follow.
Install Arduino IDE (the .CC version)
As first operation, you have to install the Arduino IDE from Arduino.CC (not Arduino.ORG). To follow this guide, you must have the version 1.8 or higher.
Register Additional Boards
Once the last version of Arduino IDE installed, open the IDE and select the Preference menu (available in the File menu for Windows and Linux --or-- under the Arduino menu for OS X).
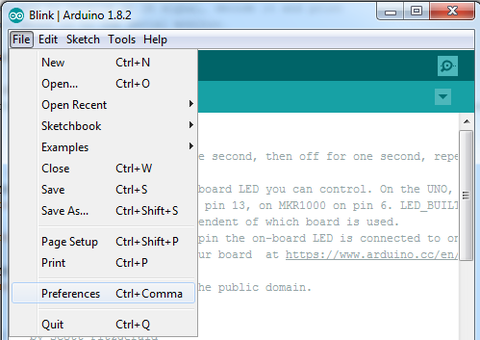
Crédit: AdaFruit Industries www.adafruit.com
You should see a dialog box like the following.
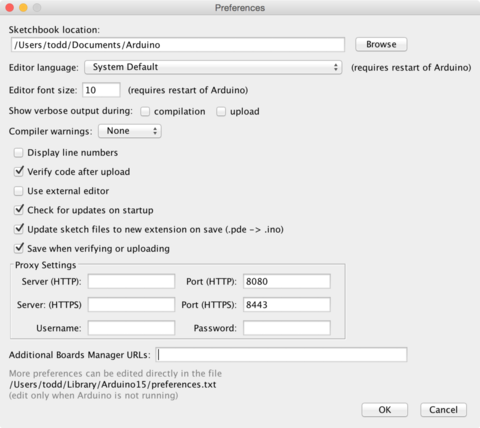
Crédit: AdaFruit Industries www.adafruit.com
We will add an URL in the new option Additional Boards Manager URLs (the URL to handle additional boards).
This field contains an URL list (coma separated). Each new URL can only be added once in this list.
This new Adafruit's board and updates of existing boards will be collected by the "Board Manager" (each time you open it). The URLs point to the index files used by the board manager to build the list of the board available to download.
If you want to know the Arduino IDE's supported boards then browse the list of URLs of managed boards (Arduino Wiki page).
For this Feather M0 Express, we only need to add a single URL. However, it is possible to add several URLs separated by a coma.
Copy/paste the link here below in the field Additional Boards Manager URLs (of the Arduino IDE "preference" window).
https://adafruit.github.io/arduino-board-index/package_adafruit_index.json
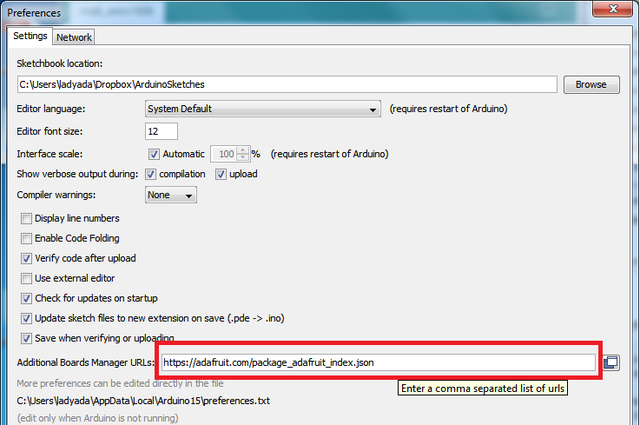
Crédit: AdaFruit Industries www.adafruit.com
Here follows a small description of the boards available with the URLs:
- Adafruit AVR Boards - support for Flora, Gemma, Feather 32u4, Trinket and Trinket Pro.
- Adafruit SAMD Boards - support for the Feather M0, Metro M0, Circuit Playground Express, Gemma M0 and Trinket M0
- Arduino Leonardo & Micro MIDI-USB - Add the MIDI over USB support for Flora, Feather 32u4, Micro & Leonardo (use the projet arcore).
Once the "OK" button pressed, the new preferences are saved.
We can now install the needed board into the Board Manager.
Install the Feather M0 board
Open the Boards Manager available via the menu Tools->Board .
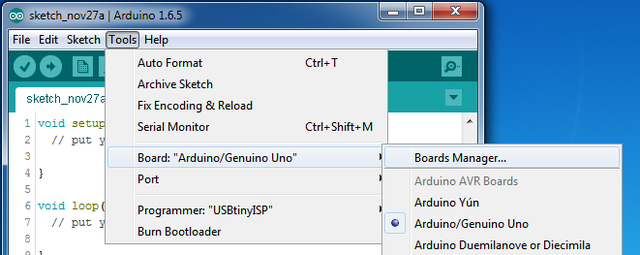
Crédit: AdaFruit Industries www.adafruit.com
Once the Boards Manager opened, select the Contributed type. Once done, you will be able to install the board attached to package_adafruit_index.json URL.
Install the SAMD boards
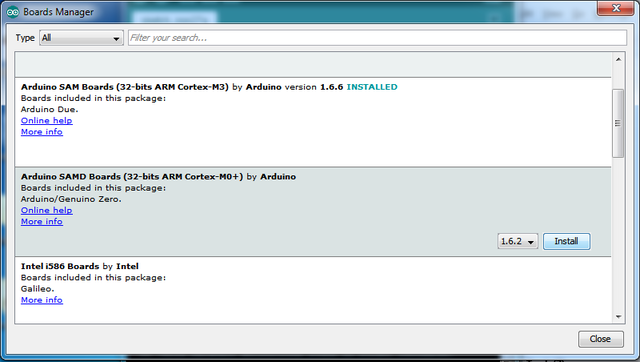
Now, we will install the Arduino SAMD board version 1.6.15 or higher.
You can type in the Arduino SAMD in the search box to quickly find the package, then press the Install button.
Crédit: AdaFruit Industries www.adafruit.com
Install the ADAFRUIT SAMD board
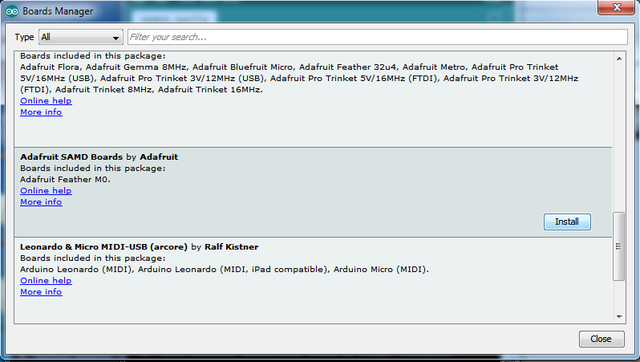
After the SAMD board, it's time to install the "Adafruit SAMD" package to support the Adafruit boards.
You can type in the Adafruit SAMD in the search field to find the package. Once located, press the Install button.
Crédit: AdaFruit Industries www.adafruit.com
We strongly recommand to restart the Arduino IDE (it is not required but it is better to do it anyway).
Check installed boards
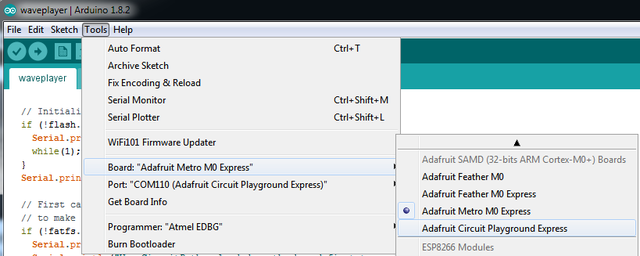
Once the Arduino IDE restarted to be sure that boards are properly installed, you should be able to select the new boards in the interfaces (and to upload code) via the menu Tools -> Board.
Select the board for the kit among those now available:
- Feather M0 (for the Feather M0 boards other than Feather M0 Express)
- Feather M0 Express
- Metro M0 Express
- Circuit Playground Express
- Gemma M0
- Trinket M0
Crédit: AdaFruit Industries www.adafruit.com
Test with BLINK
| If you are using WINDOWS then you should have a look to the "Windows Driver" section here below! |
Now, we can upload your first sketch to the board (the "blink" sketch)!
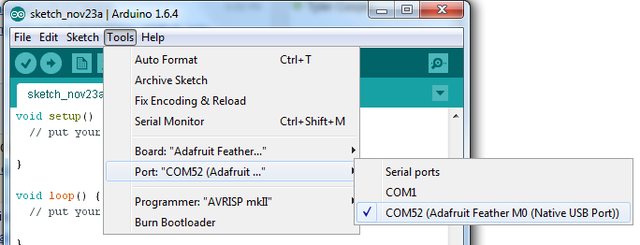
Wire your board to the computer and wait for the operating system to identify it (this may take few seconds). Once identified, the Serial port/COM is available in the list of serial port available.
Crédit: AdaFruit Industries www.adafruit.com
It is now time to upload the Blink sketch
void setup() {
  // init the digital pin #13 as OUTPUT
  pinMode(13, OUTPUT);
}

// the "loop" function is executed again and again (in a infinite loop)
void loop() {
  digitalWrite(13, HIGH);   // Light up the LED (HIGH level = 3.3v)
  delay(1000);              // Wait 1 second
  digitalWrite(13, LOW);    // Switch off the LED (LOW level = 0V)
  delay(1000);              // Wait 1 second
}
Then click on the "upload" button! You should be able to see the board LED blinking. You can tune the blink speed by updating the value for the delay() function.
| If you get upload issue then you should check if you selected the proper board type. |
Install the Windows Driver (Win 7 only)
You will certainly have to install Windows Driver before plugin the board on the computer.
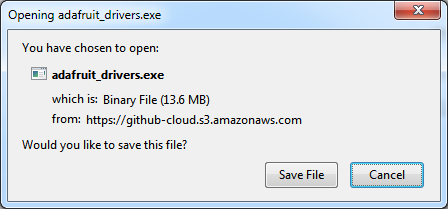
You can download the Windows Driver from the Adafruit Industries server :
Download and start the setup software.
Crédit: AdaFruit Industries www.adafruit.com
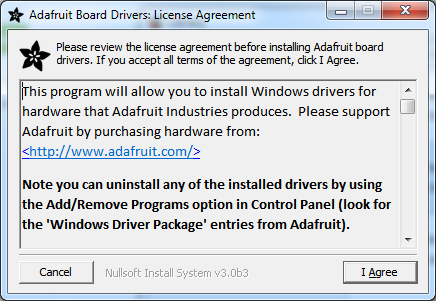
Execute the setup software! It will be necessary to review the licensing instruction as it contains the SiLabs setup and FTDI driver.
Crédit: AdaFruit Industries www.adafruit.com
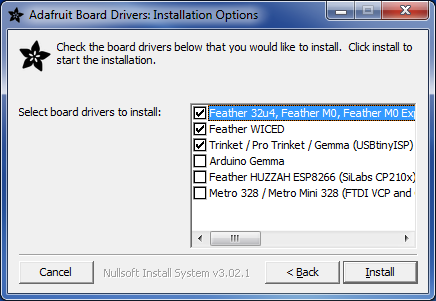
Select the driver you want to install, the default selection would be perfect for the Adafruit boards!
Crédit: AdaFruit Industries www.adafruit.com
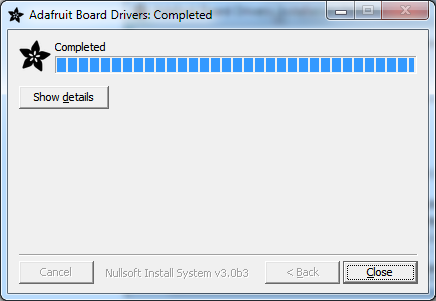
Push the 'Install button to proceed.
Crédit: AdaFruit Industries www.adafruit.com
Written by Meurisse D. from MC Hobby - License: CC-SA-BY.