Différences entre versions de « EZ-LINK-Programmer-Arduino »
(→Intro) |
|||
| Ligne 2 : | Ligne 2 : | ||
== Intro == | == Intro == | ||
| − | {{ADFImage|EZ-LINK- | + | {{ADFImage|EZ-LINK-02.jpg|640px}} |
Unlike any other Bluetooth module, you can use the EZ-Link to program an Arduino. The reason this is possible is because EZ-Link can dynamically change the baud rate and has the ability to send the DTR signal from the Arduino IDE wirelessly through the module. Both are required if you want to be able to quickly change to the 115.2K signal required for upload and toggle the DTR lines. | Unlike any other Bluetooth module, you can use the EZ-Link to program an Arduino. The reason this is possible is because EZ-Link can dynamically change the baud rate and has the ability to send the DTR signal from the Arduino IDE wirelessly through the module. Both are required if you want to be able to quickly change to the 115.2K signal required for upload and toggle the DTR lines. | ||
Version du 29 juin 2014 à 09:46
Intro

Crédit: AdaFruit Industries www.adafruit.com
Unlike any other Bluetooth module, you can use the EZ-Link to program an Arduino. The reason this is possible is because EZ-Link can dynamically change the baud rate and has the ability to send the DTR signal from the Arduino IDE wirelessly through the module. Both are required if you want to be able to quickly change to the 115.2K signal required for upload and toggle the DTR lines.
| This techique can be used for Arduino Uno, Duemilanove, Mega and any other ATmega328/168/1280/2560 based Arduinos that use a USB->Serial converter. It won't work with "USB" Arduinos such as the Leonardo/Micro/Flora since they need a direct USB connection |
This technique has been tested on Mac OS X and Windows 7, but should work identically on any other OS.
You can use any version of the Arduino IDE with this technique, the Bluetooth part is completely transparent to the software
Avant de commencer
You will need to first be paired to the module, and ideally go through the loopback test so you know that's all working!
Branchement
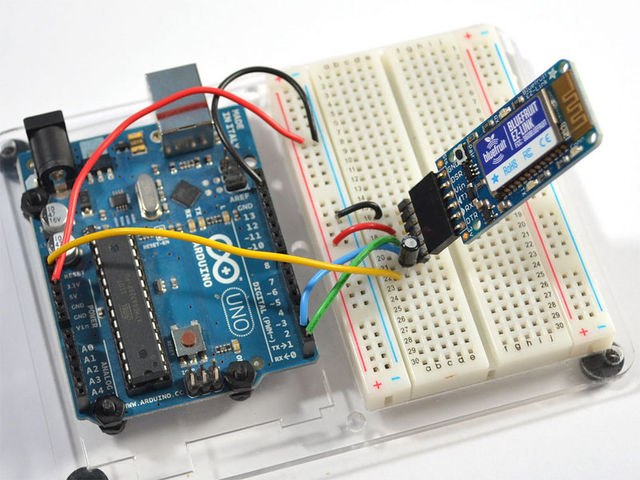
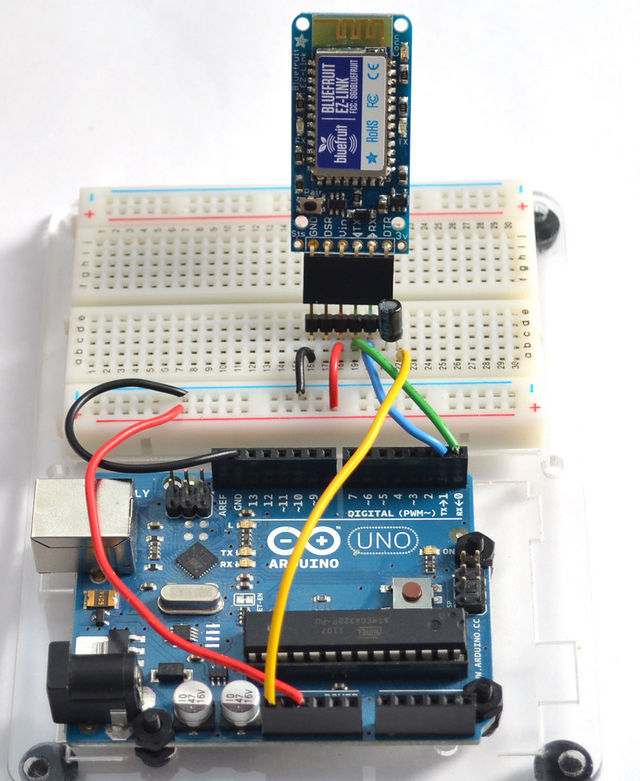
Wire up the EZ-Link to the Arduino as follows, we'll be using an Uno but the wiring is the same for another kind of Arduino/Compatible.
Connect:
- EZ-Link GND to Arduino GND
- EZ-Link DSR to GND (or no connect)
- EZ-Link Vin to Arduino 5V (or any other 3-16V power input, 5V is ideal)
- EZ-Link TX to Arduino #0 (RX)
- EZ-Link RX to Arduino #1 (TX)
- EZ-Link DTR to a 1µF capacitor in series with Arduino Reset (The cap is in series, so Reset goes to the capacitor +, and capacitor - goes to DTR)

Crédit: AdaFruit Industries www.adafruit.com
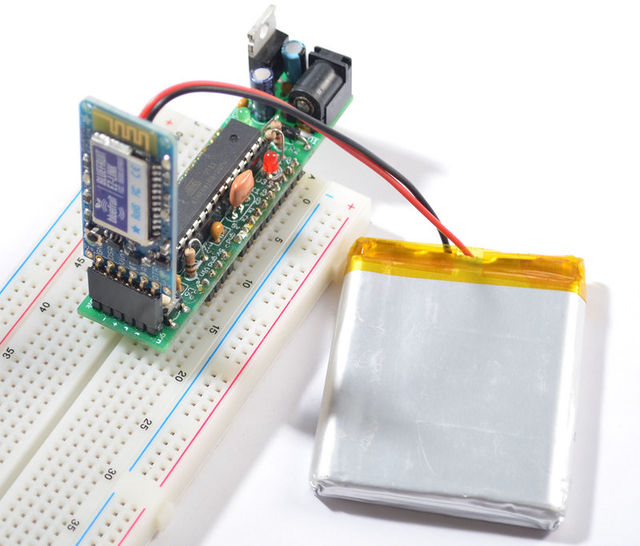
If you're using an Arduino compatible such as a Mini or Boarduino (or any of the other hundreds of Arduino-compat's), chances are it has an FTDI connector on it. You can plug the EZ-Link directly in, the GND pin lines up with the Black wire, and the DTR pin lines up with the Green wire. No other components are required

Crédit: AdaFruit Industries www.adafruit.com
Upload
That's it! Now you can open up the Arduino IDE and select the COM/Serial port that you identified as the EZ-Link. If you open and close the Serial Monitor you should see the Arduino reset (the L pin #13 LED will blink)
| Since opening and closing a bluetooth connection takes a few seconds, there will be an extra 10 second delay when starting the upload process. This is due to the Bluetooth wireless protocol and how the Arduino IDE opens and closes the connection a few times to reset the Arduino. Please be patient! |
Tutoriel Introducing Bluefruit EZ-Link créé par LadyAda pour AdaFruit Industries.
Traduit avec l'autorisation d'AdaFruit Industries - Translated with the permission from Adafruit Industries - www.adafruit.com
Toute référence, mention ou extrait de cette traduction doit être explicitement accompagné du texte suivant : « Traduction par MCHobby (www.MCHobby.be) - Vente de kit et composants » avec un lien vers la source (donc cette page) et ce quelque soit le média utilisé.
L'utilisation commercial de la traduction (texte) et/ou réalisation, même partielle, pourrait être soumis à redevance. Dans tous les cas de figures, vous devez également obtenir l'accord du(des) détenteur initial des droits. Celui de MC Hobby s'arrêtant au travail de traduction proprement dit.