Différences entre versions de « RASP-PiTFT-PLUS-Touch »
| Ligne 48 : | Ligne 48 : | ||
== Script de calibration automatique == | == Script de calibration automatique == | ||
| + | Si vous faire une rotation de l'écran, vous aurez besoin de recalibrer la partie tactile pour qu'elle fonctionne avec la nouvelle orientation. Vous pouvez exécuter manuellement le processus de calibration (voir section suivante) ou vous pouvez exécuter un petit script python qui initialise automatiquement les paramètres de calibration en fonction de l'orientation de l'écran. | ||
| − | + | [https://raw.githubusercontent.com/adafruit/PiTFT_Extras/master/pitft_touch_cal.py Petit script d'aide (dit ''helper'') qui est automatiquement installé mais dont voici la source sur GitHub] | |
| + | Executez la ligne de commande {{fname|sudo adafruit-pitft-touch-cal}} | ||
| − | + | Le script essaye de détecter l'écran installé et l'état du paramètre de rotation | |
| − | |||
| − | |||
| − | |||
| − | |||
{{ADFImage|RASP-PiTFT-PLUS-Touch-20.png|640px}} | {{ADFImage|RASP-PiTFT-PLUS-Touch-20.png|640px}} | ||
| − | + | Par défaut, le script essaye d'obtenir l'orientation de l'écran en examinant la configuration du module PiTFT avec modprobe. Si le script peut lire l'orientation alors il l'affichera à l'écran, ainsi que les valeurs de calibration actuelles et les nouvelles valeurs de calibration basée sur l'orientation effective de l'écran. Pressez "y" (oui) et le retour-claver (enter) pour confirmer. | |
{{ADFImage|RASP-PiTFT-PLUS-Touch-21.png|640px}} | {{ADFImage|RASP-PiTFT-PLUS-Touch-21.png|640px}} | ||
| − | + | Essayez d'utiliser le script de calibration par défaut pour facilement calibrer votre afficheur tactile. Notez que les valeurs de calibration pourraient ne pas être les valeurs correspondant exactement à votre écran (tous les écrans sont sensiblement différents) mais elles devraient être suffisamment proche pour répondre à la plupart des besoins courants. Si vous avez besoin d'une calibration tactile plus précise, suivez les étapes de la prochaine section afin de calibrer manuellement votre écran tactile. | |
== Calibration Manuelle == | == Calibration Manuelle == | ||
Version du 13 juillet 2015 à 12:26
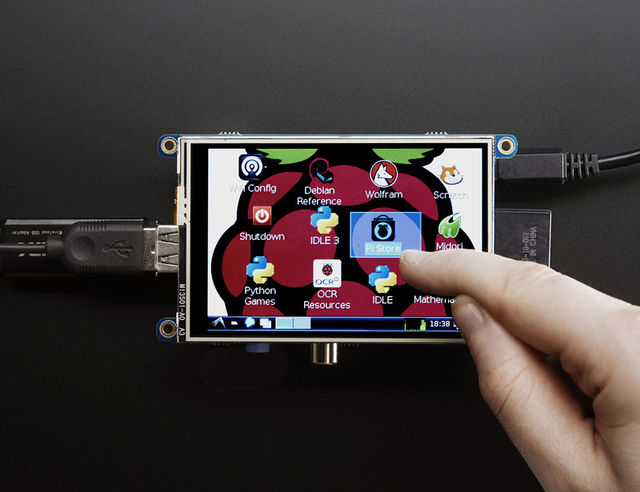
Introduction
| If you've grabbed our Easy Install image, or use the script, this step is not required, it's already done! This is just for advanced users who are curious on how to configure and customize the touchscreen |
Crédit: AdaFruit Industries www.adafruit.com
Configurer l'écran tactile
Maintenant que l'écran fonctionne correctement, nous allons nous attarder sur la partie tactile. Il y a juste un peut de calibration à faire mais cela n'est pas bien compliqué.
Avant de commencer, nous allons faire une règle udev pour l'écran tactile. C'est parce que le nom eventX du périphérique va être beaucoup modifié (recevoir beaucoup d'information) et qu'il sera difficile de se faire une idée sur ce qui sera appelé si vous avez une souris ou un clavier.
Exécutez la commande:
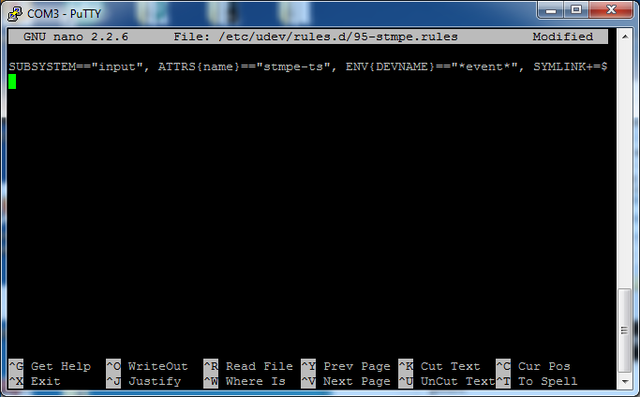
sudo nano /etc/udev/rules.d/95-stmpe.rules
pour créer une nouveau fichier udev et y copier/coller les lignes suivantes:
SUBSYSTEM=="input", ATTRS{name}=="stmpe-ts", ENV{DEVNAME}=="*event*", SYMLINK+="input/touchscreen"
Crédit: AdaFruit Industries www.adafruit.com
Retirer et réinstaller l'écran tactile avec les commandes suivantes
sudo rmmod stmpe_ts; sudo modprobe stmpe_ts
Saisissez ensuite ls -l /dev/input/touchscreen
qui devrait pointer vers eventX où X représente une valeur numérique. Cette valeur numérique est différente pour chanque installation puisque les autres périphériques clavier/souris/USB occuperons également un event slot.

Crédit: AdaFruit Industries www.adafruit.com
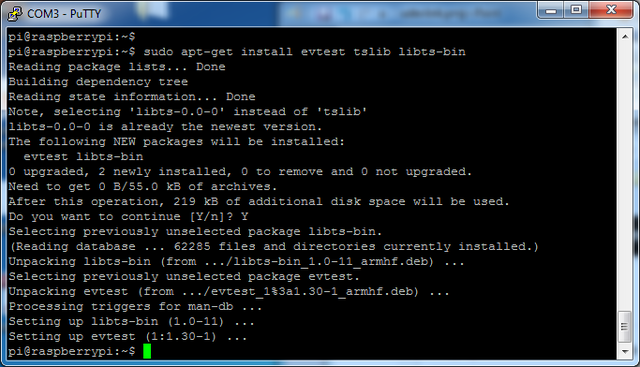
Il existes quelques outils que nous pouvons utiliser pour calibrer et et déboguer l'écran tacticle. Installez les paquet de test d'événement (event test) et bibliothèque tactile (touchscreen library) avec la commande
sudo apt-get install evtest tslib libts-bin
Crédit: AdaFruit Industries www.adafruit.com
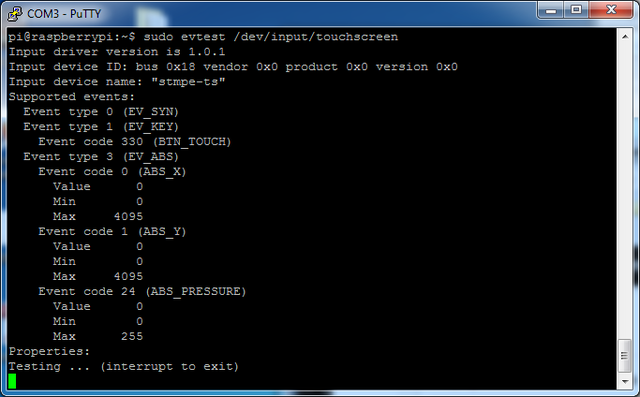
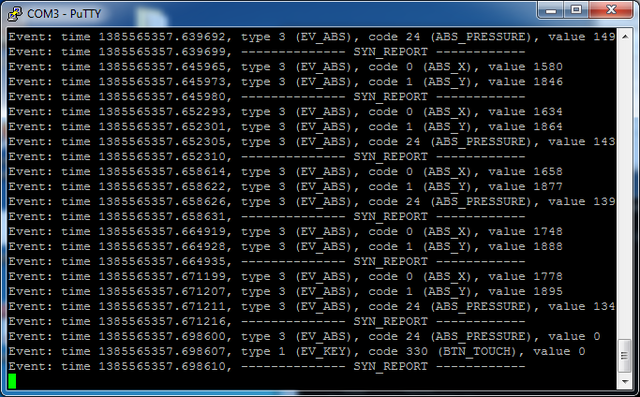
Maintenant, vous pouvez utiliser des outils tels que sudo evtest /dev/input/touchscreen qui affiche, en temps réel, les événements reportée par l'écran tactile. Pressez sur l'écran tactile pour voie ces différents événements.
Crédit: AdaFruit Industries www.adafruit.com
Crédit: AdaFruit Industries www.adafruit.com
Script de calibration automatique
Si vous faire une rotation de l'écran, vous aurez besoin de recalibrer la partie tactile pour qu'elle fonctionne avec la nouvelle orientation. Vous pouvez exécuter manuellement le processus de calibration (voir section suivante) ou vous pouvez exécuter un petit script python qui initialise automatiquement les paramètres de calibration en fonction de l'orientation de l'écran.
Executez la ligne de commande sudo adafruit-pitft-touch-cal
Le script essaye de détecter l'écran installé et l'état du paramètre de rotation

Crédit: AdaFruit Industries www.adafruit.com
Par défaut, le script essaye d'obtenir l'orientation de l'écran en examinant la configuration du module PiTFT avec modprobe. Si le script peut lire l'orientation alors il l'affichera à l'écran, ainsi que les valeurs de calibration actuelles et les nouvelles valeurs de calibration basée sur l'orientation effective de l'écran. Pressez "y" (oui) et le retour-claver (enter) pour confirmer.
Crédit: AdaFruit Industries www.adafruit.com
Essayez d'utiliser le script de calibration par défaut pour facilement calibrer votre afficheur tactile. Notez que les valeurs de calibration pourraient ne pas être les valeurs correspondant exactement à votre écran (tous les écrans sont sensiblement différents) mais elles devraient être suffisamment proche pour répondre à la plupart des besoins courants. Si vous avez besoin d'une calibration tactile plus précise, suivez les étapes de la prochaine section afin de calibrer manuellement votre écran tactile.
Calibration Manuelle
If you rotate the display you have some other setup where you need to carefully calibrate you can do it 'manually'
You will want to calibrate the screen once but shouldn't have to do it more than that. We'll begin by calibrating on the command line by running
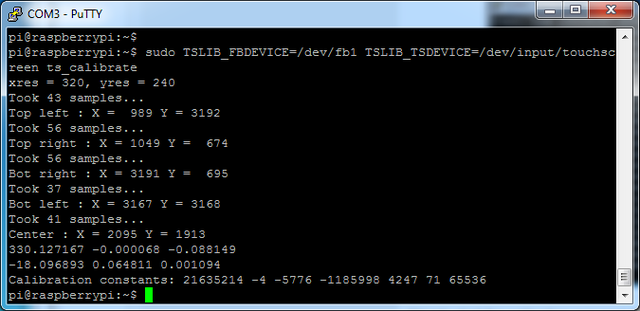
sudo TSLIB_FBDEVICE=/dev/fb1 TSLIB_TSDEVICE=/dev/input/touchscreen ts_calibrate
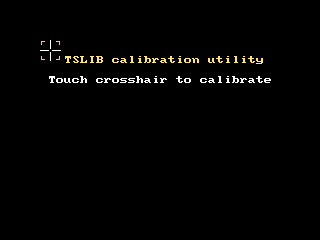
follow the directions on the screen, touching each point. Using a stylus is suggested so you get a precise touch. Don't use something metal, plastic only!
Crédit: AdaFruit Industries www.adafruit.com
| You should see five crosshair targets. If you see less than that, the touchscreen probably generated multiple signals for a single touch, and you should try calibrating again. |
Crédit: AdaFruit Industries www.adafruit.com
Next you can run sudo TSLIB_FBDEVICE=/dev/fb1 TSLIB_TSDEVICE=/dev/input/touchscreen ts_test which will let you draw-test the touch screen. Go back and re-calibrate if you feel the screen isn't precise enough!
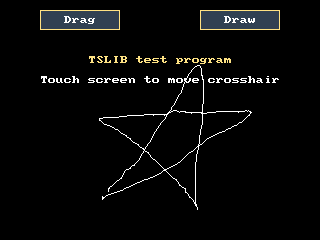
Crédit: AdaFruit Industries www.adafruit.com
Calibration X
You can also calibrate the X input system but you have to use a different program called xinput_calibrator.
You can do this if the calibration on the screen isnt to your liking or any time you change the rotate=XX module settings for the screen. Since the screen and touch driver are completely separated, the touchscreen doesn't auto-rotate
Normally you'd have to compile it but we have a ready to go package for you so run:
wget http://adafruit-download.s3.amazonaws.com/xinput-calibrator_0.7.5-1_armhf.deb
sudo dpkg -i -B xinput-calibrator_0.7.5-1_armhf.deb
Before you start the xinput_calibrator you will need to delete the old calibration data so run
sudo rm /etc/X11/xorg.conf.d/99-calibration.conf
Before running startx and the calibrator - otherwise it gets really confused! Now you'll have to run the xcalibrator while also running X. You can do this by startx and then opening up the terminal program and running the xinput_calibrator command (which is challenging to do on such a small screen) OR you can do what we do which is run startx in a SSH/Terminal shell and then run the xinput_calibrator from the same shell, which requires the following command order:
FRAMEBUFFER=/dev/fb1 startx &
DISPLAY=:0.0 xinput_calibrator
Follow the directions on screen:
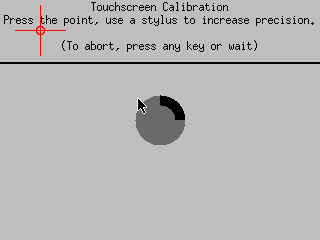
Crédit: AdaFruit Industries www.adafruit.com
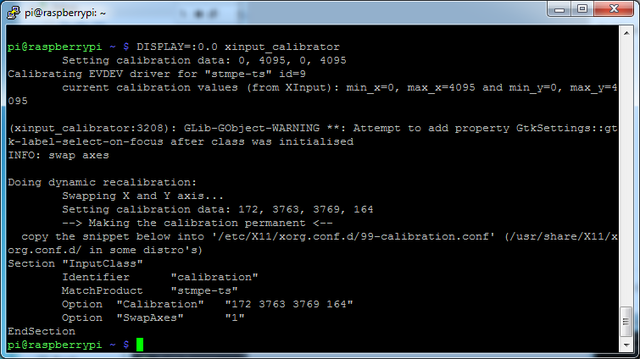
Une fois complété, vous obtenez quelque-chose comme:
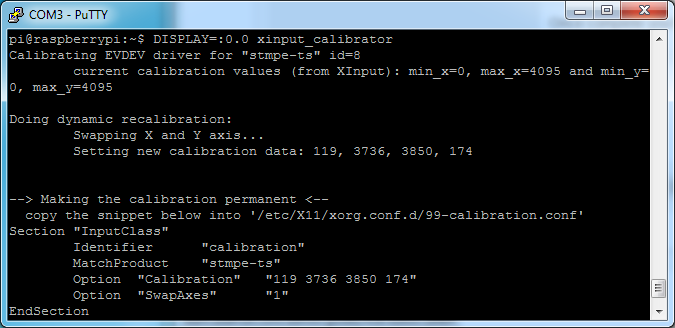
Crédit: AdaFruit Industries www.adafruit.com
Run sudo nano /etc/X11/xorg.conf.d/99-calibration.conf and copy the
Section "InputClass"
        Identifier      "calibration"
        MatchProduct    "stmpe-ts"
        Option  "Calibration"   "119 3736 3850 174"
#        Option  "SwapAxes"      "1"
EndSection
or whatever you got, into there. You can quit X if you want by typing fg to bring that command into the foreground, and then Control-C to quit.
Depending on the 'rotation' of the screen, when you do this calibration, you may need to comment out the SwapAxes part with a # and/or swap the numbers around so looks like:
Option "Calibration" "119 3736 3850 174"
to
Option "Calibration" "3736 119 174 3850"
Your touchscreen is now super calibrated, hurrah!
Source: Adafruit PiTFT 3.5" Touch Screen for Raspberry Pi
Créé par LadyAda pour AdaFruit Industries.
Traduction réalisée par Meurisse D pour MCHobby.be.
Toute référence, mention ou extrait de cette traduction doit être explicitement accompagné du texte suivant : « Traduction par MCHobby (www.MCHobby.be) - Vente de kit et composants » avec un lien vers la source (donc cette page) et ce quelque soit le média utilisé.
L'utilisation commercial de la traduction (texte) et/ou réalisation, même partielle, pourrait être soumis à redevance. Dans tous les cas de figures, vous devez également obtenir l'accord du(des) détenteur initial des droits. Celui de MC Hobby s'arrêtant au travail de traduction proprement dit.
Traduit avec l'autorisation d'AdaFruit Industries - Translated with the permission from Adafruit Industries - www.adafruit.com