ENG-CANSAT-PICO-BMP280
About the BMP280 breakout
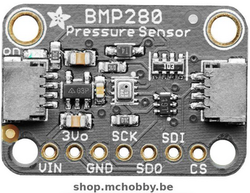
The BMP280 sensor can measure the atmospheric pressure and temperature. As the temperature also impact the sensor physics, the sensor measure it to apply appropriate correction to the measured pression.
The BMP280 is a Bosch sensor upgraded from the BMP085/BMP180/BMP183 serie. This sensor is really great to make environmental or weather measurements.
It can be used over an I2C or a SPI bus. Best of all, it is now fitted with a StemmaQt I2C connector (Qwiic compatible). So it is really easy to connect to a StemmaQT/Qwiic capable board like the Kit Cansat avec Raspberry-Pi Pico.
It is one of the best sensor, it offer good accuracy for an affordable price. The accuracy is ±1 hPa for the pressure and ±1.0°C for the temperature. This sensor is not really made to measure the temperature but you can estimate its range with the BMP280.
As the pressure also change with the altitude, the sensor accuracy allows you to use the BMP280 to make an altimeter (with accuracy of ±1m at worst, about 0.25m in best conditions).
To ease the usage of this sensor, the SMD component is solder on a breakout board with some additional passive electronics. The board also bring a level shifter and 3V voltage regulator so it is save for 3V and 5V logic microcontrolers.
technical details
- Fiche technique du BMP280 (Bosch, pdf)
- Size: 19.2mm x 17.9mm x 2.9mm
- weight: 1.3 gr
Install the Library
The BMP280 do have a MicroPython library available on GitHub. It must be copied to the microcontroler before using the sensor with the board.
So:
- Download bme280.py from the online reposity to the local computer
- copy the file bme280.py from the computer to the microcontroler board
Manual Installation
The Adafruit's BMP280 & BME280 are provided with a MicroPython library available on GitHub.
It is the same library for the both boards (BME280 also reads the humidity).
You can download and copy the library manually to your board from the Repository.
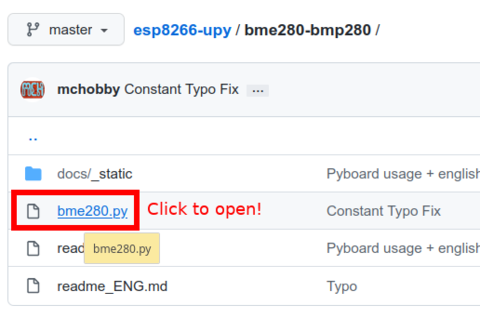
First, open the repository, then navigate to the bme280.py file by clicking on it.
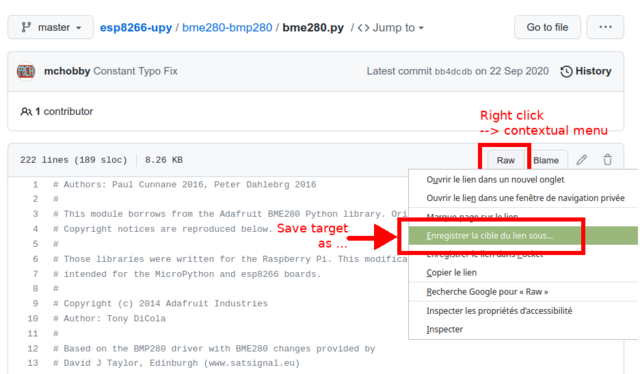
On the bme280.py file content. Right click the "Raw" button to show the contextual menu.
Select the "Save target as..."
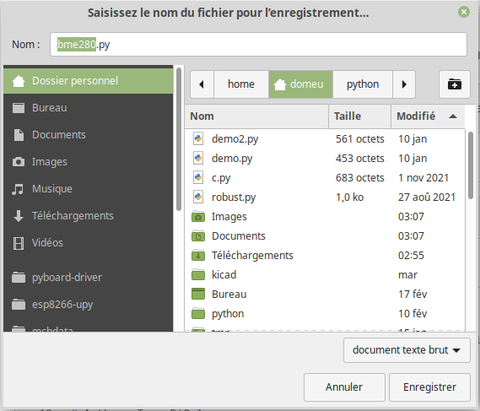
Navigates to the target directory (eg: user folder) then save the target as bme280.py .
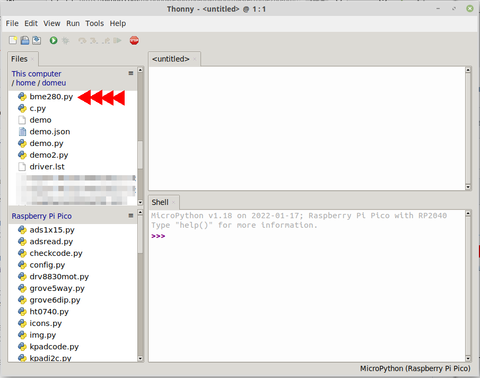
From now, the file should be visible in the Thonny's file manager (see menu "View | Files" to activate it).
Select the bme280.py file from computer in Thonny.
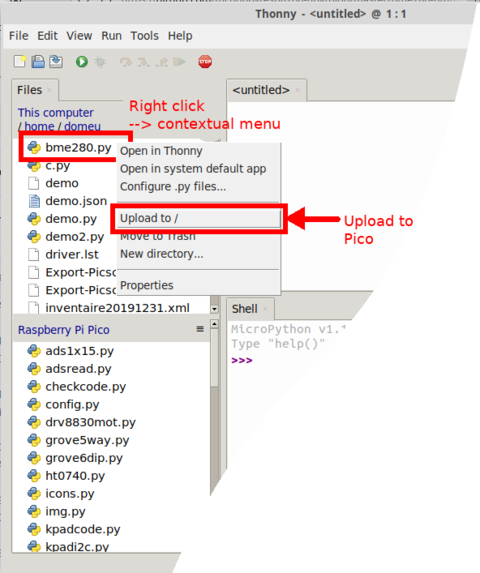
Right click the file to get the contextual menu... then select the option "Upload to root /"
Check the library
It is easy to check if the library is properly uploaded to the MicroPython board.
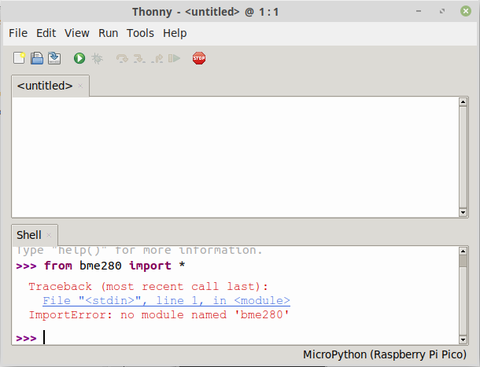
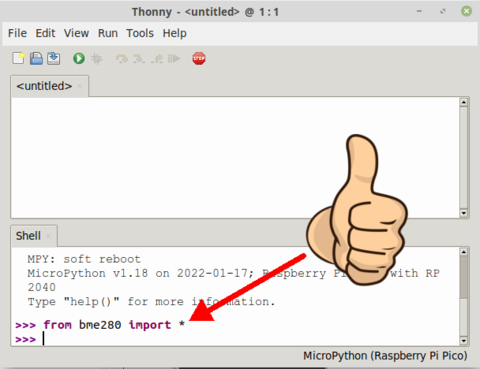
Just key-in the line from bme280 import * into the REPL/shell.
IF the file is missing or contains a syntax error THEN MicroPython will returns an error.
IF everything is all right THEN the import proceed without error.
Wiring the sensor
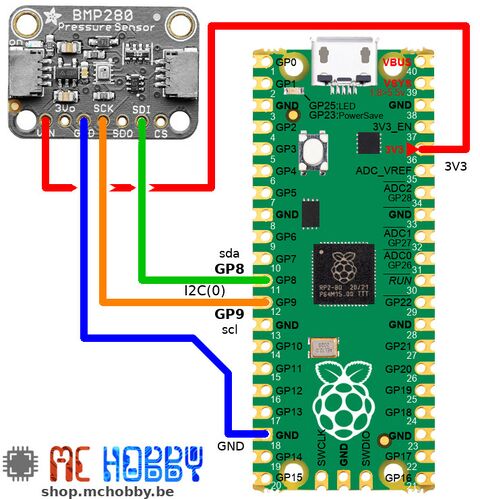
Here how to connect the sensor to the Raspberry-Pi Pico board.
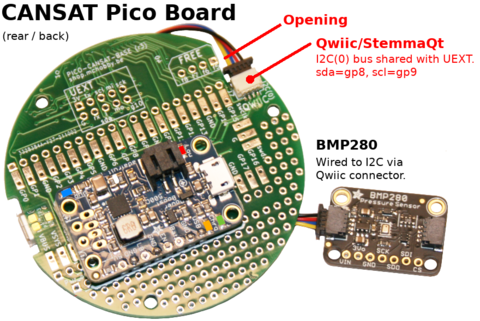
The Kit Cansat avec Pico does already fire a StemmaQt/Qwiic connector. Just connect the Qwiic/StemmaQt wires between the board and the sensor. The Qwiic connector is wired to the I2C(0) bus.
Testing the sensor
The sensor can be easily tested with a few lines of codes thank to the installed library.
The following snip of code can be copied to the Thonny editor or encoded into the REPL/shell section.
# Read the sensor values:
#    (temperature_celcius, pressure_hpa, humidity_percent)
#    Humidity only applies to BME280 only, not BMP280.
#
from machine import I2C
# BME280 aslo work for BMP280
from bme280 import BME280, BMP280_I2CADDR
from time import sleep
i2c = I2C(0)
bmp = BME280( i2c=i2c, address=BMP280_I2CADDR )
while True:
    # returns a tuple with (temperature, pressure_hPa, humidity)
    print( bmp.raw_values )
    sleep(1)
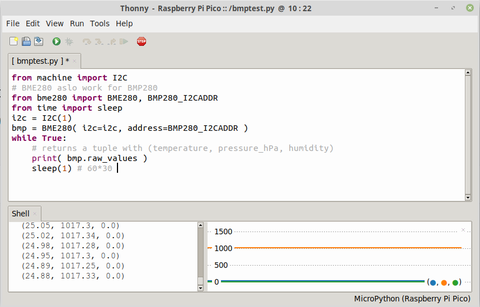
Which produce the following results:
(22.28, 1017.68, 0.0)
(22.27, 1017.66, 0.0)
(21.87, 1017.67, 0.0)
(21.83, 1017.73, 0.0)
(21.83, 1017.68, 0.0)
(21.81, 1017.68, 0.0)
(21.81, 1017.68, 0.0)
By activating the Plotter, the value can even be made visible as a graph. However, to see a proper graph evolution, the best is to replace the sleep(1) to sleep( 60*30 ) (30 min).
Pressure and altitude
This section could also be named "the Weather Station OR the Altimeter".
Depending on the use case (weather station or altimeter", the way of using the BMP280 is slightly different.
About pressure reading
The pressure is returned in Pascals (an unit from International System of Units). 100 Pascals = 1 hPa = 1 millibar. The barometric pressure is often using the millibar or mm of mercury as unit. Just note that 1 pascal = 0.00750062 mm of mercury mercure.
SLP: Sea Level Pressure
You can also calculate the altitude from the pressure. However, to proprely measure the altitude, you need to know the pressure at the sea level (hPa, pressure that change every day)!. The BMP280 is really precise, however it may be difficult to have precise evaluation of the altitude if you don't know the pressure at the sea level (the pressure of day at the sea level).
Pressure, SLP and altitude
SLP means Sea Level Pressure (also knwon as PNM pressure). Most of the advanced the weather station does transform the current pressure to normalized SLP pressure before displaying it. If all pressure in the country are expressed as SLP pressure then it is more easy to determine the wind (and cloud) movements across the country, from higher pressure to lower pressure.
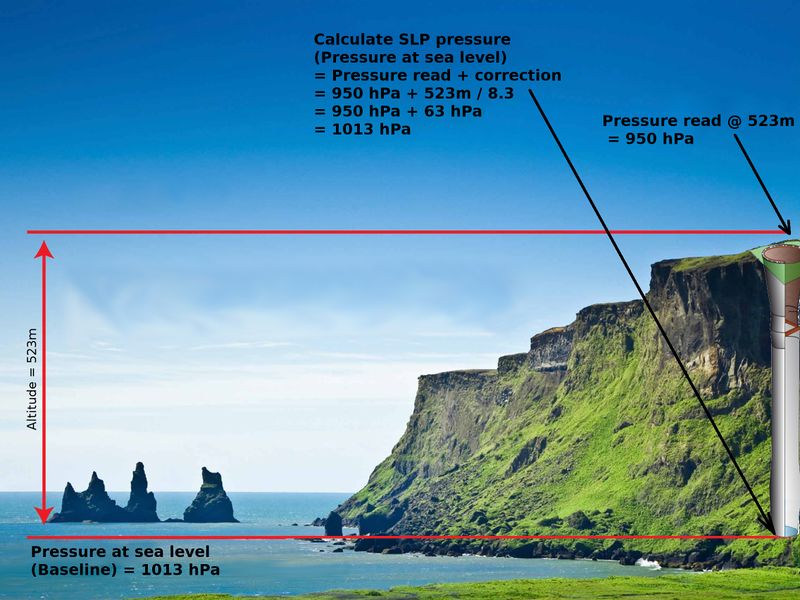
Here is a small picture that shows the relation between normalized SLP pressure, altitude and pressure given by a sensor (like the BMP280).
Let's say that we readed the pressure of 950 hPa at our house with the BMP280. The house sit at 523m of altitude.
If we want to know the SLP pressure, it is like sink a well under the house (down to the sea level). At the bottom of the well, we have more air over our head so the pressure will be greater than 950 hPa. In real world, we do not have to sink a well, we do know the altitude of our house (at 523m) so we can estimate the correction to apply (corresponding to a column of 523m of air). So, from the 950hPa read at house, we can calculate the corresponding pressure at sea level (SLP pressure). Together with the other SLP values, we can estimate the movement of clouds :-) .
In real world, we cannot sink a well under the house, neither know exact altitude of the house.
Here the steps to follow with the BMP280 to estimate the altitude of the house:
- Find the hPa pressure at Sea Level on a WebSite
- Use the BMP280 sensor to read the pressure.
- Calculate the height with the following code
# Read Local pressure then
# Calculate corresponding Altitude
#
from machine import I2C
# BME280 aslo work for BMP280
from bme280 import BME280, BMP280_I2CADDR
from time import sleep
i2c = I2C(0)

baseline = 1032.0 # day's pressure at sea level
bmp = BME280( i2c=i2c, address=BMP280_I2CADDR )
while True:
    # returns a tuple with (temperature, pressure_hPa, humidity)
    p = bmp.raw_values[1]
    altitude = (baseline - p)*8.3
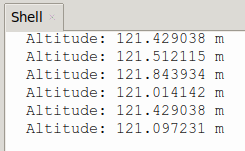
    print( "Altitude: %f m" % altitude )
    sleep(1)
Just remind:
- If you plan to do a Weather station then you will have to calculate the normalized pressure value at sea level. You have to know the height of the sensor (the weather station doesn't move).
- if you need a flying sensor in a rocket then you have to care about the baseline value (sea level pressure of the day) to have an accurate measurement the the altitude.
The sea level pressure change every day!
The usual pressure at sea level is about 1013.25 mbar (or 1013.25 hPa or 101325 Pa).
However, this value depends on the weather conditions and quantity of steam in the air.
By example, today the pressure is 1002.00 hPa at the Belgian's sea level.
this value is critical if you want to evaluate the altitude of the sensor.
It is also important to know the current altitude if you plan to calculate the "correction" for the normalized SLP pressure.
Remark:
It is quite easy to know the current sea level pressure by using an Internet Weather Broadcast like this link to meteobelgique.be
The sensor doesn't give the right altitude!
My sensor does indicates an altitude of 189m whereas the reference weather station (next to house) is known to be at 120m height (at the top of the tower)! What's wrong with the sensor?
The altitude is deduced from the difference of local pressure and pressure at the sea level.
If you want to obtain an accurate altitude value with the BMP280 then you need to know the pressure at the sea level (the baseline) with precision.
Once the baseline value corrected, you will have the correct altitude.
The athmospheric pressure is not correct!
My sensor returned a pressure of 98909 pascal (so 989.09 hPa) whereas the reference weather station does mentino 1002 hPa!
The sensor value is right, it just not apply the correction to return the Normalized SLP pressure (equivalent pressure at the sea level). The reference reference weather station does applies SLP correction for you (so they displays normalized SLP).
Let's do the SLP correction on the sensor's value...
First: You must know your altitude (121m in my case, see here before How I did calculate it).
Then: Read the pressure and apply the SLP correction factor.
# Read Local pressure
# Calculate corresponding SLP pressure
#   (SLP: sea level pressure)
#
from machine import I2C
# BME280 aslo work for BMP280
from bme280 import BME280, BMP280_I2CADDR
from time import sleep
i2c = I2C(0)

# Sensor altitude (in meter) required to
# calculate SLP (See Level Pressure)
altitude = 120.1
bmp = BME280( i2c=i2c, address=BMP280_I2CADDR )
while True:
    # returns a tuple with (temperature, pressure_hPa, humidity)
    p = bmp.raw_values[1]
    p_sea = p + (altitude/8.3)
    print( "Plocal: %6.1f hPa, Psea: %6.1f hPa" % (p,p_sea) )
    sleep(1)
which returns:
Plocal: 1017.4 hPa, Psea: 1031.8 hPa
Plocal: 1017.4 hPa, Psea: 1031.9 hPa
Plocal: 1017.3 hPa, Psea: 1031.8 hPa
Plocal: 1017.4 hPa, Psea: 1031.8 hPa
Plocal: 1017.4 hPa, Psea: 1031.9 hPa
Plocal: 1017.4 hPa, Psea: 1031.9 hPa
Plocal: 1017.4 hPa, Psea: 1031.8 hPa
Written by Meurisse D. for MCHobby
