PN532-RFID-NFC-Brancher-Shield
Souder les Header
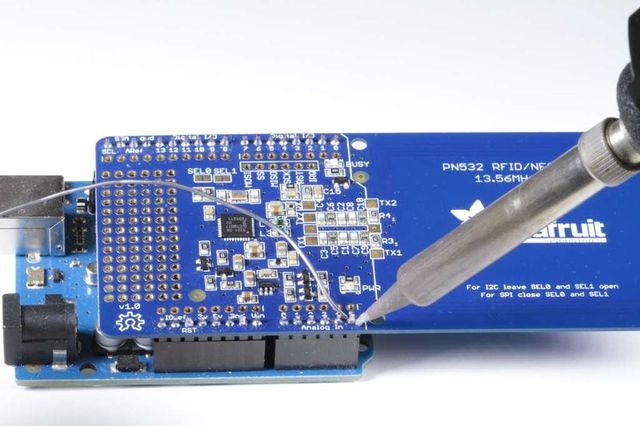
The first step is to solder the headers to the shield. Cut the header strip to length and insert the sections (long pins down) into an Arduino. Then place the shield on top and solder each pin.

Crédit: AdaFruit Industries www.adafruit.com
640px
Crédit: AdaFruit Industries www.adafruit.com
Utiliser le NFC Shield avec I2C
The Adafruit NFC shield is designed to be used using the I2C by default. I2C only uses two pins (Analog 4 and 5 which are fixed in hardware and cannot be changed) to communicate and one pin as an 'interrupt' pin (Digital 2 - can be changed however). What is nice about I2C is that it is a 'shared' bus - unlike SPI and TTL serial - so you can put as many sensors as you'd like all on the same two pins, as long as their addresses don't collide/conflict. The Interrupt pin is handy because instead of constantly asking the NFC shield "is there a card in view yet? what about now?" constantly, the chip will alert us when a NFC target comes into the antenna range.
Utiliser un Arduino Leonardo et Yun
| The IRQ pin is tied to Digital pin #2 by default. However, on the Arduino Leonardo and Yun, digital #2 is used for I2C which will not work. If using with a Leonardo or Yun, cut the trace beween the IRQ pin and Digital #2 and solder a wire from IRQ pin to Digital #4 or higher. Then change the example code so the the IRQ pin is declared as the new pin (say #6) not #2 |
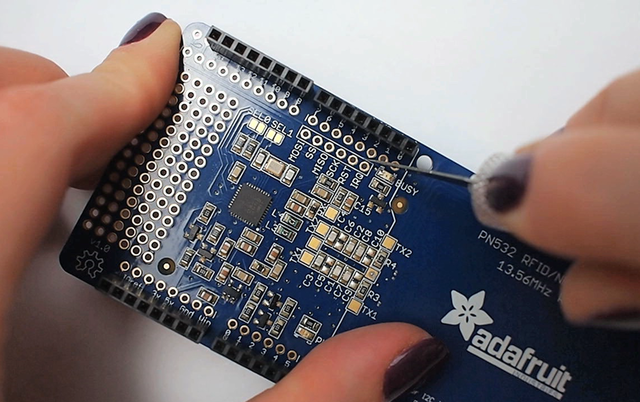
Here are some photos of setting the IRQ pin to digital 6. First, use a sharp hobby knife to cut the trace from IRQ to 2

Crédit: AdaFruit Industries www.adafruit.com
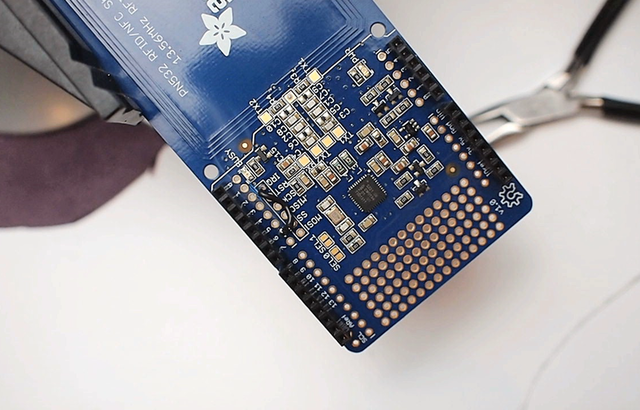
Solder a wire from IRQ to #6

Crédit: AdaFruit Industries www.adafruit.com
Source: PN532 RFID/NFC Breakout and Shield créé par LadyAda pour AdaFruit Industries. Crédit [www.adafruit.com AdaFruit Industries]
Traduit par Meurisse D. pour MCHobby.be
Traduit avec l'autorisation d'AdaFruit Industries - Translated with the permission from Adafruit Industries - www.adafruit.com
Toute référence, mention ou extrait de cette traduction doit être explicitement accompagné du texte suivant : « Traduction par MCHobby (www.MCHobby.be) - Vente de kit et composants » avec un lien vers la source (donc cette page) et ce quelque soit le média utilisé.
L'utilisation commercial de la traduction (texte) et/ou réalisation, même partielle, pourrait être soumis à redevance. Dans tous les cas de figures, vous devez également obtenir l'accord du(des) détenteur initial des droits. Celui de MC Hobby s'arrêtant au travail de traduction proprement dit.