Différences entre versions de « Pololu-Romi-Chassis-Assembler »
Sauter à la navigation
Sauter à la recherche
| Ligne 22 : | Ligne 22 : | ||
== Moteurs == | == Moteurs == | ||
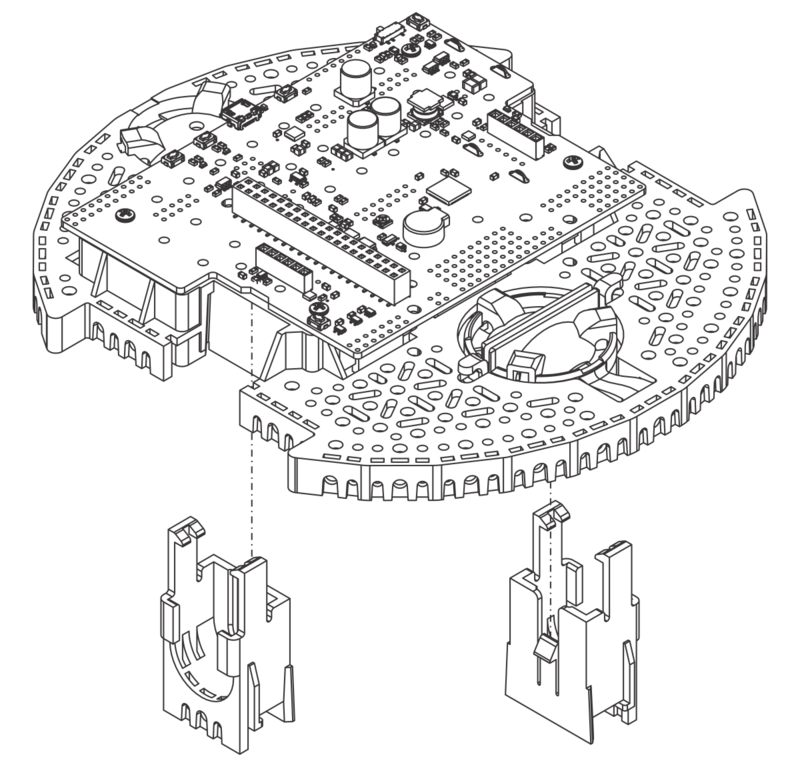
# Align the motor clips with the chassis as indicated and press them firmly into the chassis until the bottom of the clips are even with the bottom of the chassis (you may hear several clicks). | # Align the motor clips with the chassis as indicated and press them firmly into the chassis until the bottom of the clips are even with the bottom of the chassis (you may hear several clicks). | ||
| + | |||
| + | {{POLImage|Pololu-Romi-Chassis-Assembler-10.png|800px|Installer les clips moteurs sur le châssis Romi}} | ||
{{Pololu-Romi-Chassis-TRAILER}} | {{Pololu-Romi-Chassis-TRAILER}} | ||
Version du 20 mars 2019 à 23:35
|
|
En cours de traduction/élaboration. |
En vidéo
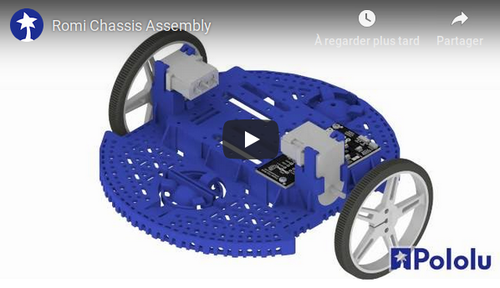
Cette vidéo de Pololu (YouTube) montre une animation de l'assemblage de la plateforme Romi.
Contact de pile et électonique
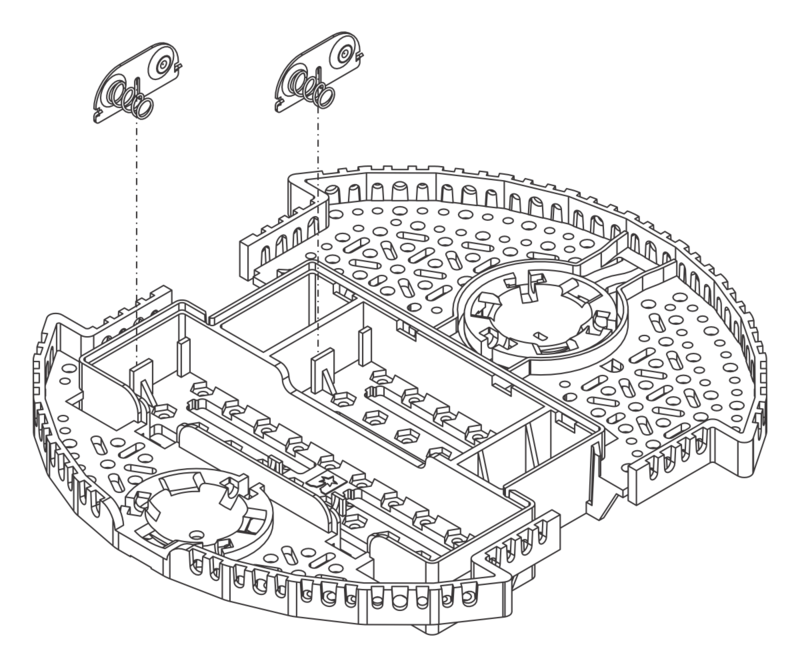
- With the chassis upside down, push the two double-sided battery contacts in the slots indicated in the picture below.
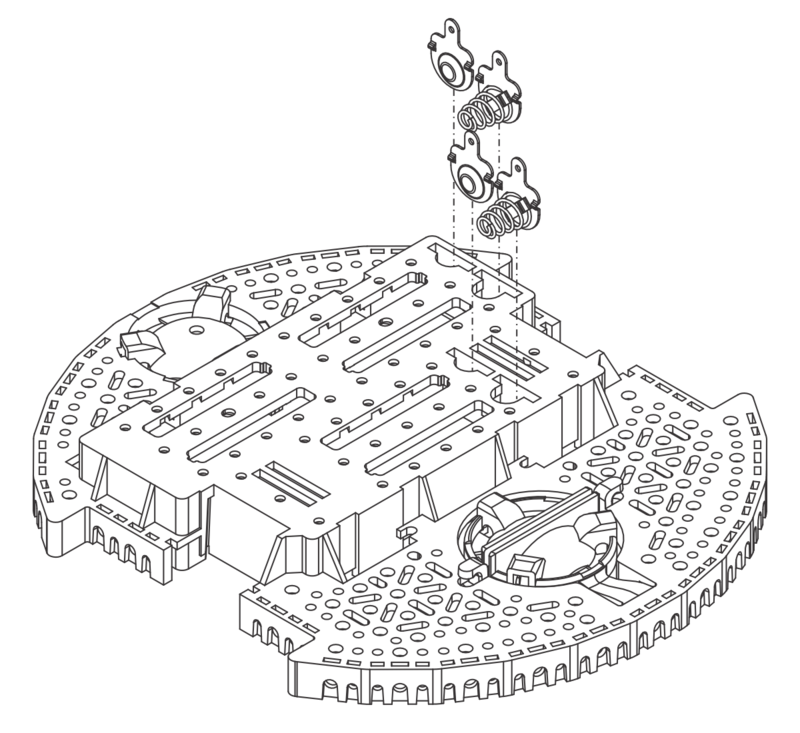
- Turn the chassis over and place the four individual battery contact terminals into the chassis from the top side of the battery box. They should rest loosely in their slots when the chassis is upright.
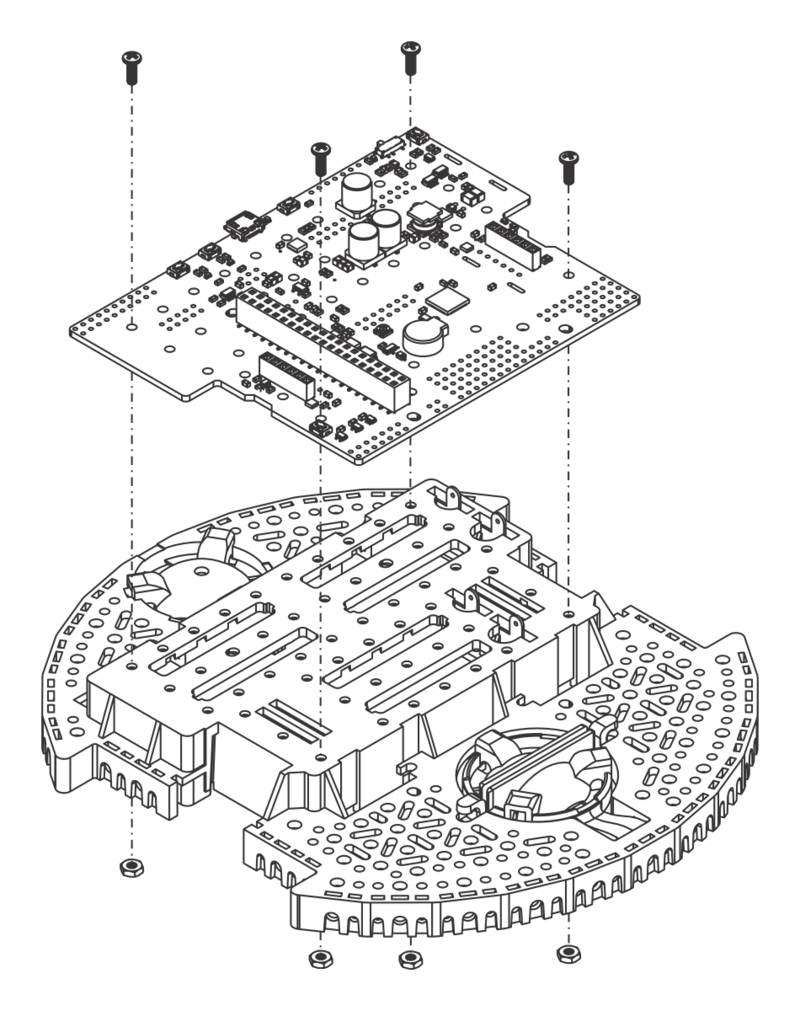
- Optional: If you have electronics that solder to the battery contacts, this is a convenient time to install them. The carte de contrôle Romi 32U4 lien pololu (not included) is shown below as an example.
Moteurs
- Align the motor clips with the chassis as indicated and press them firmly into the chassis until the bottom of the clips are even with the bottom of the chassis (you may hear several clicks).
Basé sur "Romi Chassis User’s Guide" de Pololu (https://www.pololu.com/docs/0J68) - Traduit en Français par shop.mchobby.be CC-BY-SA pour la traduction
Toute copie doit contenir ce crédit, lien vers cette page et la section "crédit de traduction". Traduit avec l'autorisation expresse de Pololu (www.pololu.com)
Based on "Romi Chassis User’s Guide" from Pololu (https://www.pololu.com/docs/0J68) - Translated to French by shop.mchobby.be CC-BY-SA for the translation
Copies must includes this credit, link to this page and the section "crédit de traduction" (translation credit). Translated with the Pololu's authorization (www.pololu.com)
