Différences entre versions de « Pololu-Romi-Chassis-Dimensions »
| Ligne 18 : | Ligne 18 : | ||
== Trou de montage Raspberry-Pi == | == Trou de montage Raspberry-Pi == | ||
| + | The Romi chassis also has mounting holes intended for use with a Raspberry Pi. These holes support the form factor and mounting hole locations used on the Raspberry Pi A+, Raspberry Pi B+, Raspberry Pi 2 Model B, and [https://shop.mchobby.be/fr/30-raspberry-pi-3 Raspberry Pi 3 Model B]. Additionally, our {{pl|704|A-Star 32U4 Robot Controller with Raspberry Pi Bridge}} {{polpl|3116}} (which is an Arduino-compatible programmable module designed to be an auxiliary controller atop a Raspberry Pi or a stand-alone control solution on its own) has mounting hole locations as these Raspberry Pi boards. | ||
| + | |||
{{Pololu-Romi-Chassis-TRAILER}} | {{Pololu-Romi-Chassis-TRAILER}} | ||
Version du 21 mars 2019 à 10:02
Introduction
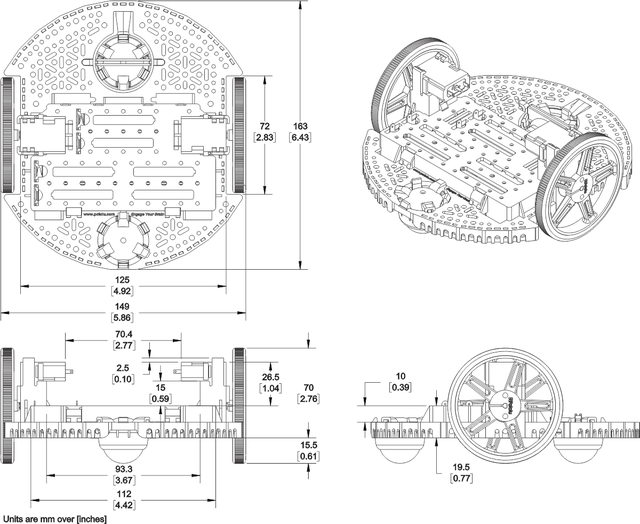
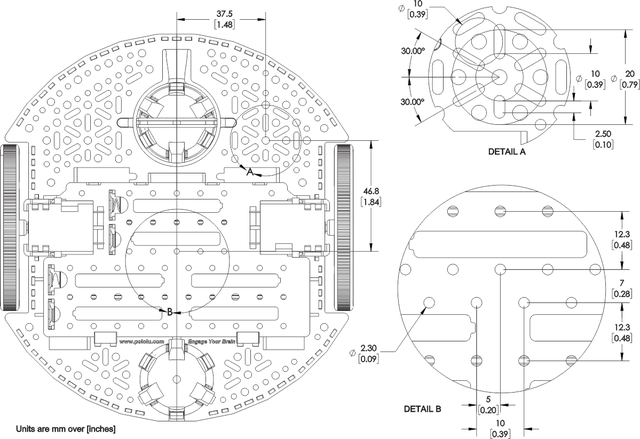
One of the features of the Romi chassis that makes it a great choice for a general purpose robotics platform is the multitude of mounting holes located all around the chassis. The mounting holes and slots are intended for various sizes of screws (not included) such as #2-56 lien pololu, #4-40 lien pololu, M2, and M3 lien pololu. Some of the key dimensions of the mounting holes are shown in the dimension diagram below, and additional dimensions can be found in the DXF file of the chassis (9MB dxf). An actual-size view of the top of the Romi chassis (115k pdf) is also available; just print it at 100% scale to make a template showing where all of the general-purpose mounting holes and slots are.
Trou de montage Arduino
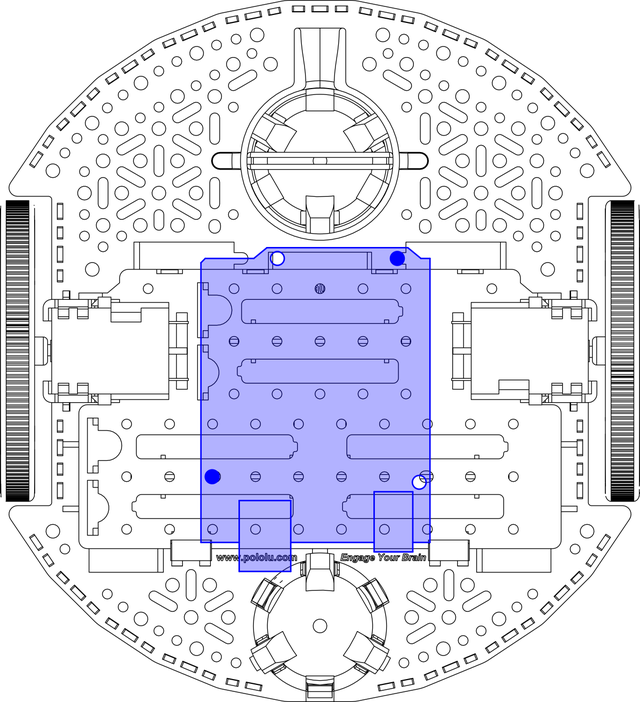
The diagram below shows the mounting holes intended for electronics that use a common Arduino form factor, including the Arduino Uno R3 and A-Star 32U4 Prime (gamme A-Star Prime chez Pololu).
Please note that the two mounting holes indicated above are on two surfaces of differing heights. The top of the battery box sits 10 mm higher than the round base. One way to compensate for this is to use (gamme A-Star Prime chez Pololu). In particular, a 10 mm spacer can match the battery box height, then 4 mm or 6 mm spacers can raise the electronics enough to make room for components that protrude below the bottom surface of the PCB.
If you are using an Arduino for controlling the Romi, you might consider our DRV8835 Dual Motor Driver Shield for Arduino lien pololu.
Trou de montage Raspberry-Pi
The Romi chassis also has mounting holes intended for use with a Raspberry Pi. These holes support the form factor and mounting hole locations used on the Raspberry Pi A+, Raspberry Pi B+, Raspberry Pi 2 Model B, and Raspberry Pi 3 Model B. Additionally, our A-Star 32U4 Robot Controller with Raspberry Pi Bridge lien pololu (which is an Arduino-compatible programmable module designed to be an auxiliary controller atop a Raspberry Pi or a stand-alone control solution on its own) has mounting hole locations as these Raspberry Pi boards.
Basé sur "Romi Chassis User’s Guide" de Pololu (https://www.pololu.com/docs/0J68) - Traduit en Français par shop.mchobby.be CC-BY-SA pour la traduction
Toute copie doit contenir ce crédit, lien vers cette page et la section "crédit de traduction". Traduit avec l'autorisation expresse de Pololu (www.pololu.com)
Based on "Romi Chassis User’s Guide" from Pololu (https://www.pololu.com/docs/0J68) - Translated to French by shop.mchobby.be CC-BY-SA for the translation
Copies must includes this credit, link to this page and the section "crédit de traduction" (translation credit). Translated with the Pololu's authorization (www.pololu.com)


